How I created this blog
There are many tutorials out there, so the main objective of this post will be to provide a (minimum) step-by-step description of creating a new blog website with GitHub Pages, while using VSC on a macOS.
TL;DR, the main point of attention of this post is to provide a step-by-step guide for dummies (such as myself), regarding the true basics of creating a repository on GitHub, cloning repository in VSC and submitting the first commit.
In addition, under the hood I have a 2021 MBP that is equipped with Apple M1 chip. Due to recent migration from Intel chips, compatibility of some libraries is still patchy. This problem will mostly affect Jekyll server, which we will be using to test the blog locally. So, below guide aims at addressing this specific case, while trying to provide the simplest solution as possible.
In conclusion, if you do not have a computer equipped with M1 chip, or if you are interested in some more advanced hacks, you may find interesting the following links, which I find particularly informative:
- Quickstart for GitHub Pages, which will quickly become your main reference
- David’s blog, which contains a very good introduction to front matter, layout and includes
- OpenSource Blogging with Jekyll GitHub VSCode, an equivalent of deploying a working pipeline on a Windows machine. This guide is split into several parts, however I was able to find only a link to Part 2.
Create GitHub Pages repository
I assume that you have an active account with GitHub (reason why you may elect to use it for blogging in the first place). In such case, creating a blogging website is a matter of minimum effort.
First, visit the GitHub Pages main page and follow the link to create a new repository.

Then create a repository by giving it a name in the form of [git username].github.io. Since my git username is A5kar, repository for GitHub Pages becomes A5kar.github.io.
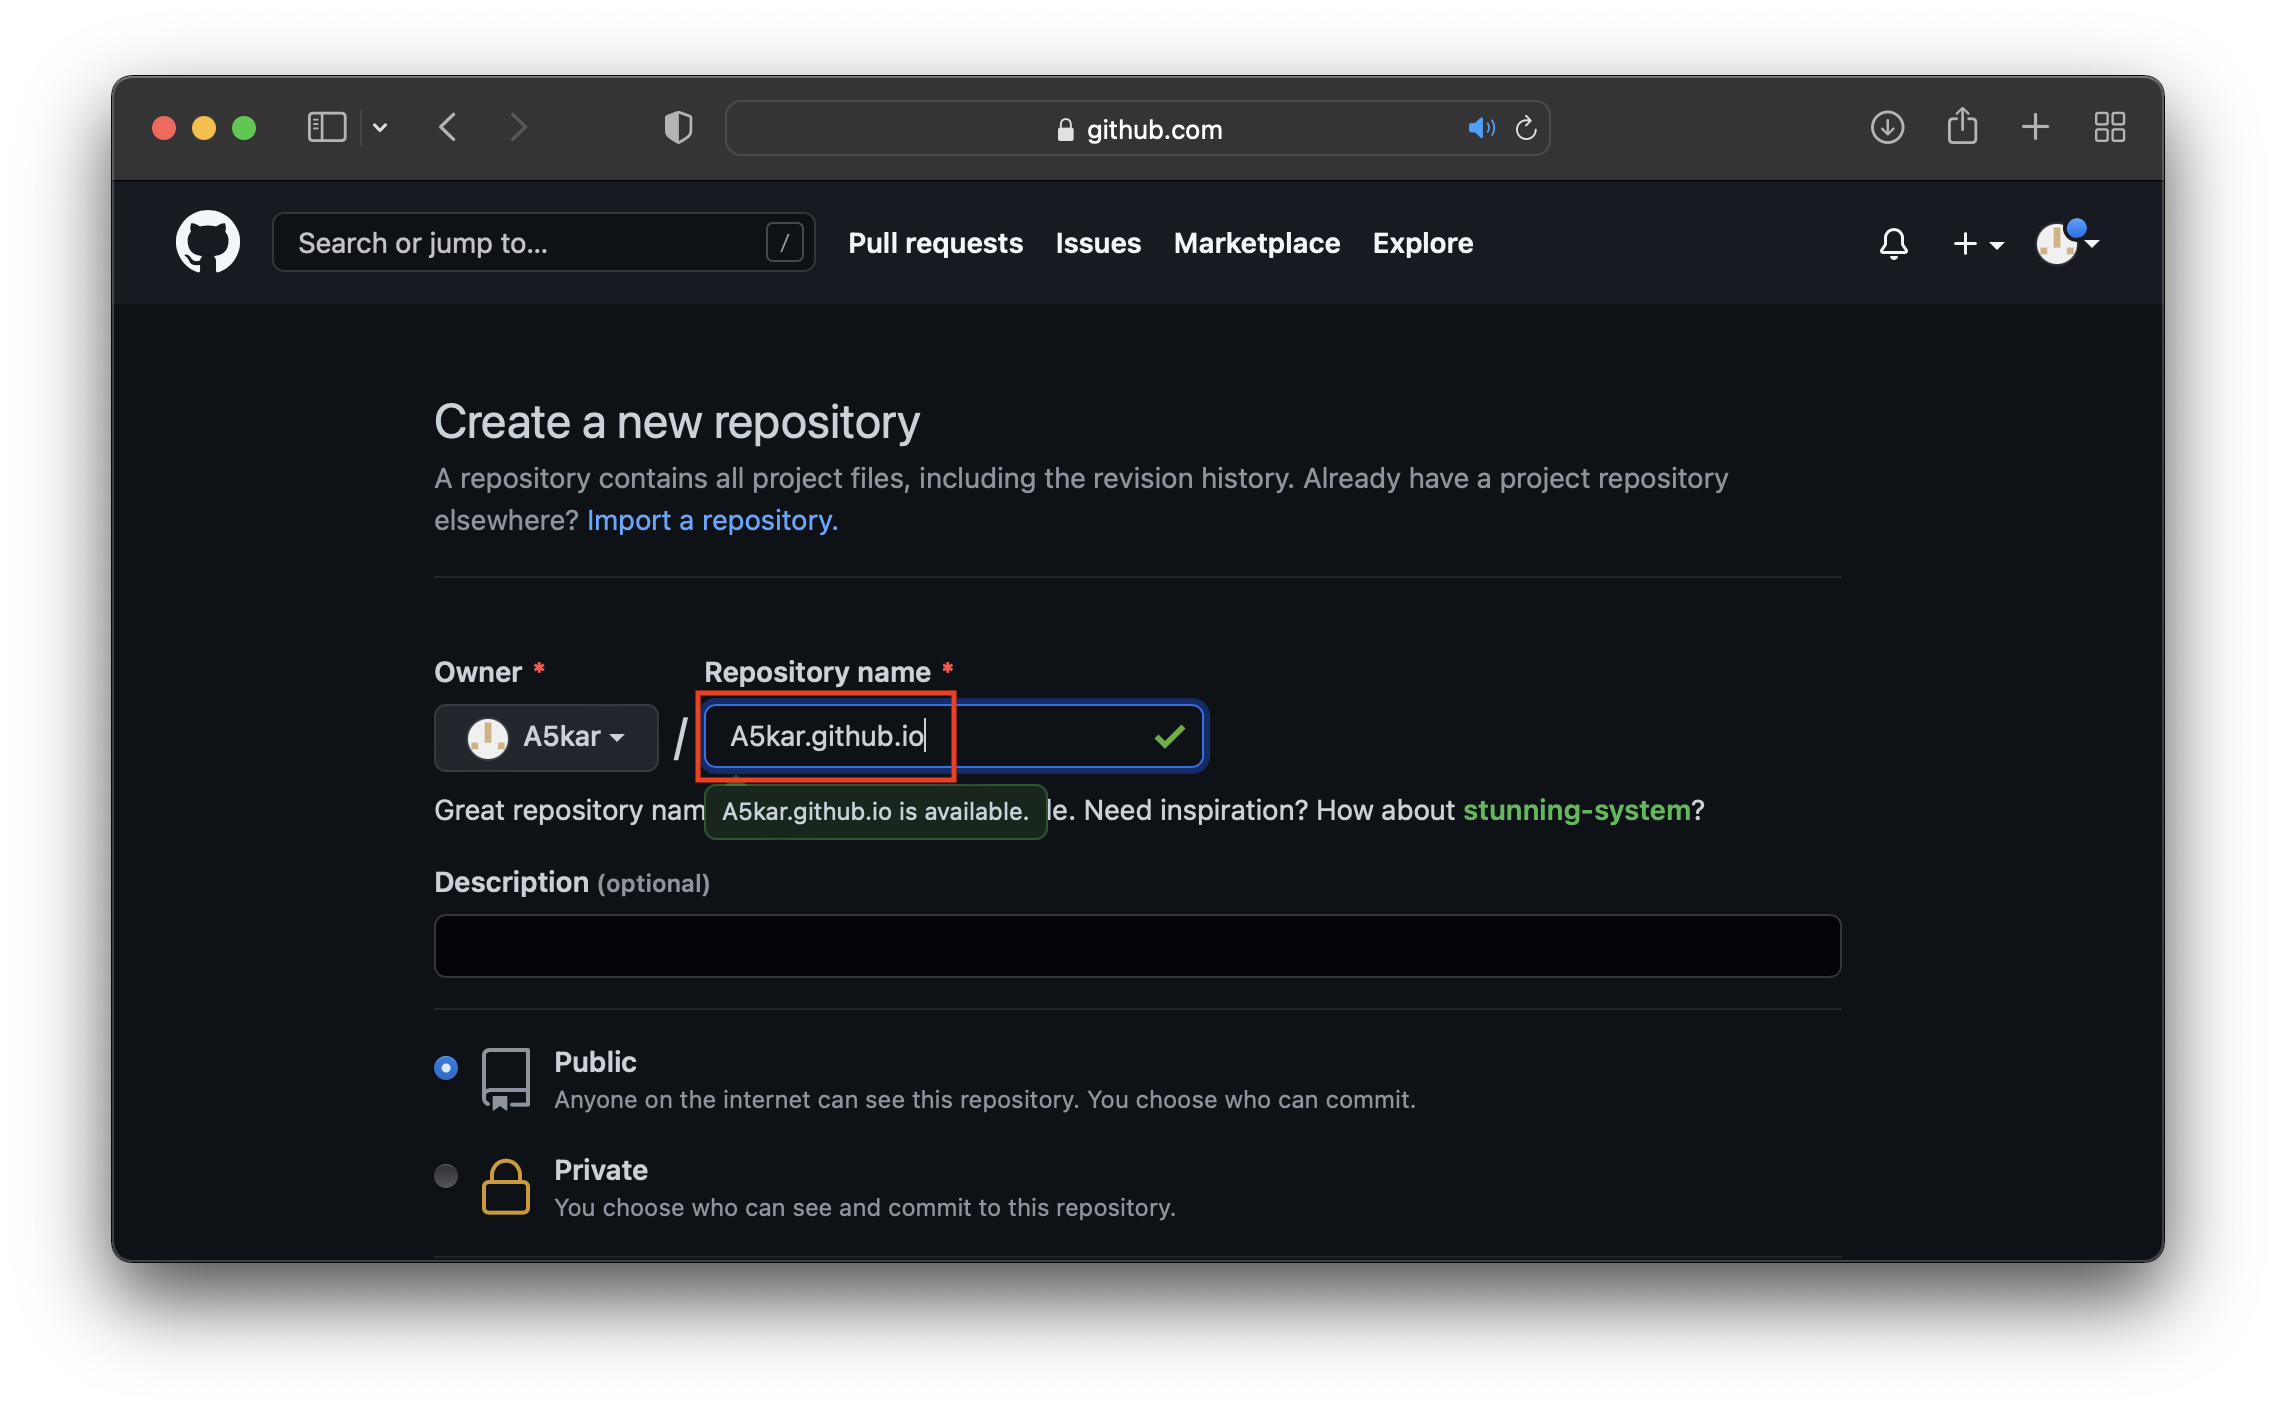
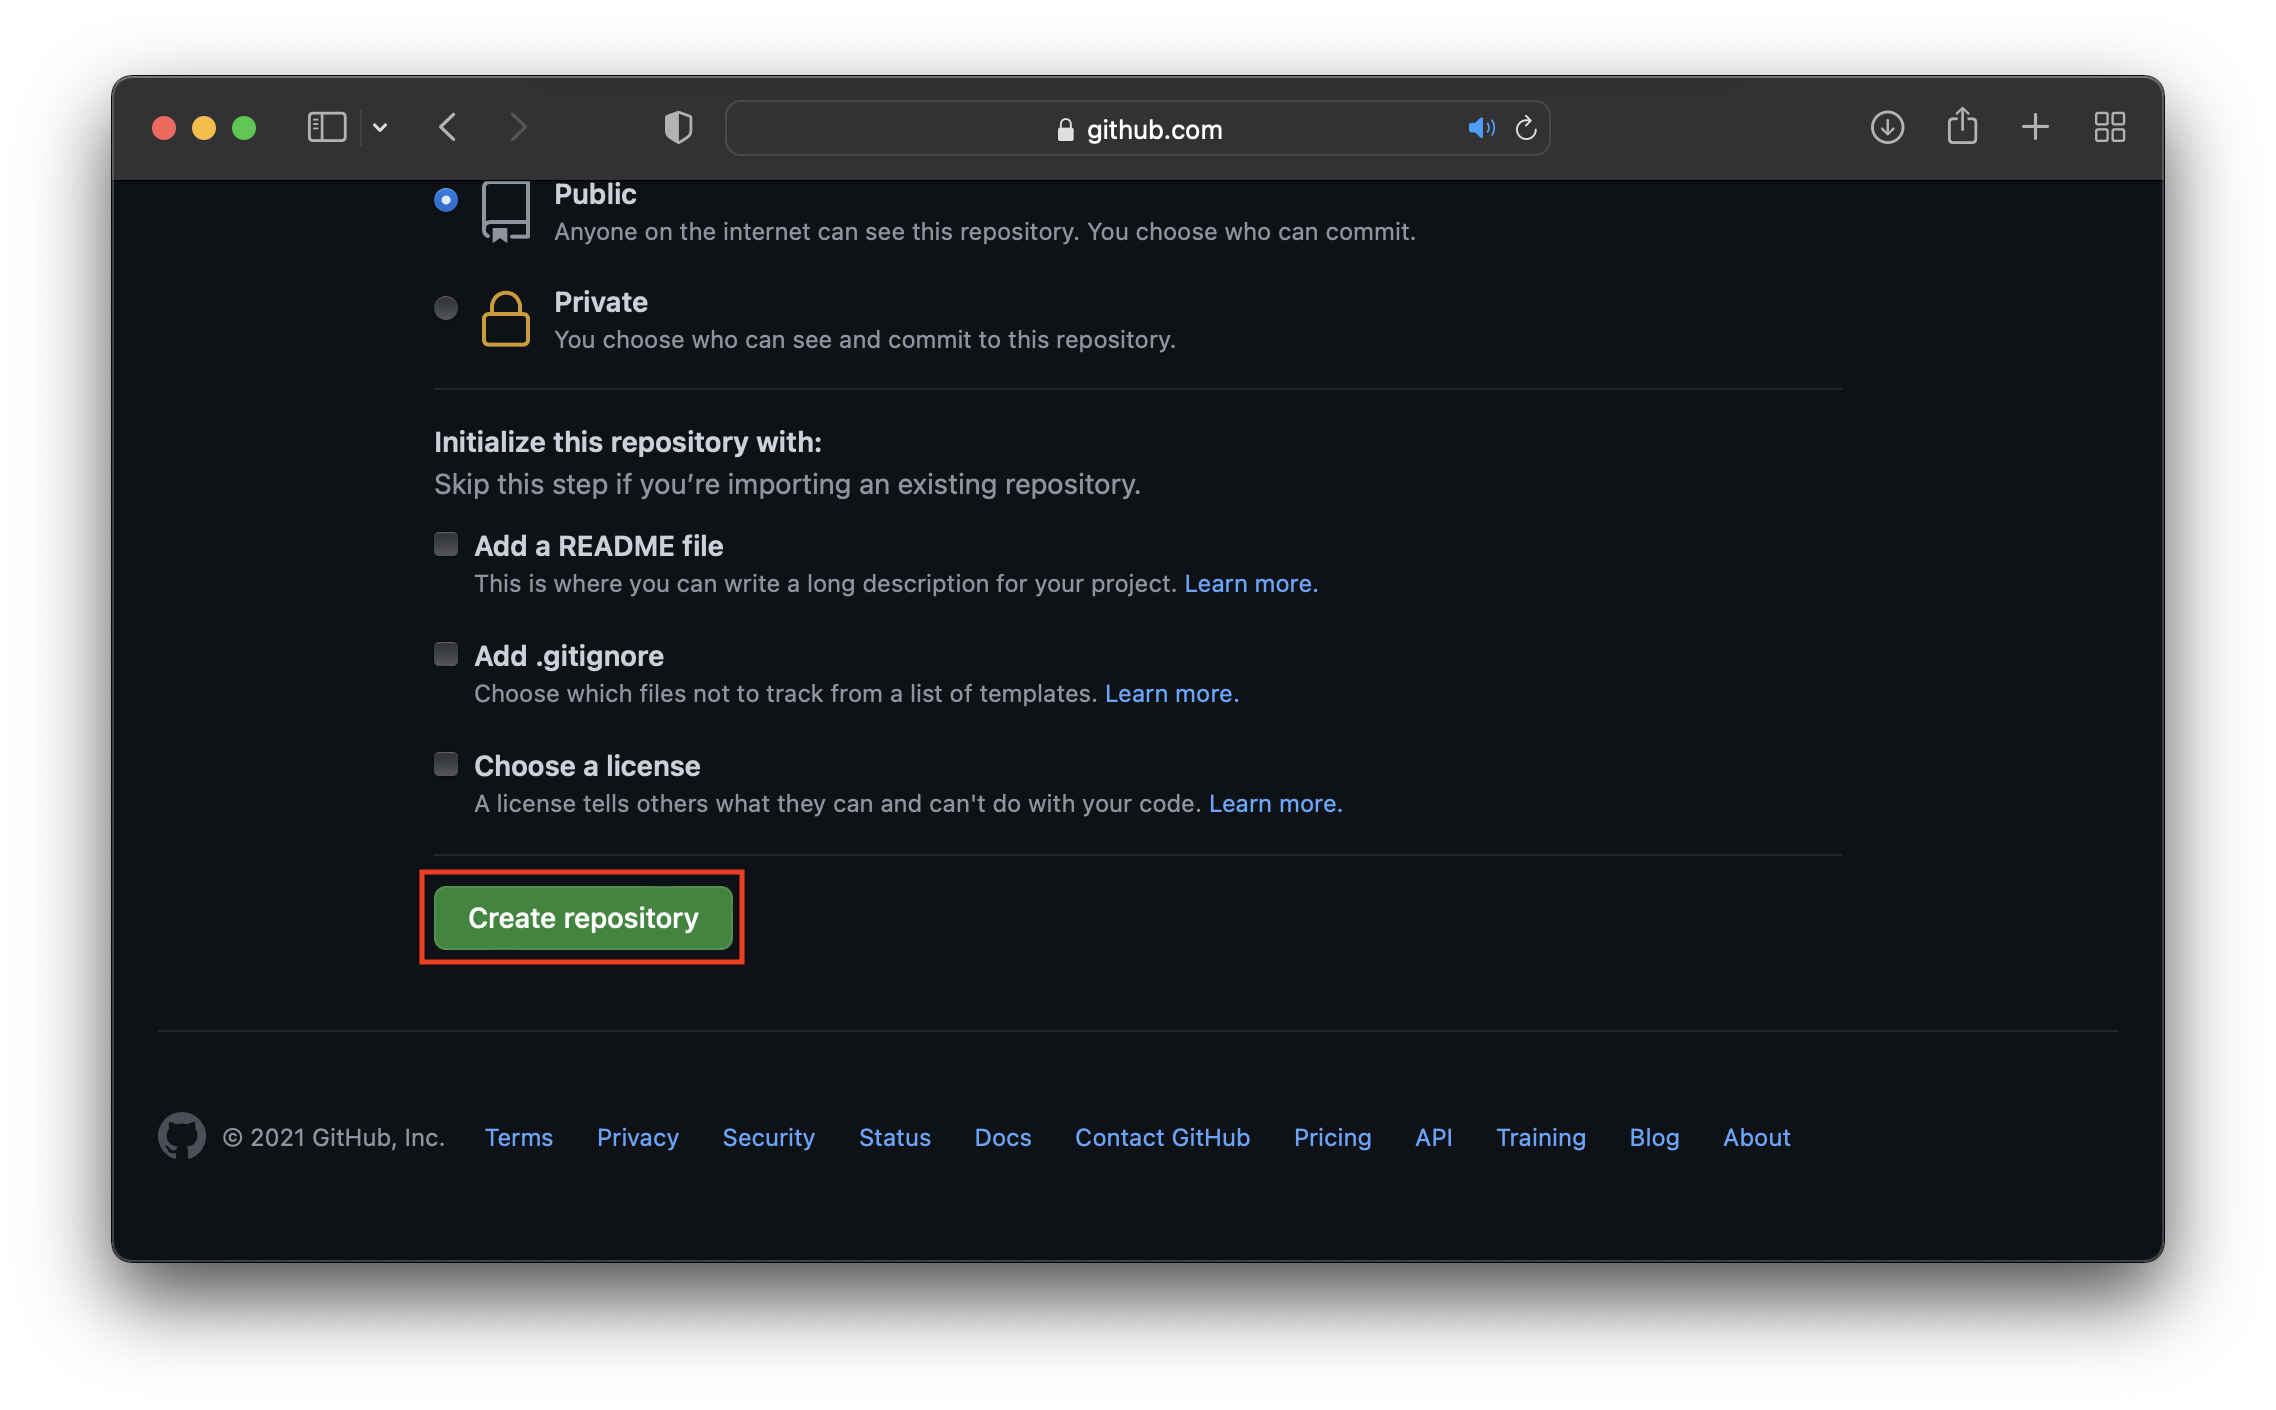
At this point, just scroll down and press Create repository.
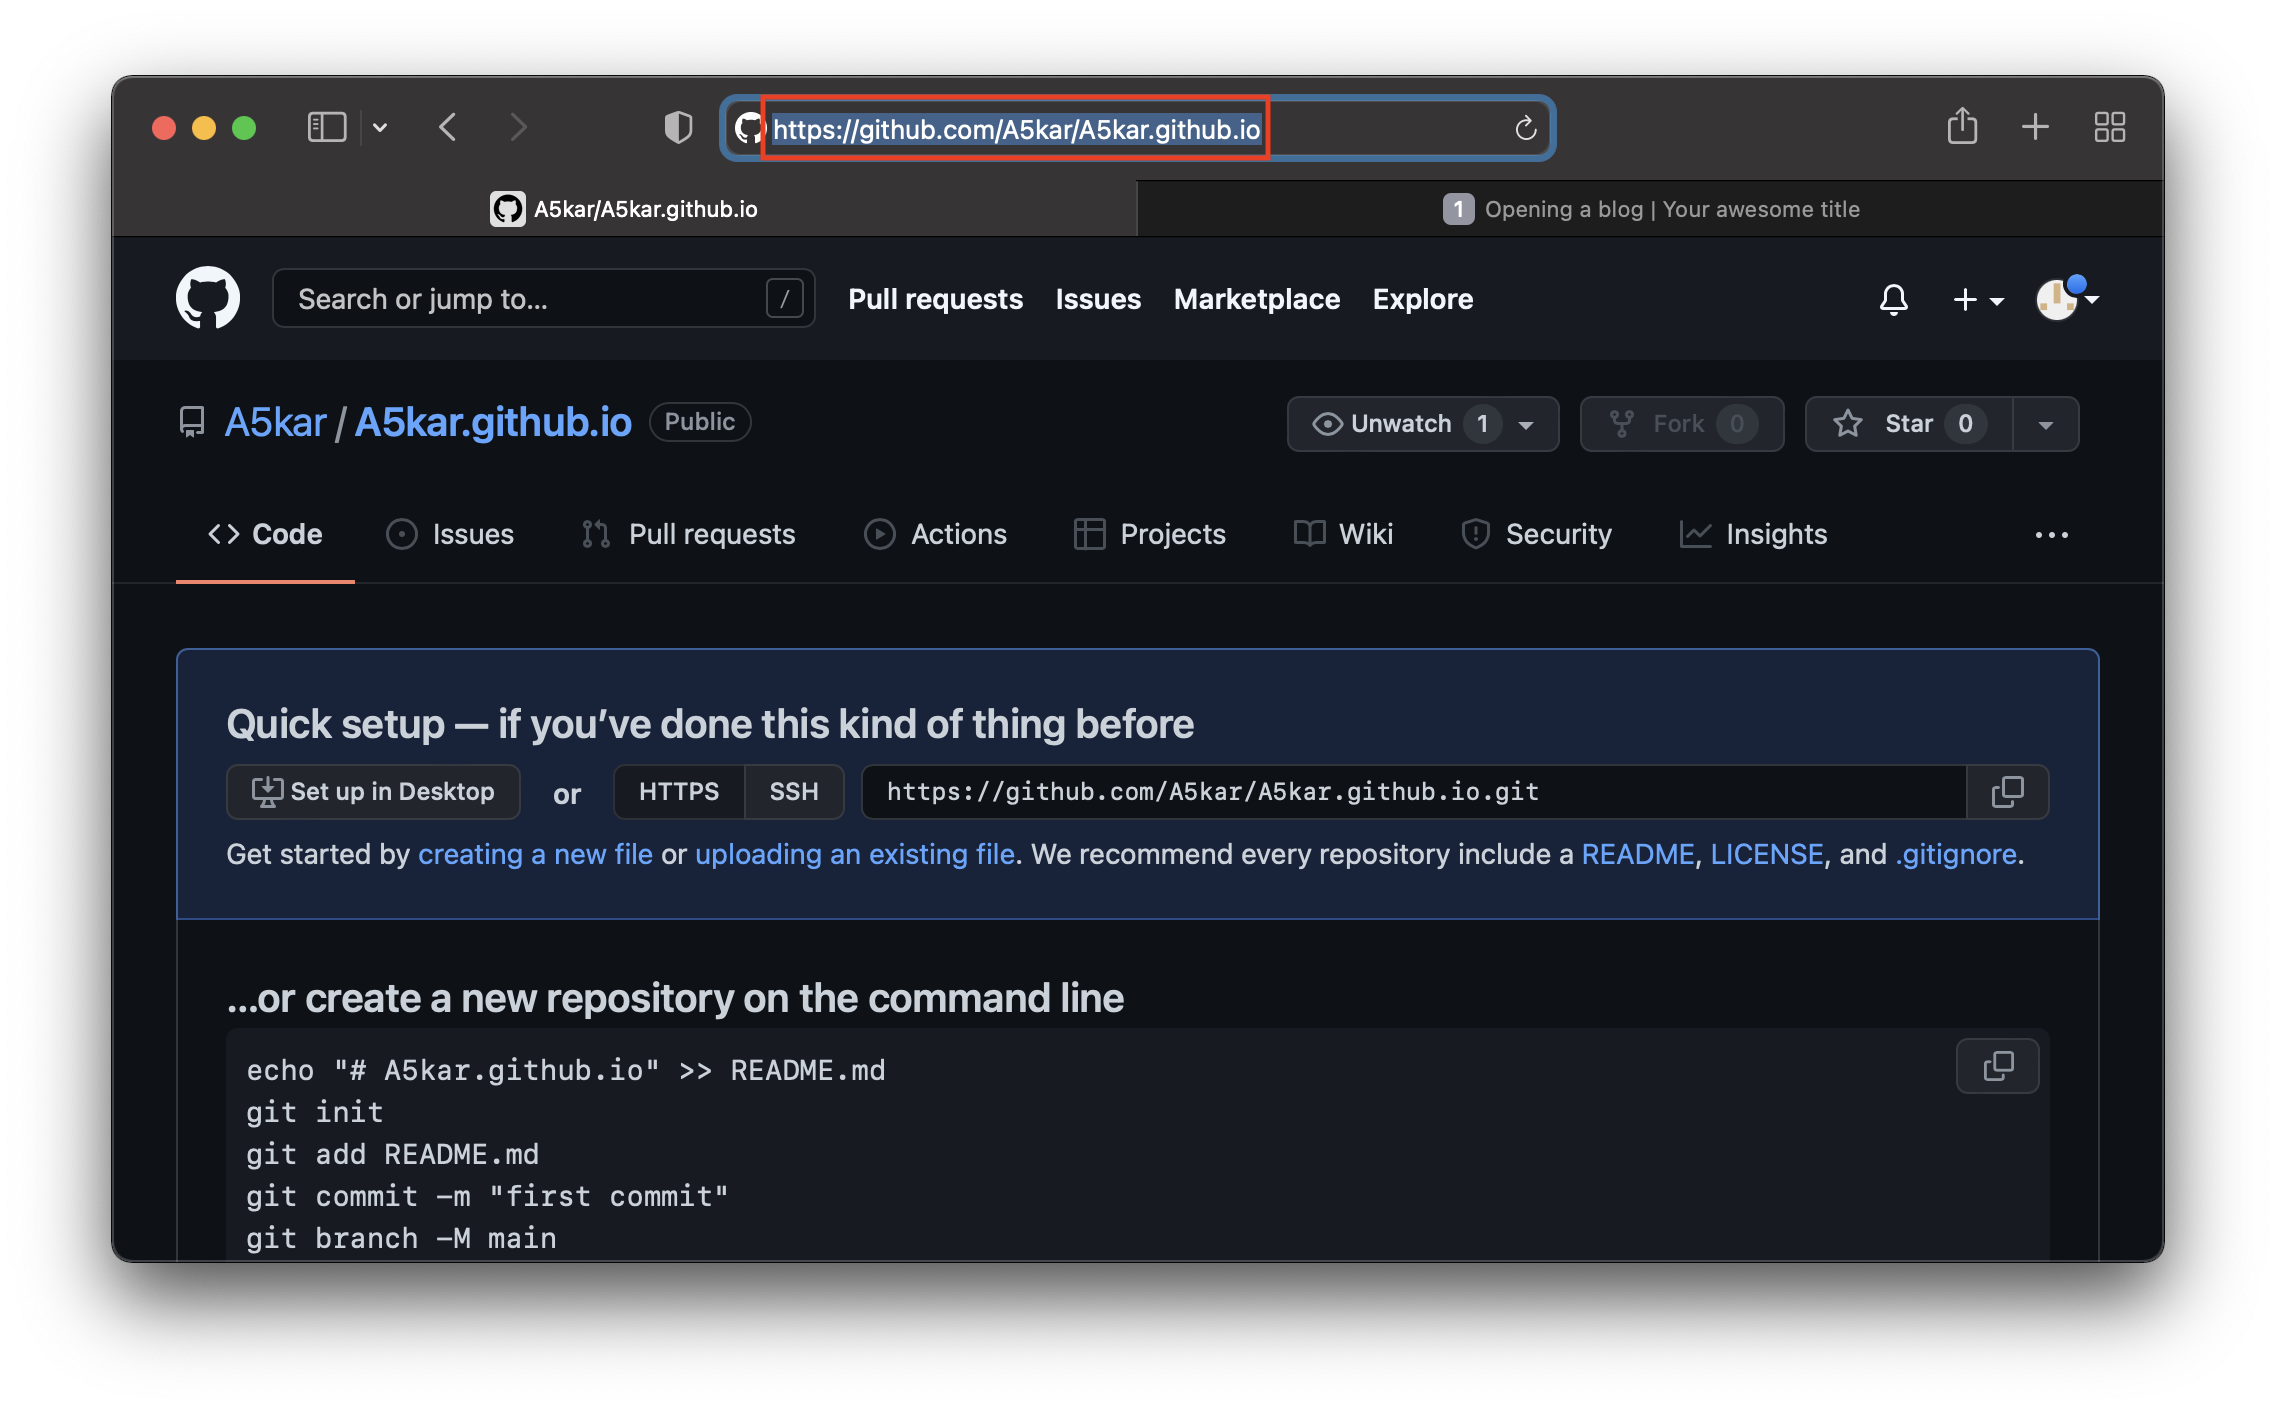
After that, the browser should bring you to an empty repository page. Copy the URL (that is https://github.com/A5kar/A5kar.github.io) and move to the IDE of your choice. In this post, we will be using Visual Studio Code.
Create a local clone of the GitHub Pages repository
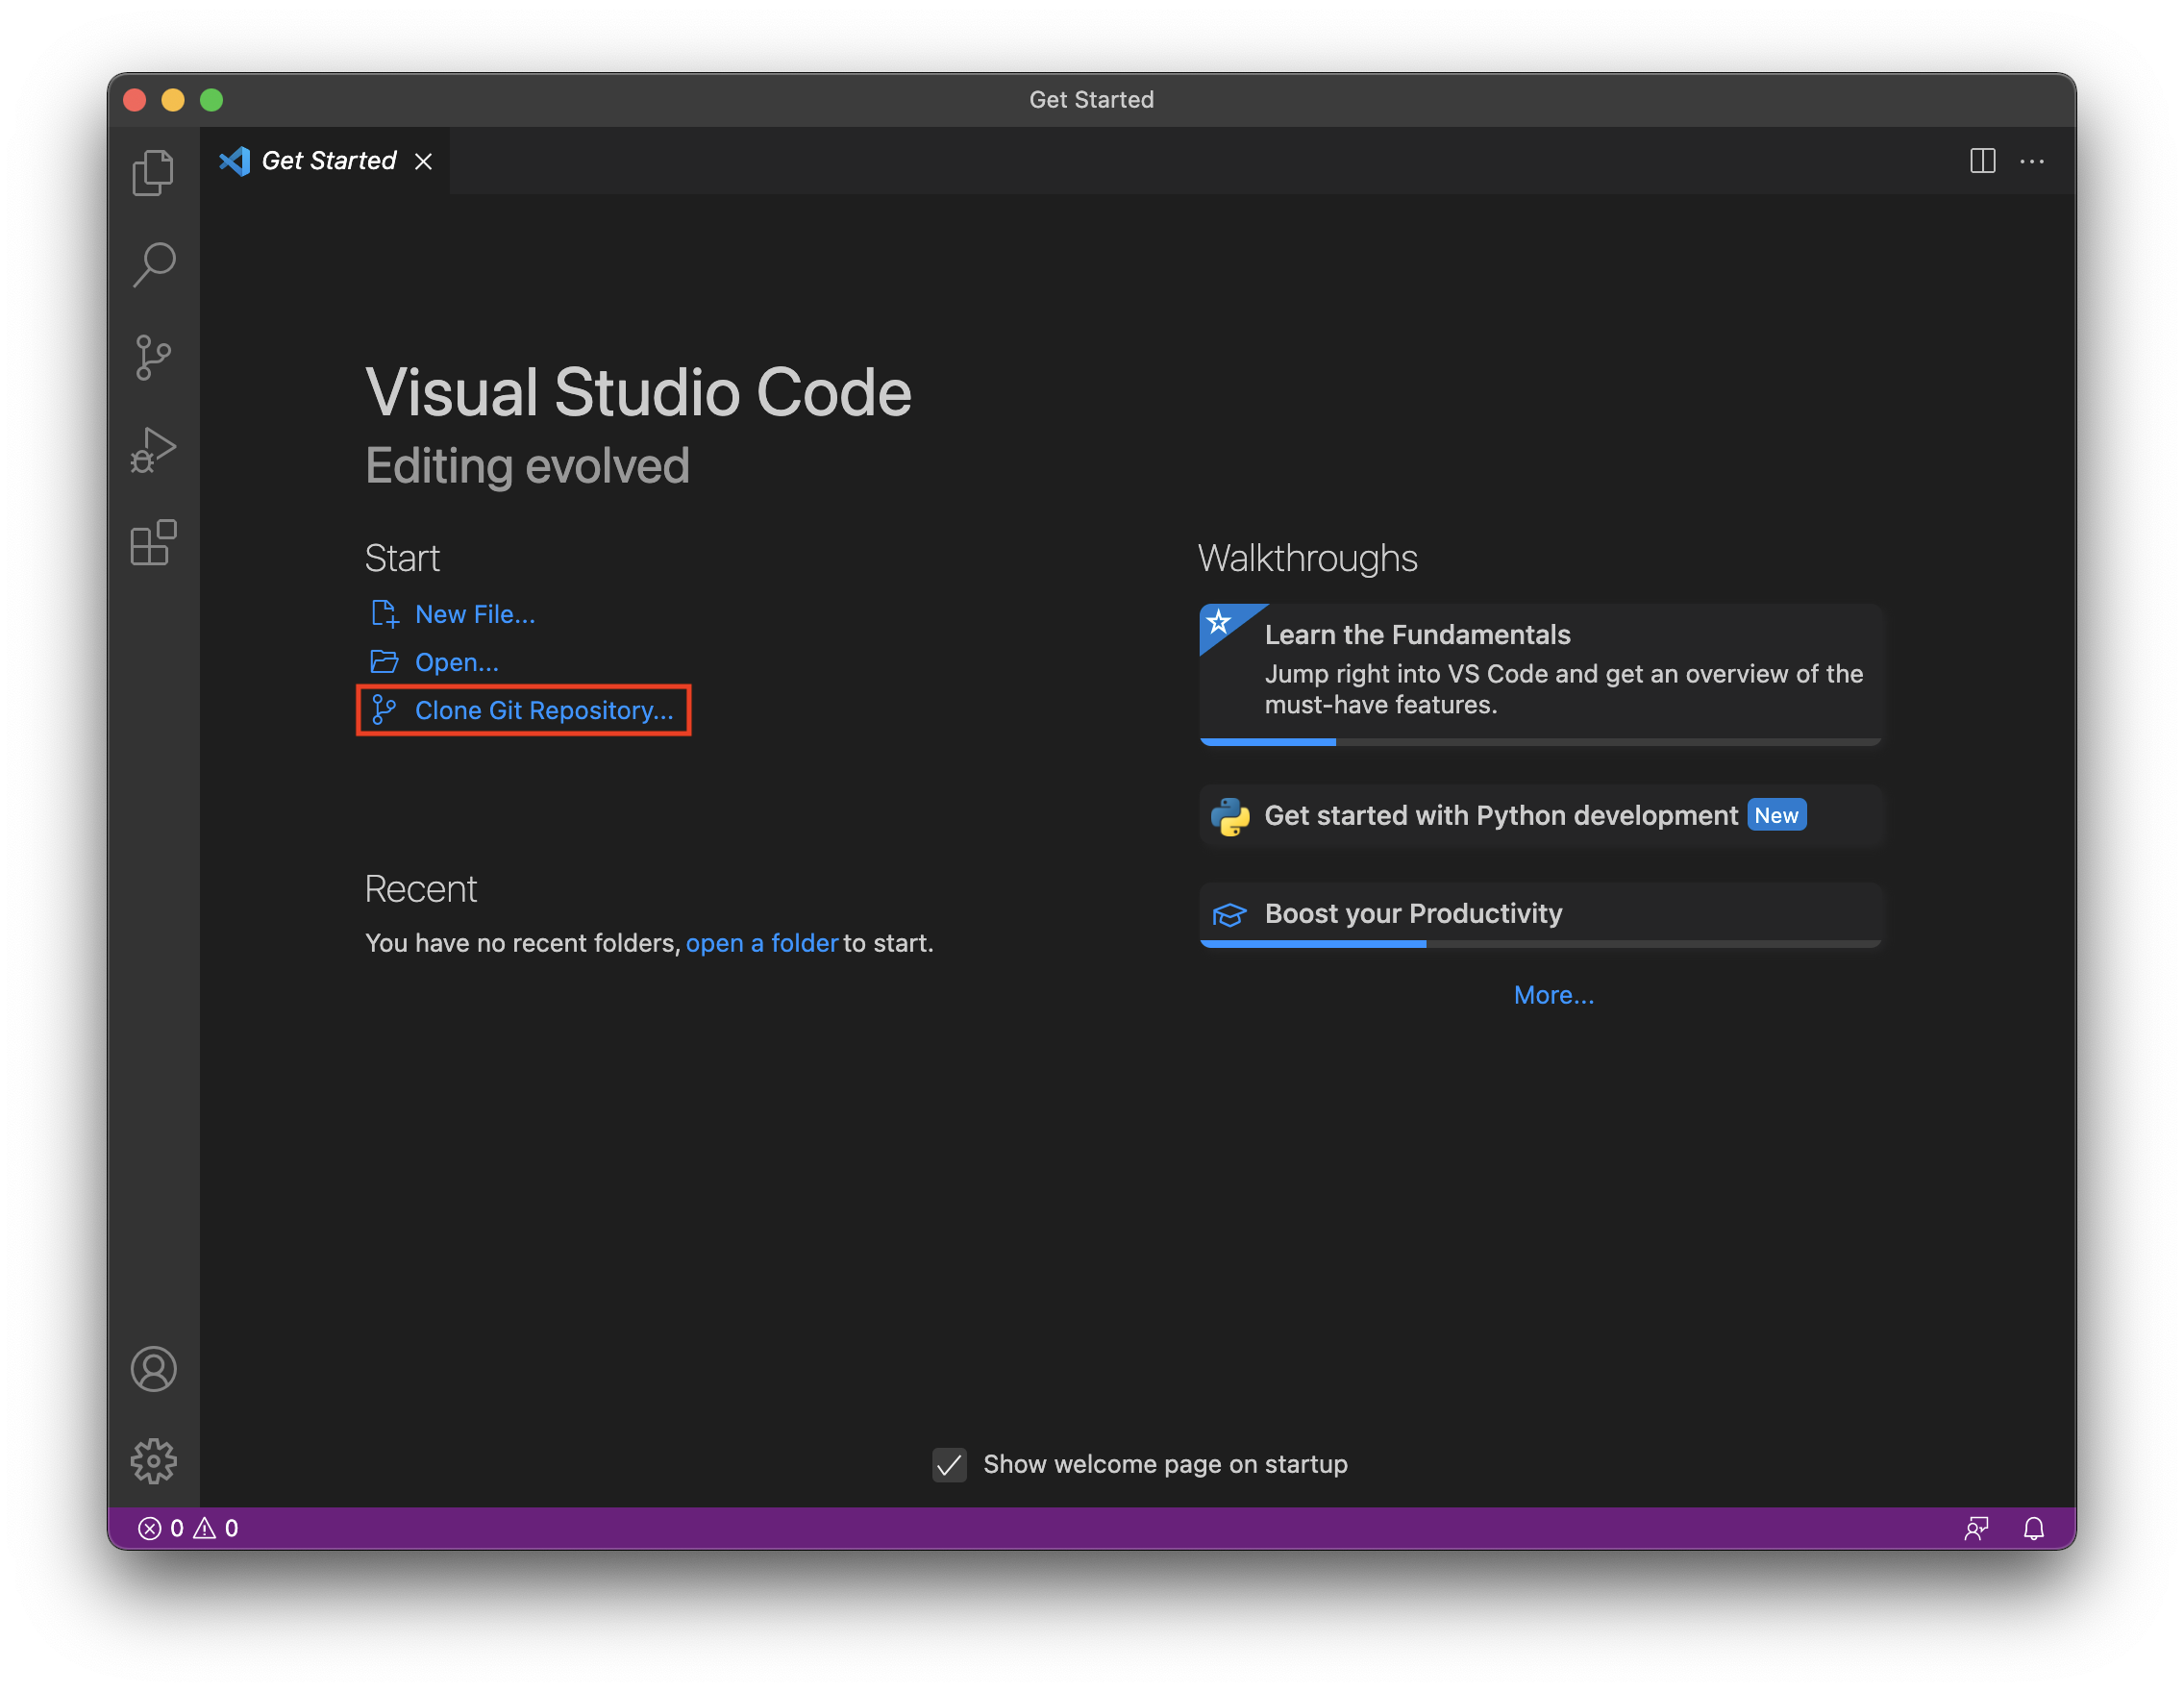
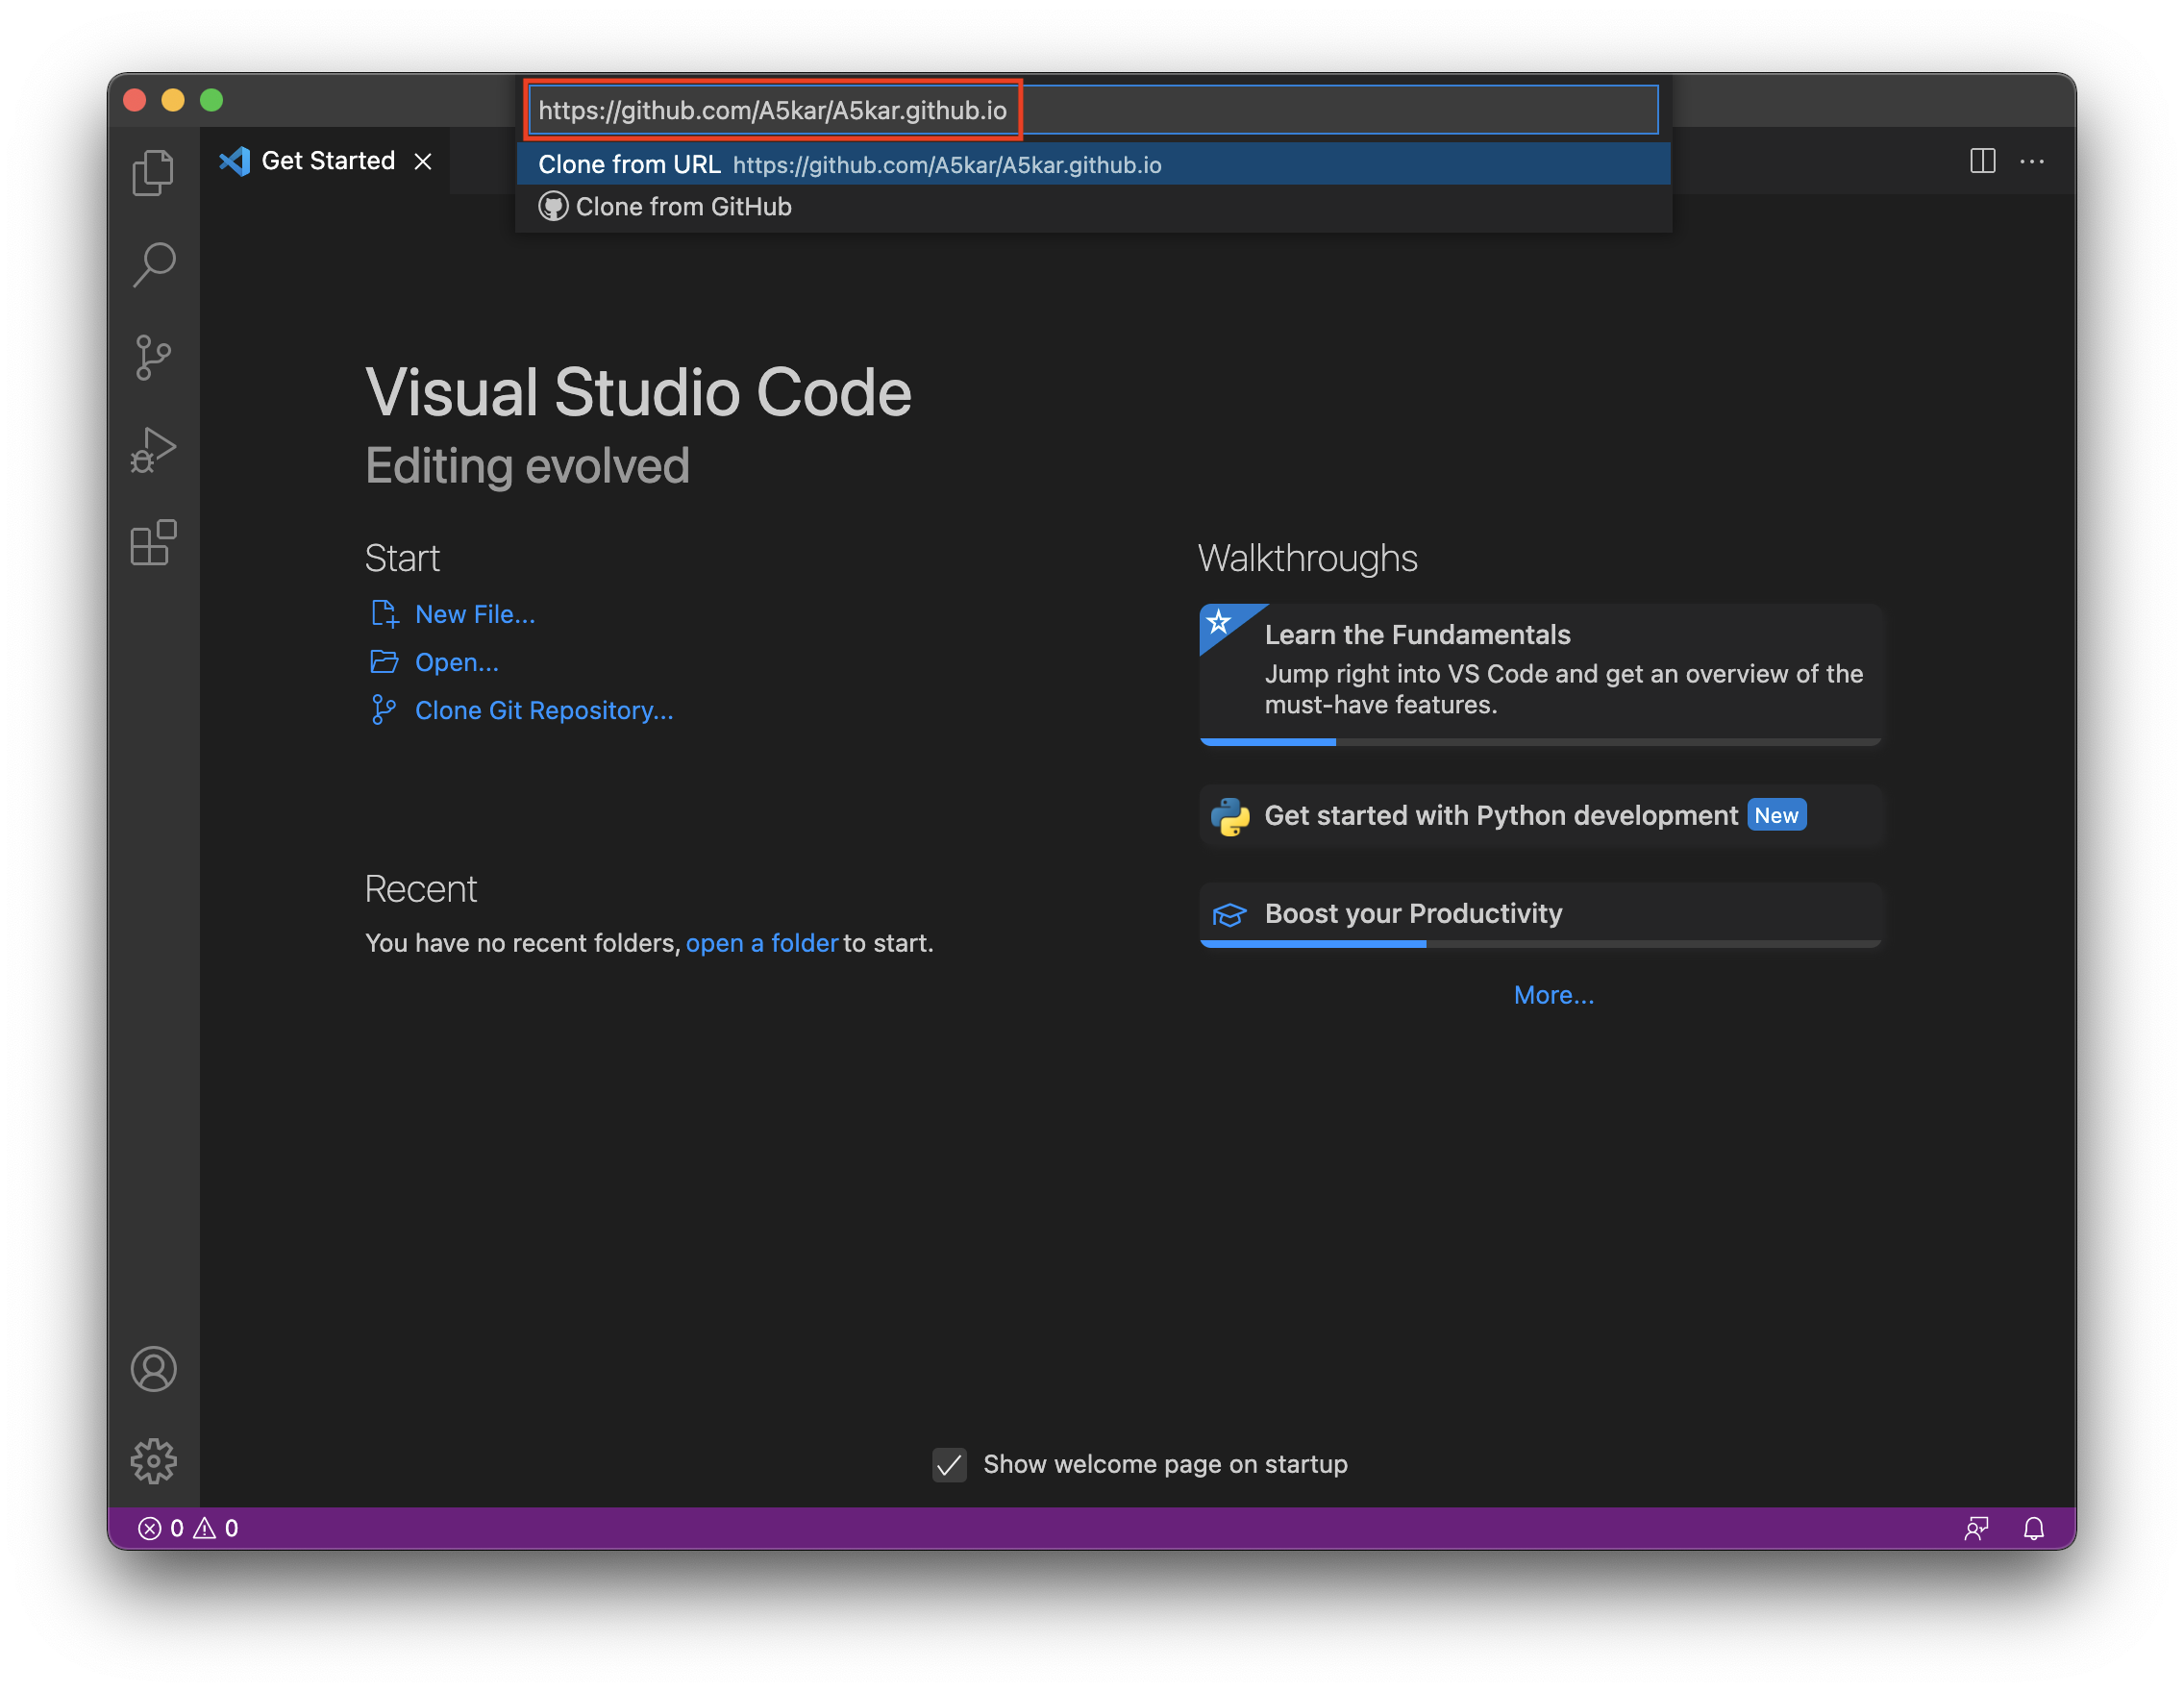
When you open VSC, you may get the Get Started page. In such case, select Clone Git Repository, otherwise press command + shift + P and start typing clone; a dedicated command will come out as Git: Clone.
Paste the URL associated with your GitHub Pages repository (copied earlier).
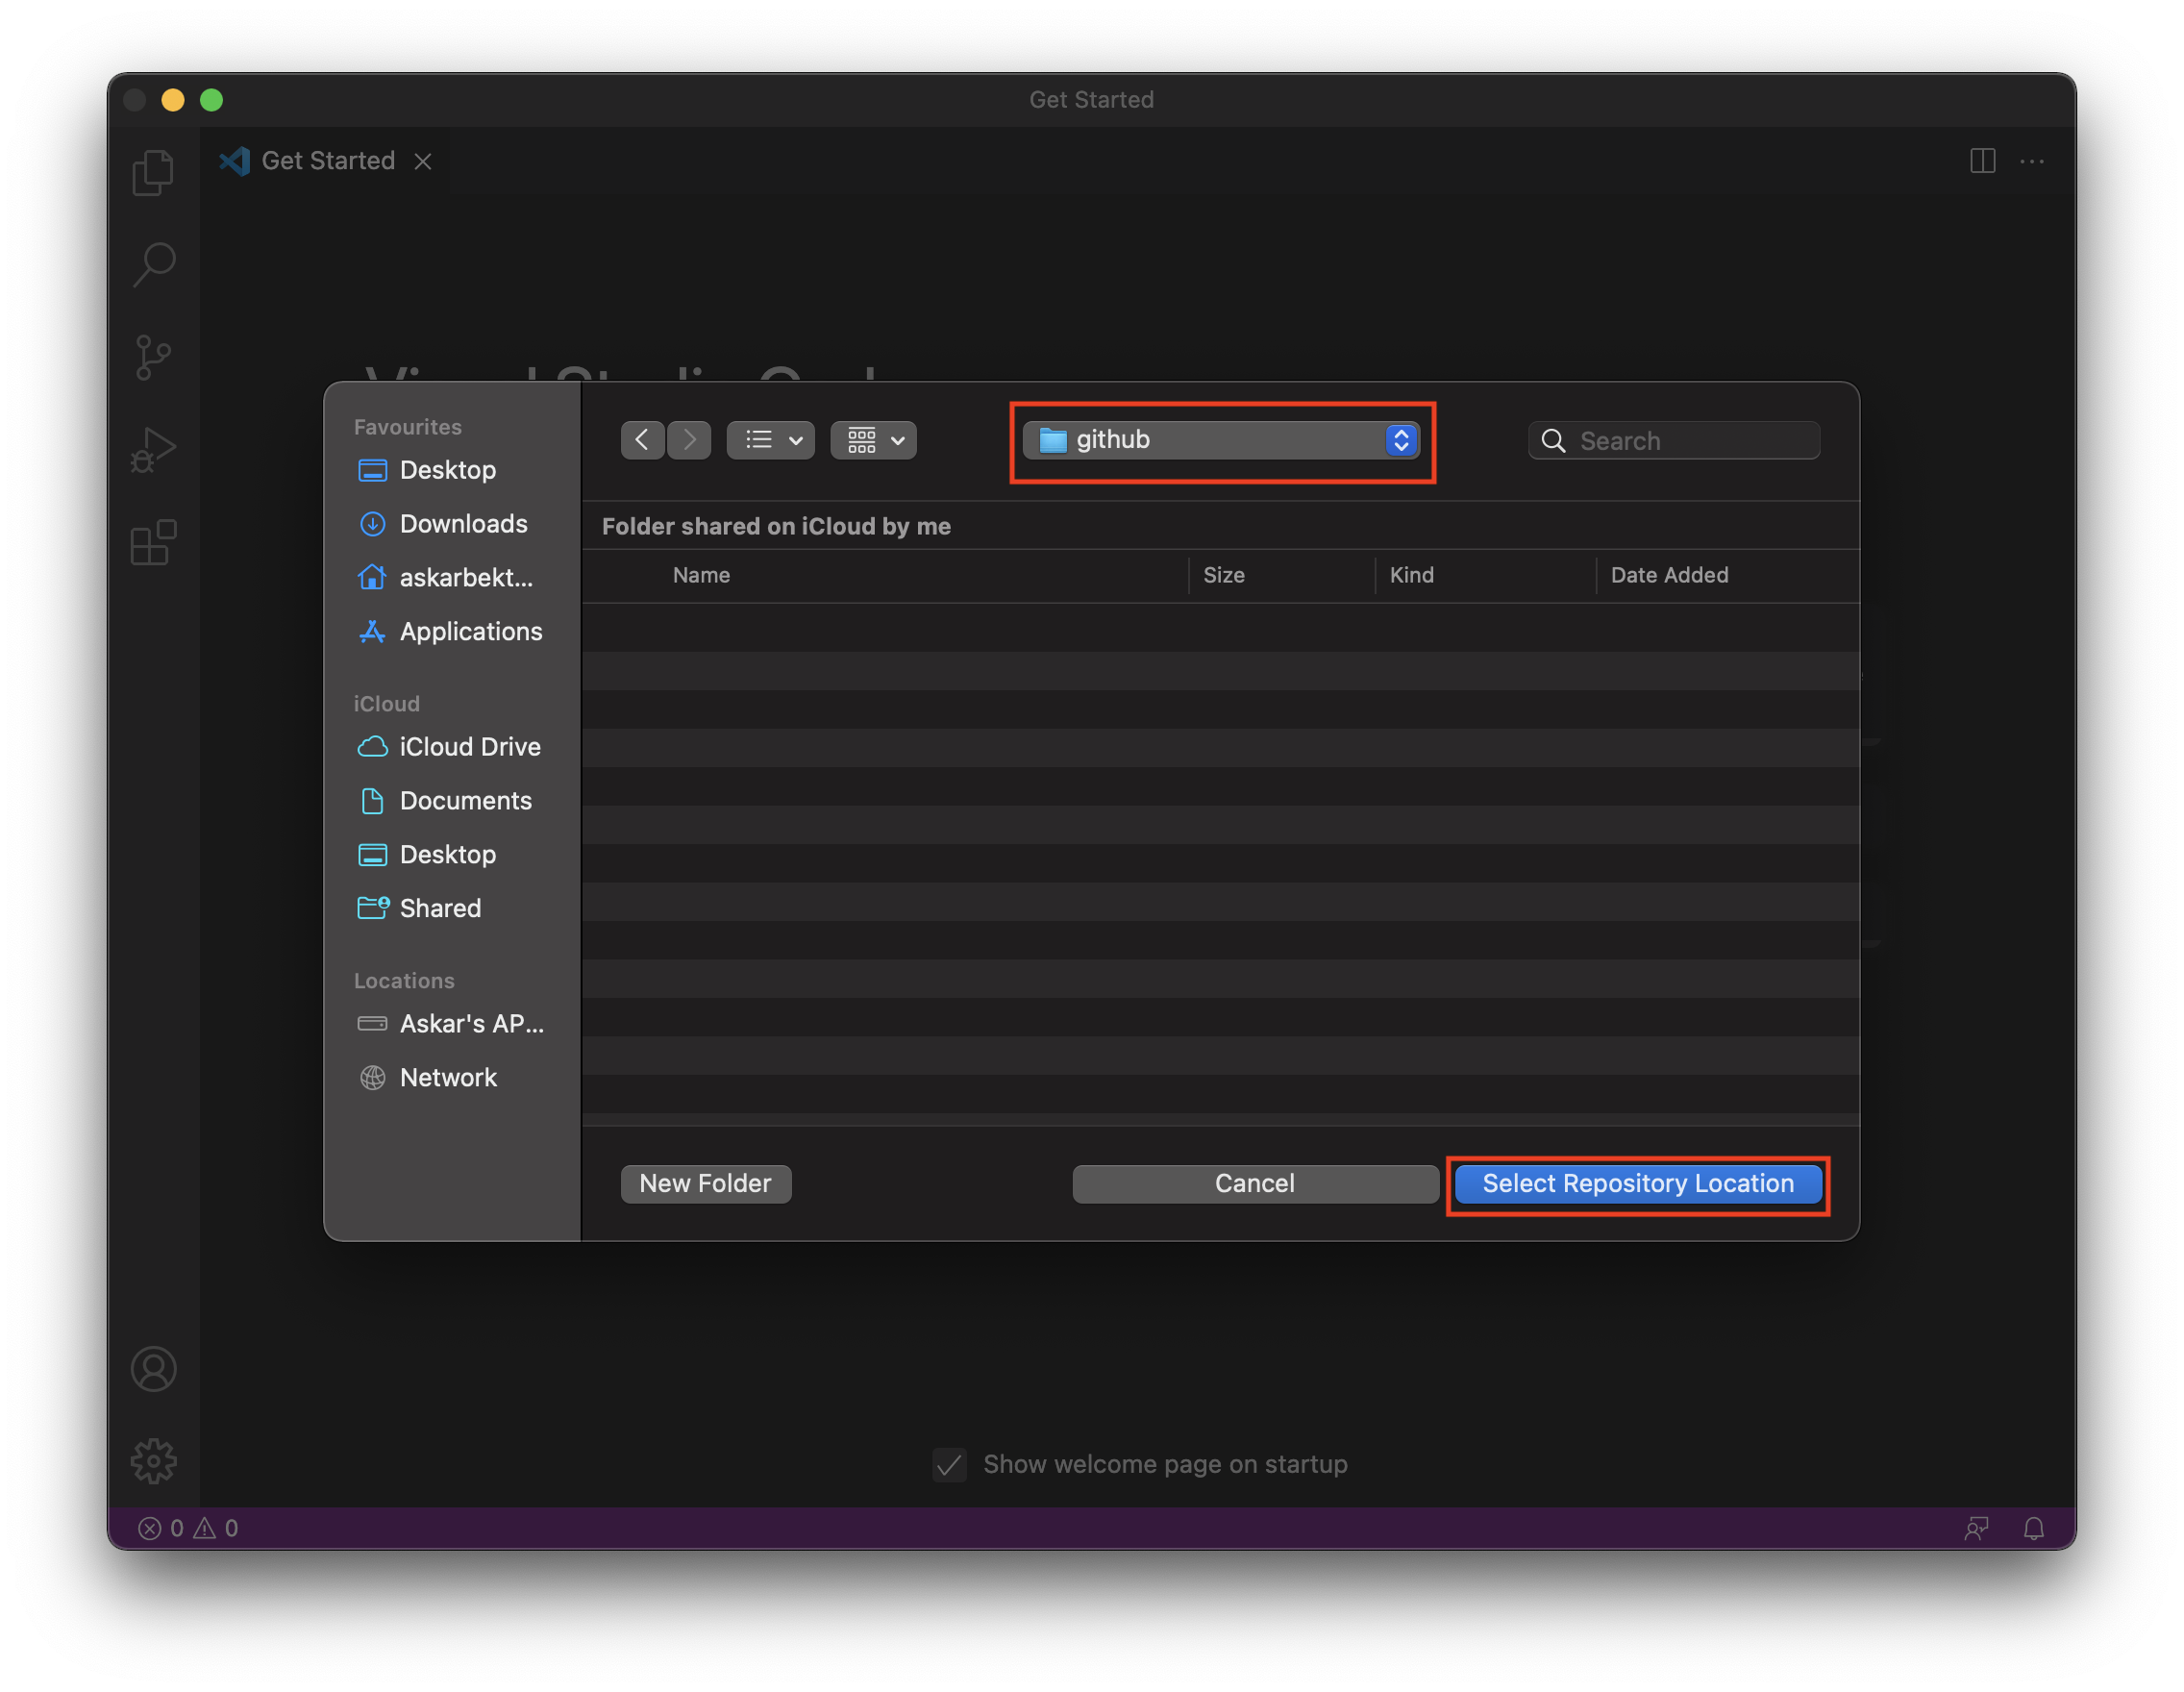
VSC will ask you the folder where you would like to clone your GitHub Page repository. Select the folder that pleases you the most and hit the Select Repository Location button.
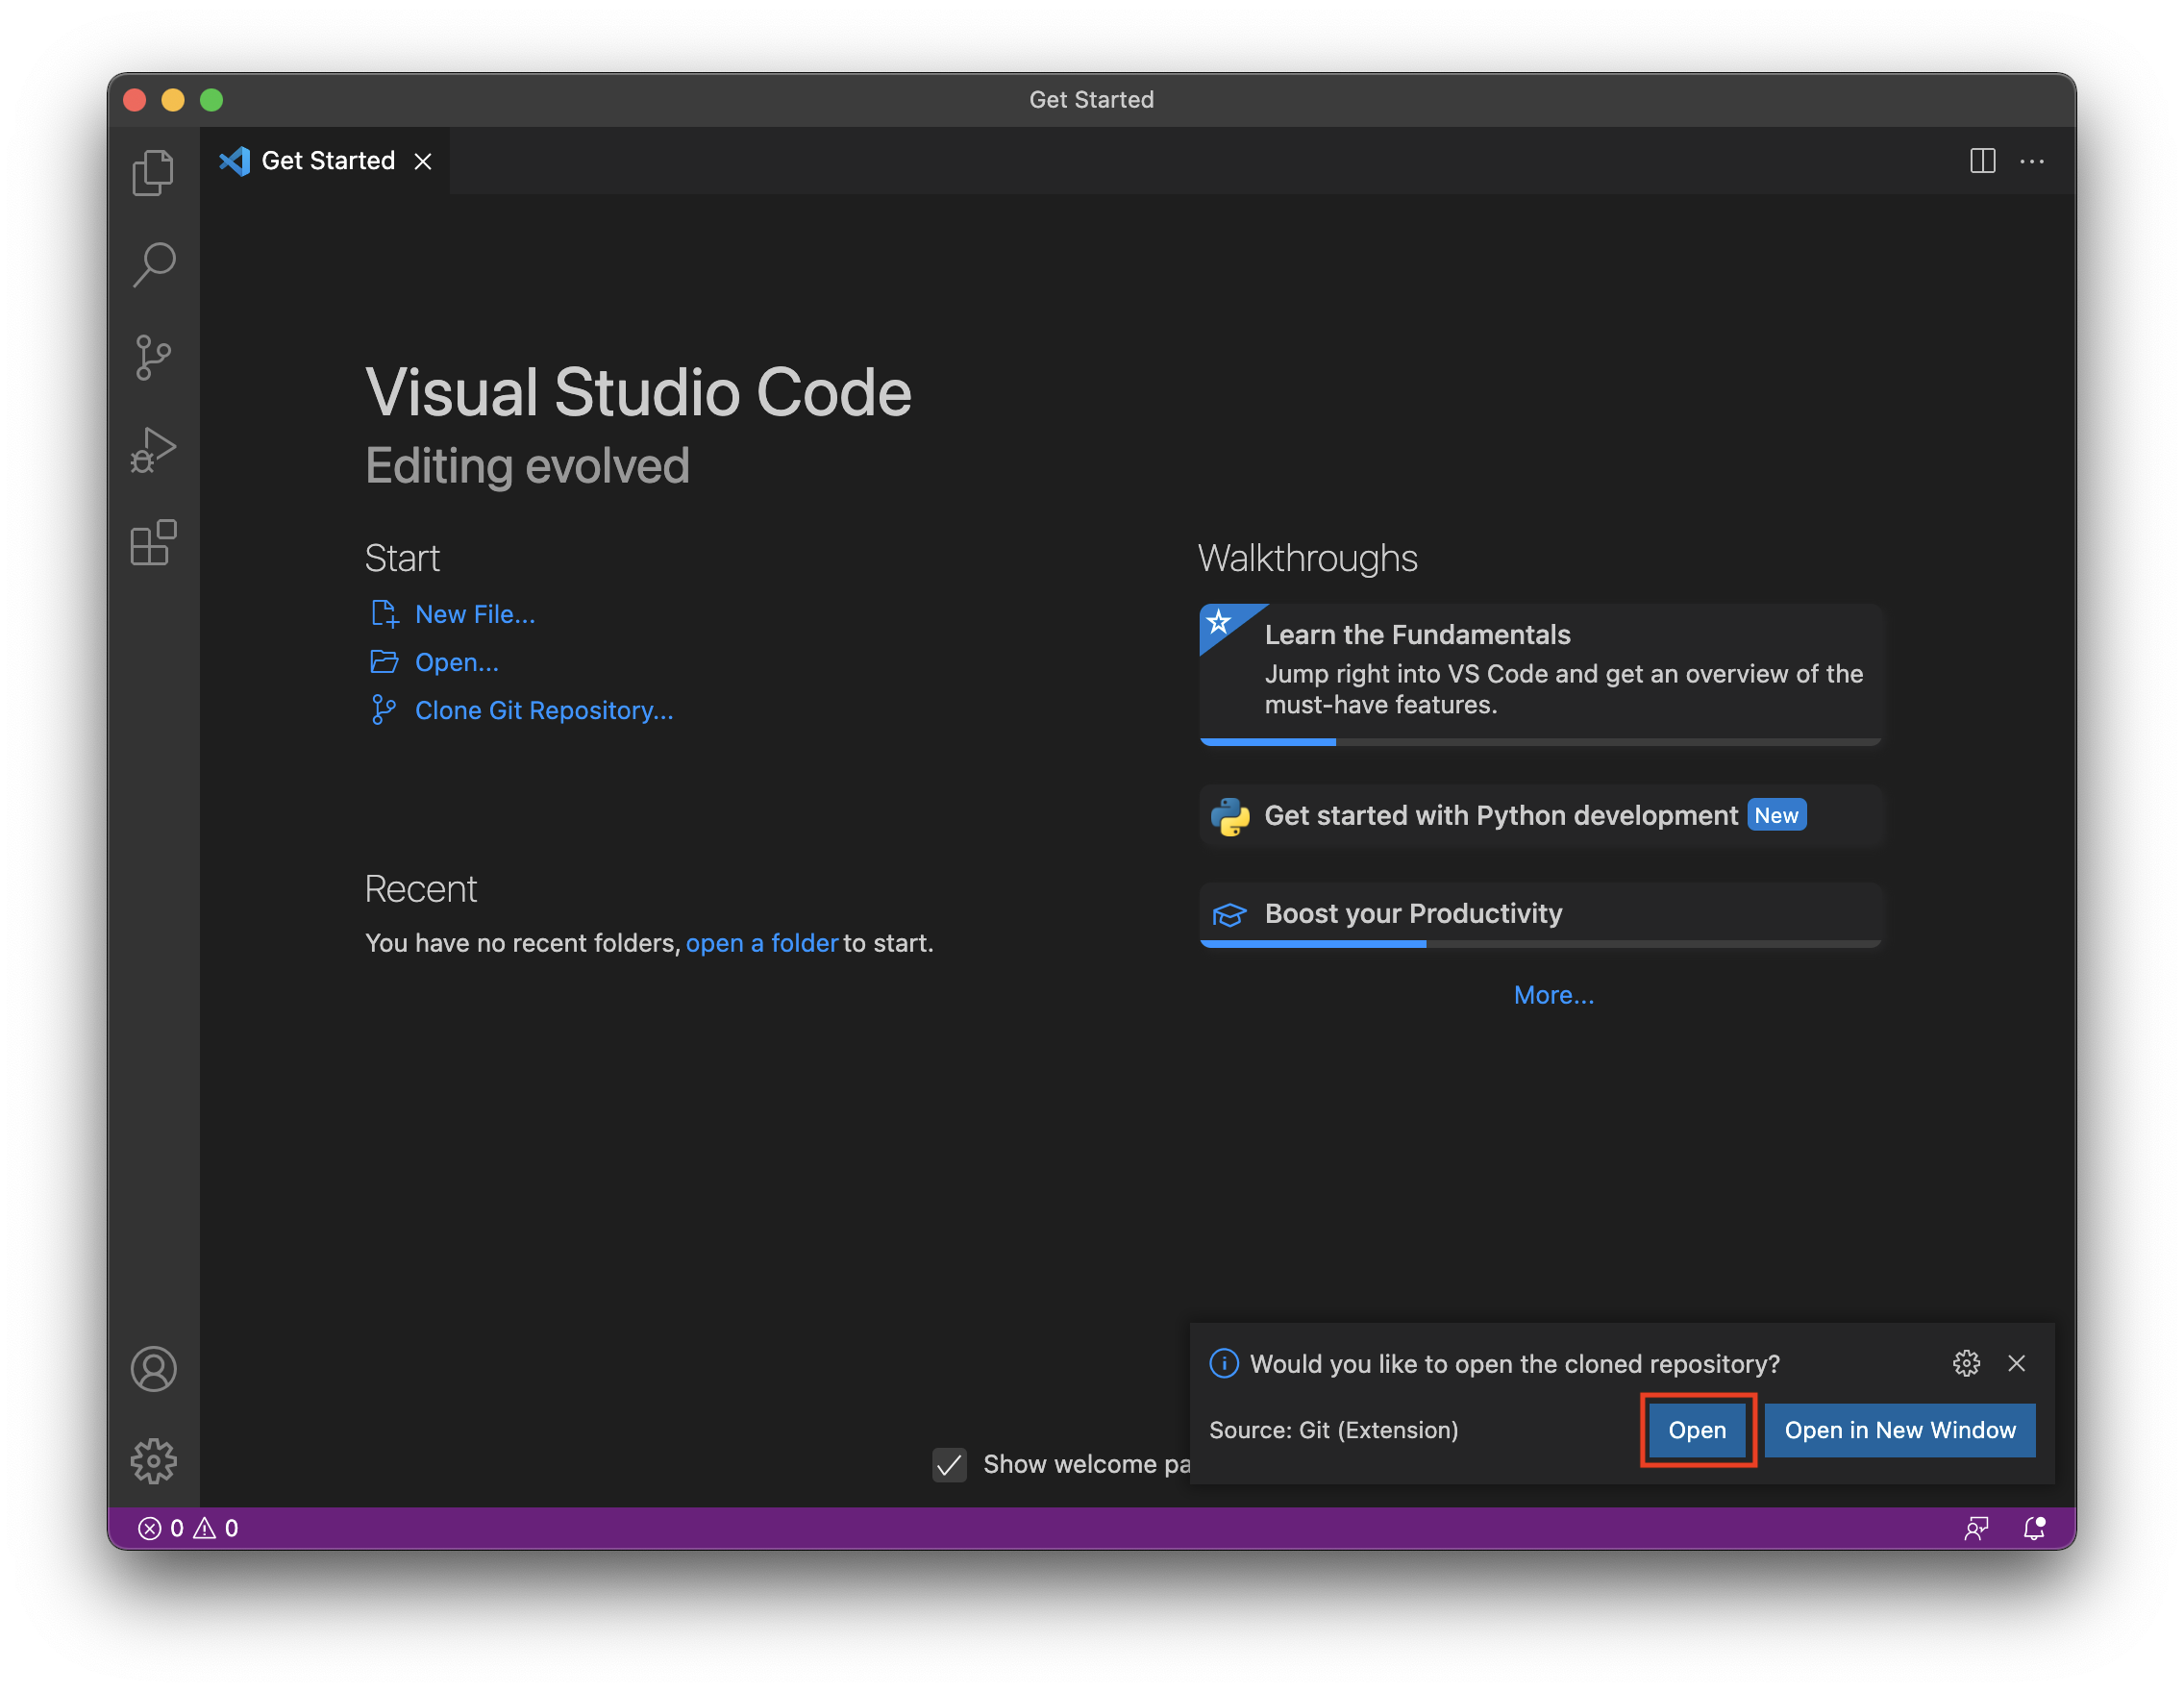
Assuming there were no issues during the copy, VSC will complete cloning the folder and will ask you if you want to open the cloned repository. You can safely accept the suggestion and press Open.
Configure Jekyll
For the next few steps we will need the terminal (very few commands, no worries). You can open it directly in the VSC, by pressing control + `.
In this post, we will install Jekyll server using the Bundler tool, which (to my limited knowledge) seems a sort of package manager for Ruby programming languages.
Jekyll is distributed under the form of a gem, that in Ruby terms means a self-contained program or library. Considering that Jekyll server may depend on many other gems, Bundler will save us from dependency hell, while ensuring that all gems we need in development and production are present in the project.
All dependencies among gem-files are contained in a so called Gemfile. By running bundle init, we create such file.
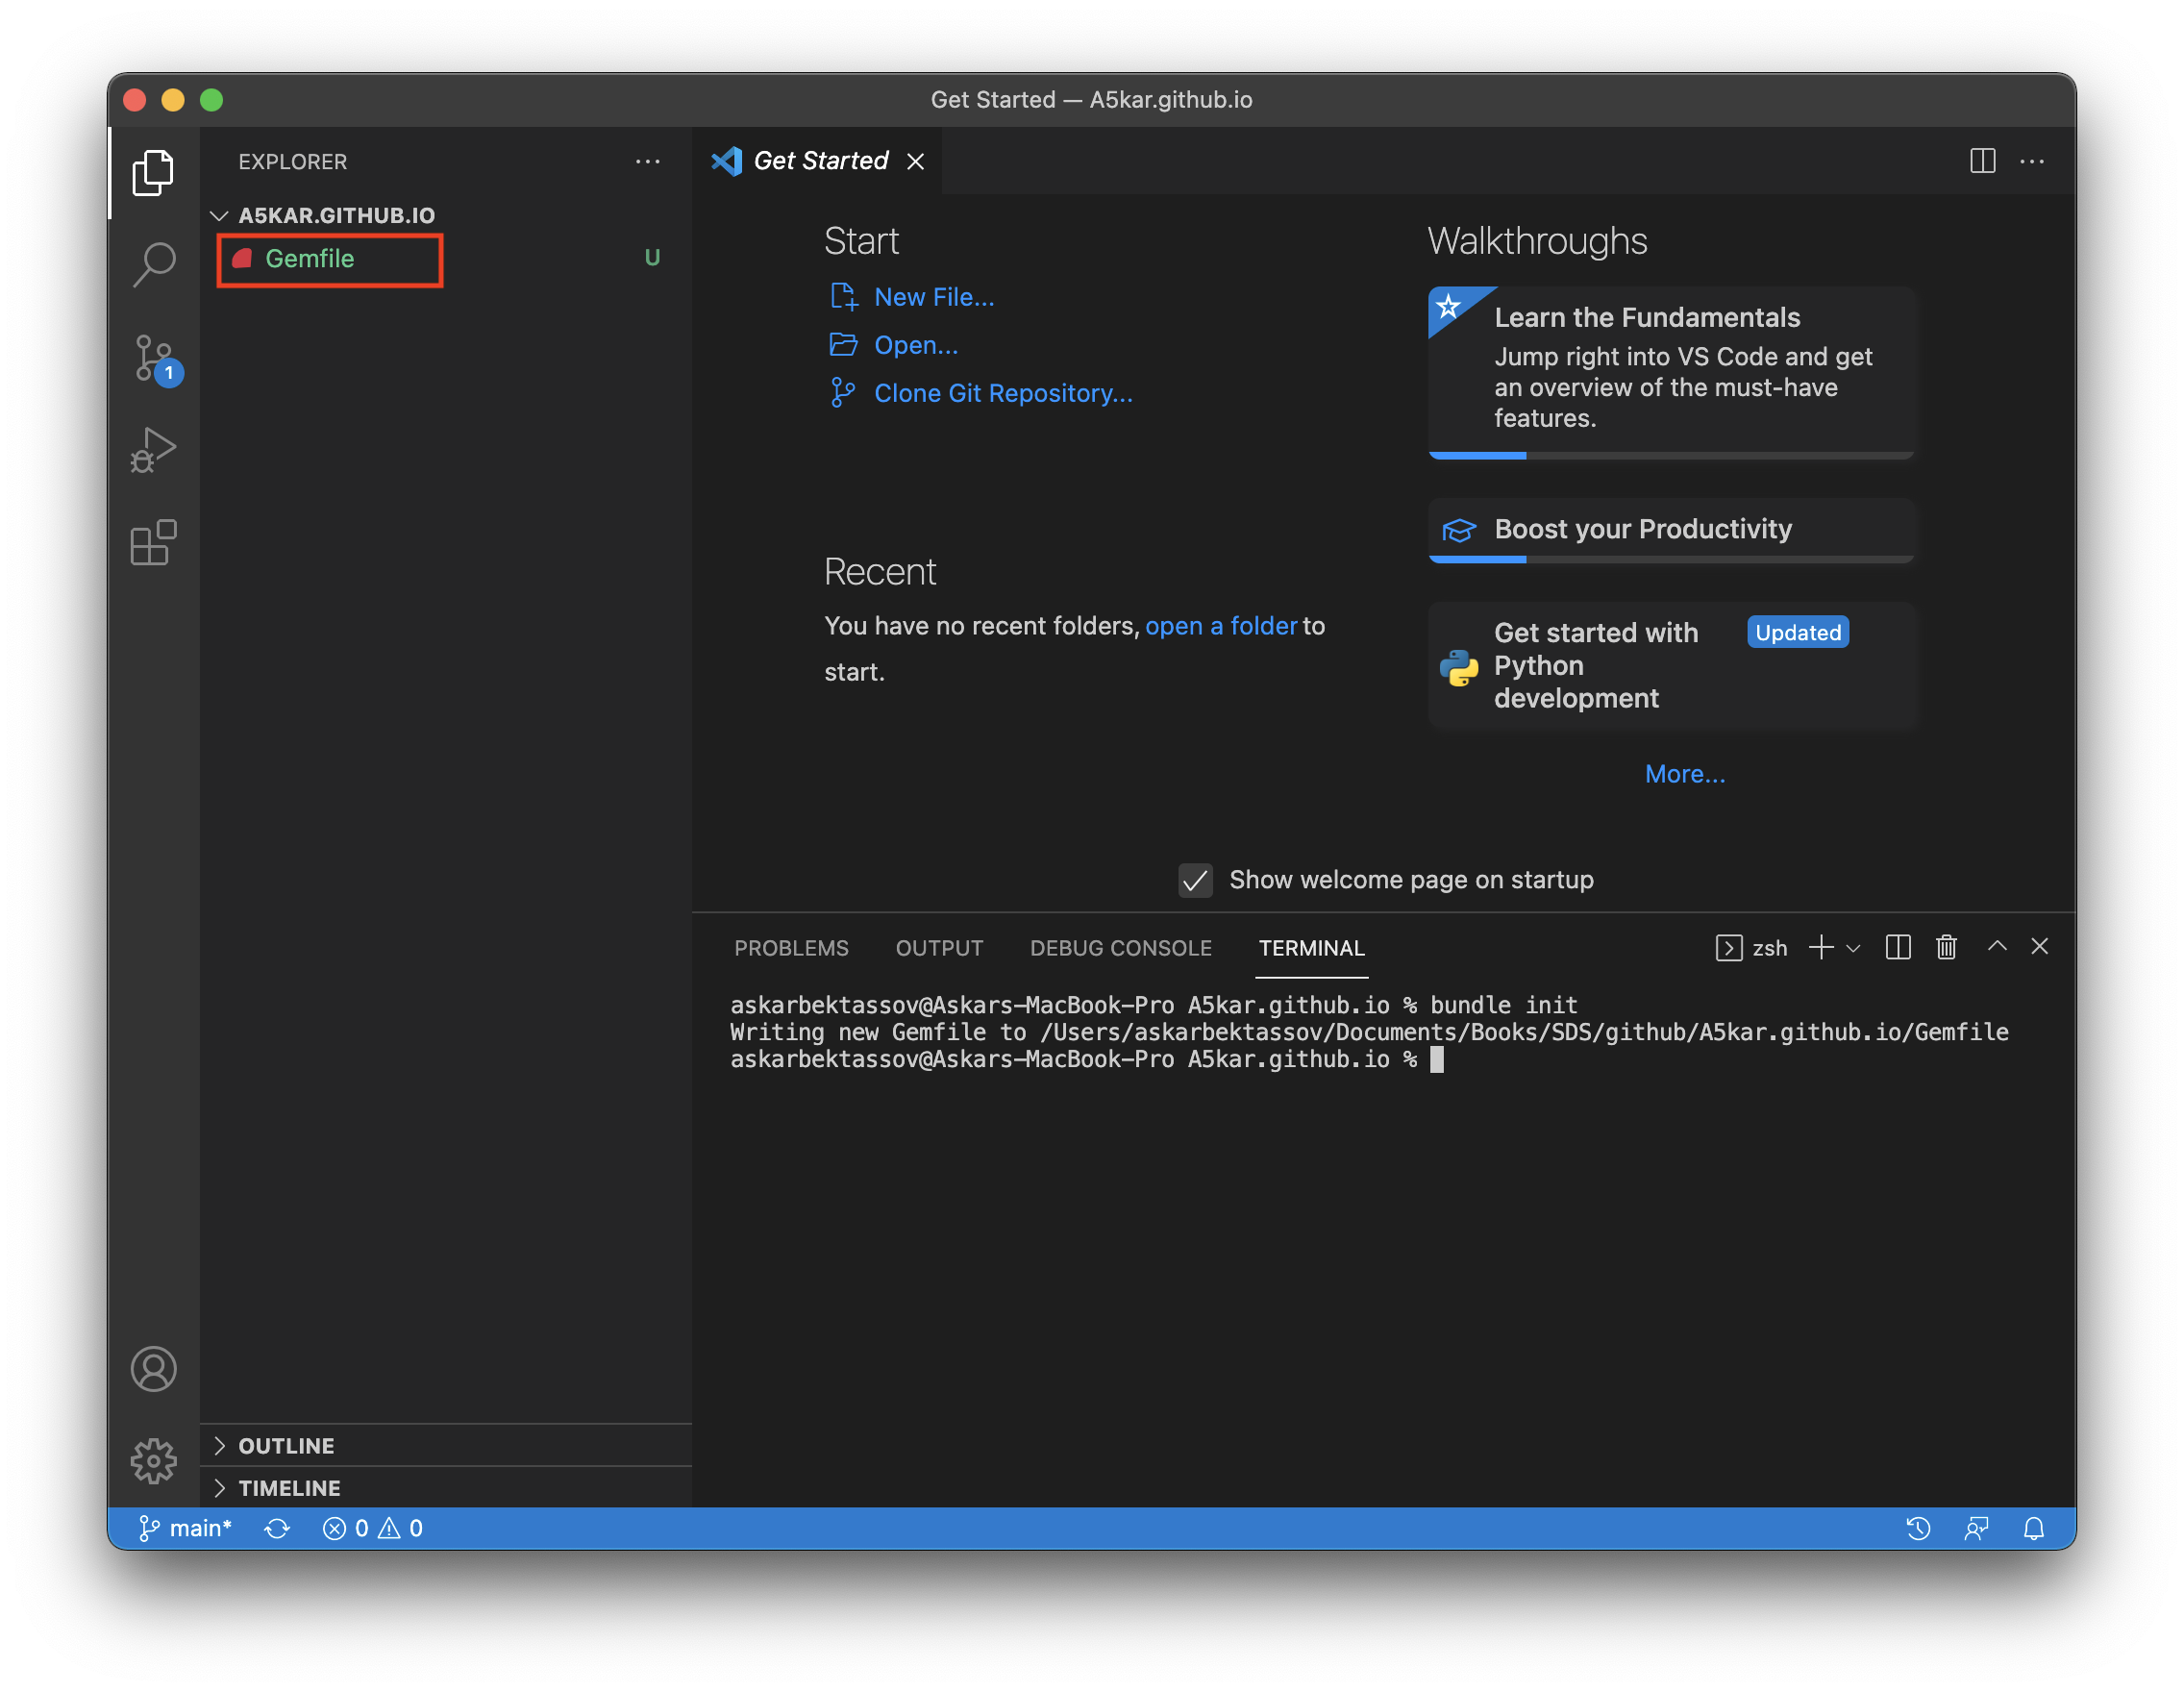
Notice that Gemfile filename is colored green. This means that this file is new and is still not present in the remote repository. Later, we will decide what files to add to the repository.
Next, let’s send bundle install --path vendor/bundle to the terminal and instruct Bundler that all gems will need to be stored in a local folder. Concurrently, Bundler will also prepare few configuration files and an empty structure under vendor/bundle.
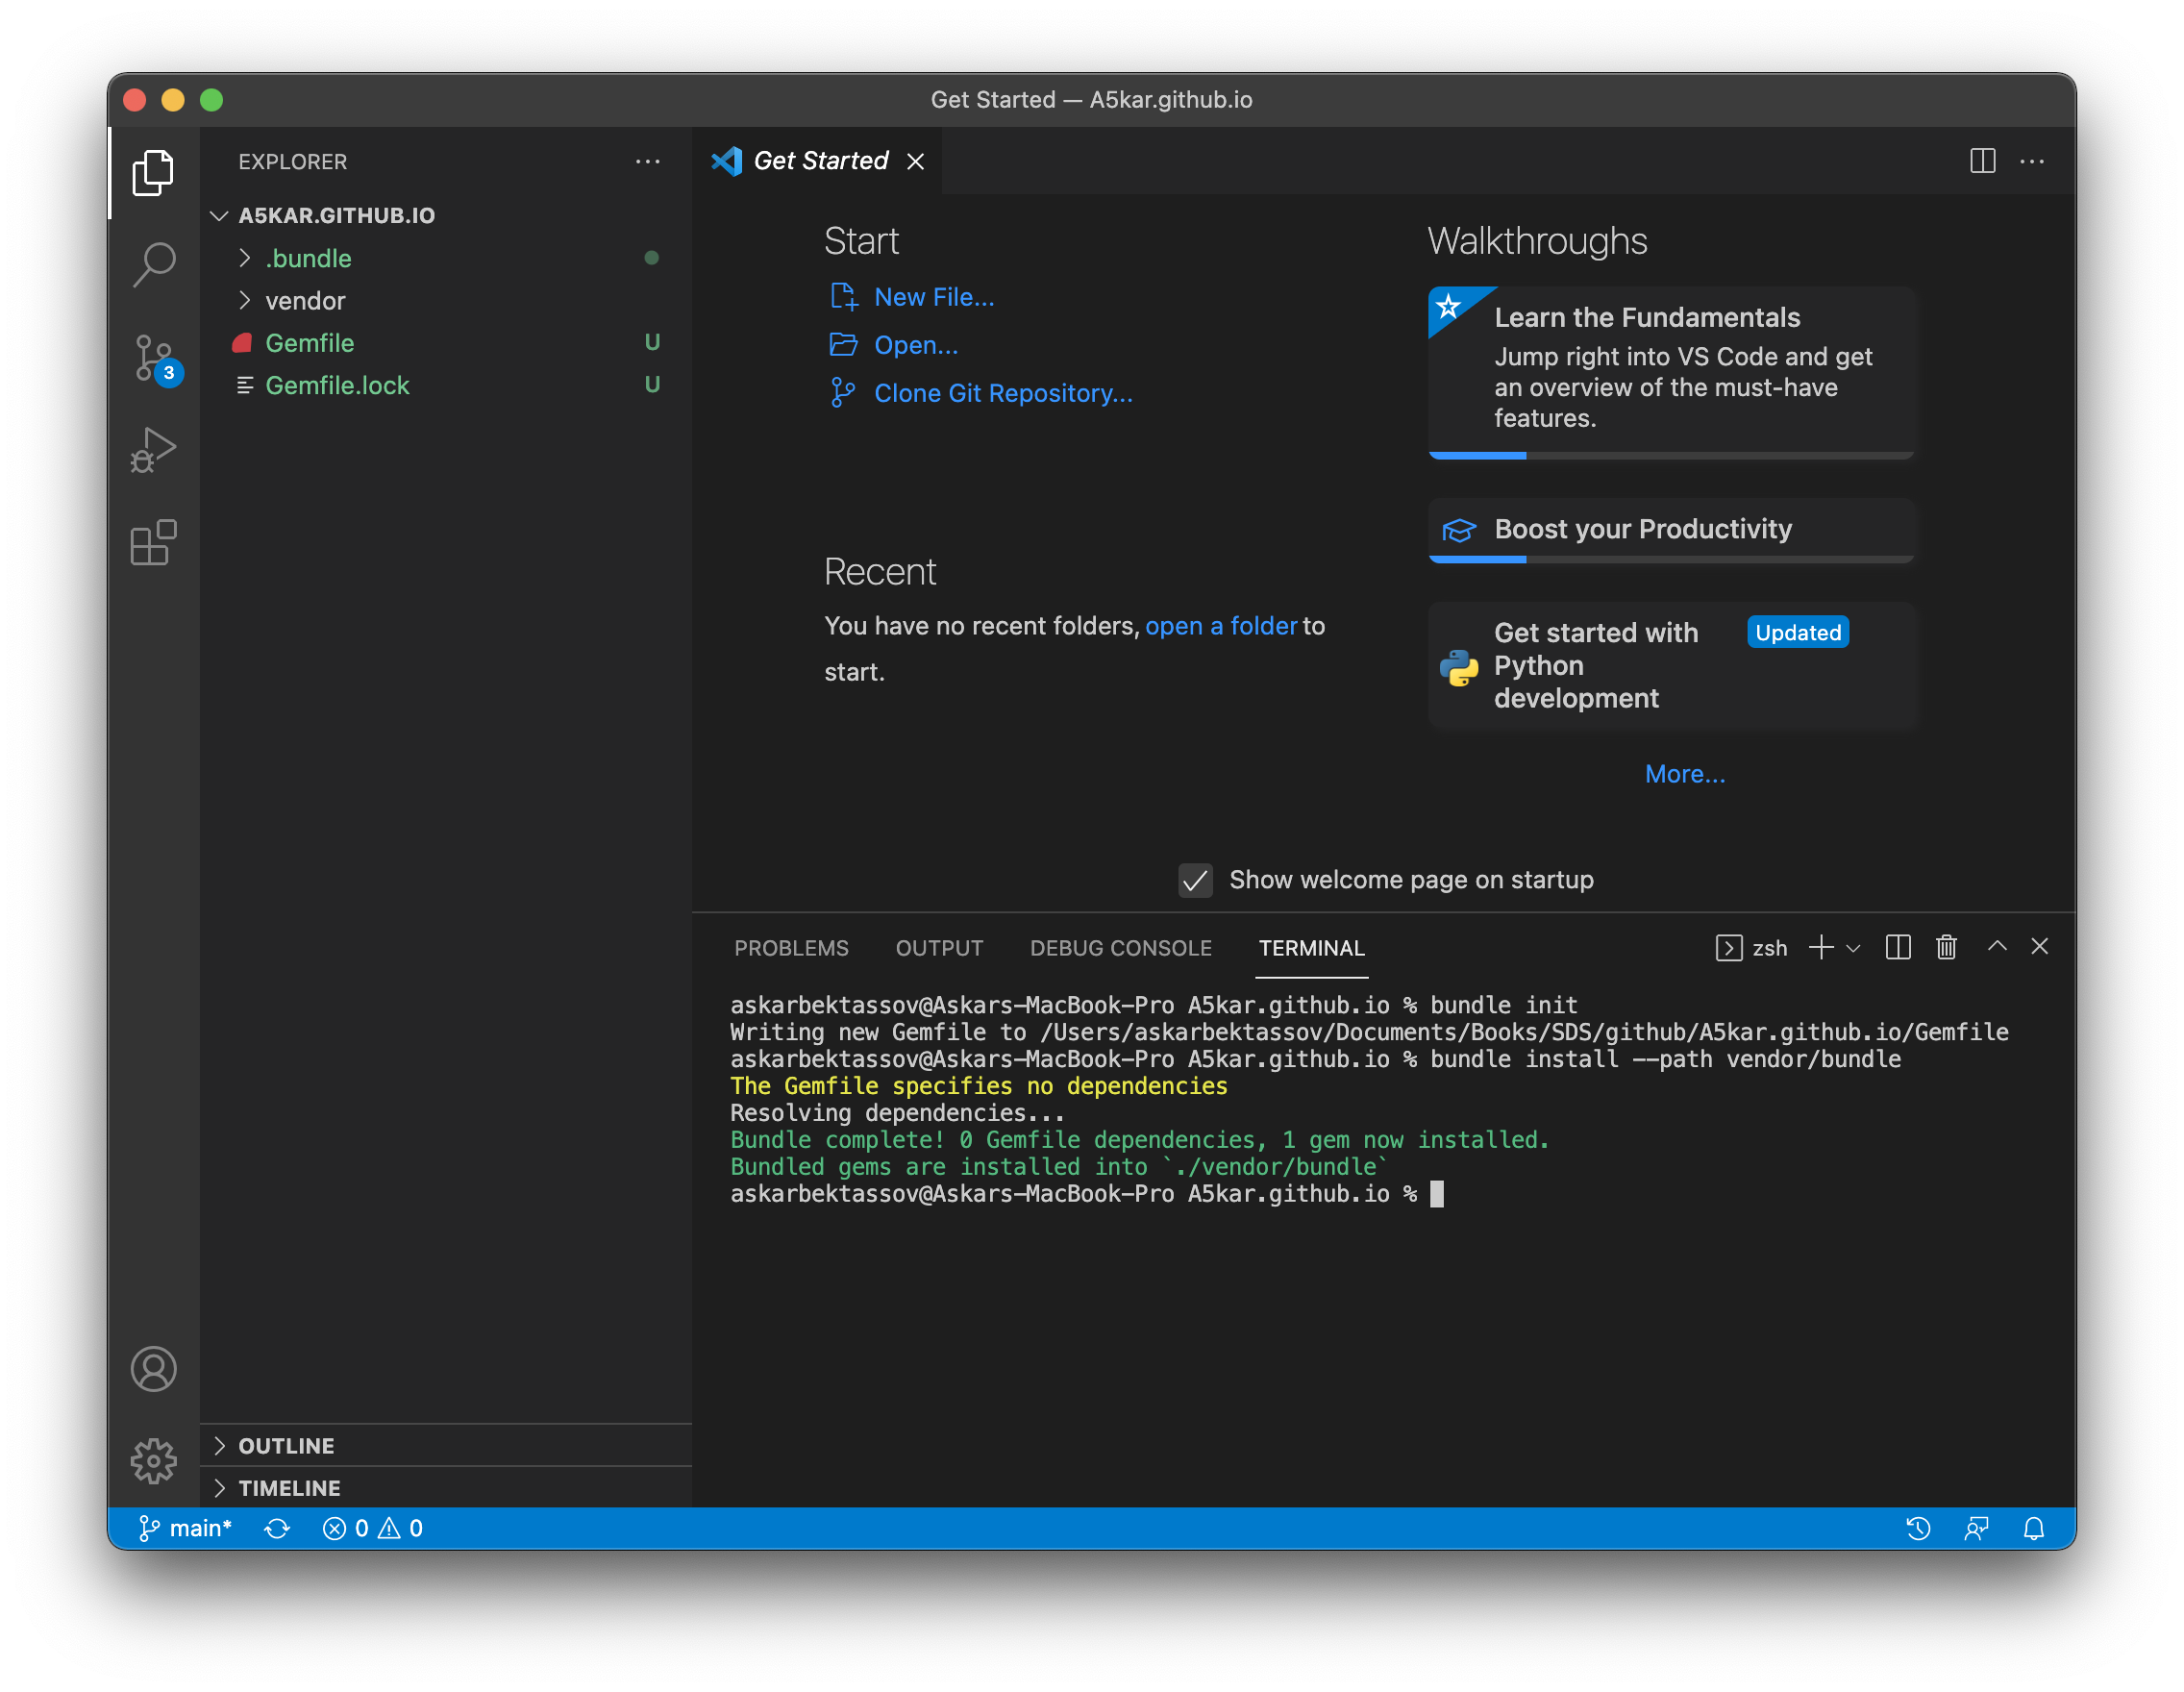
Again, on the left pane we will notice that new files have been added to the local folder:
.bundle, that includes Bundler configuration file (e.g. to say that all gems will need to be placed undervendorfolder);vendorfolder, where Bundler will place gems; andGemfile.lock, a snapshot of all gems and versions currently installed by Bundler.
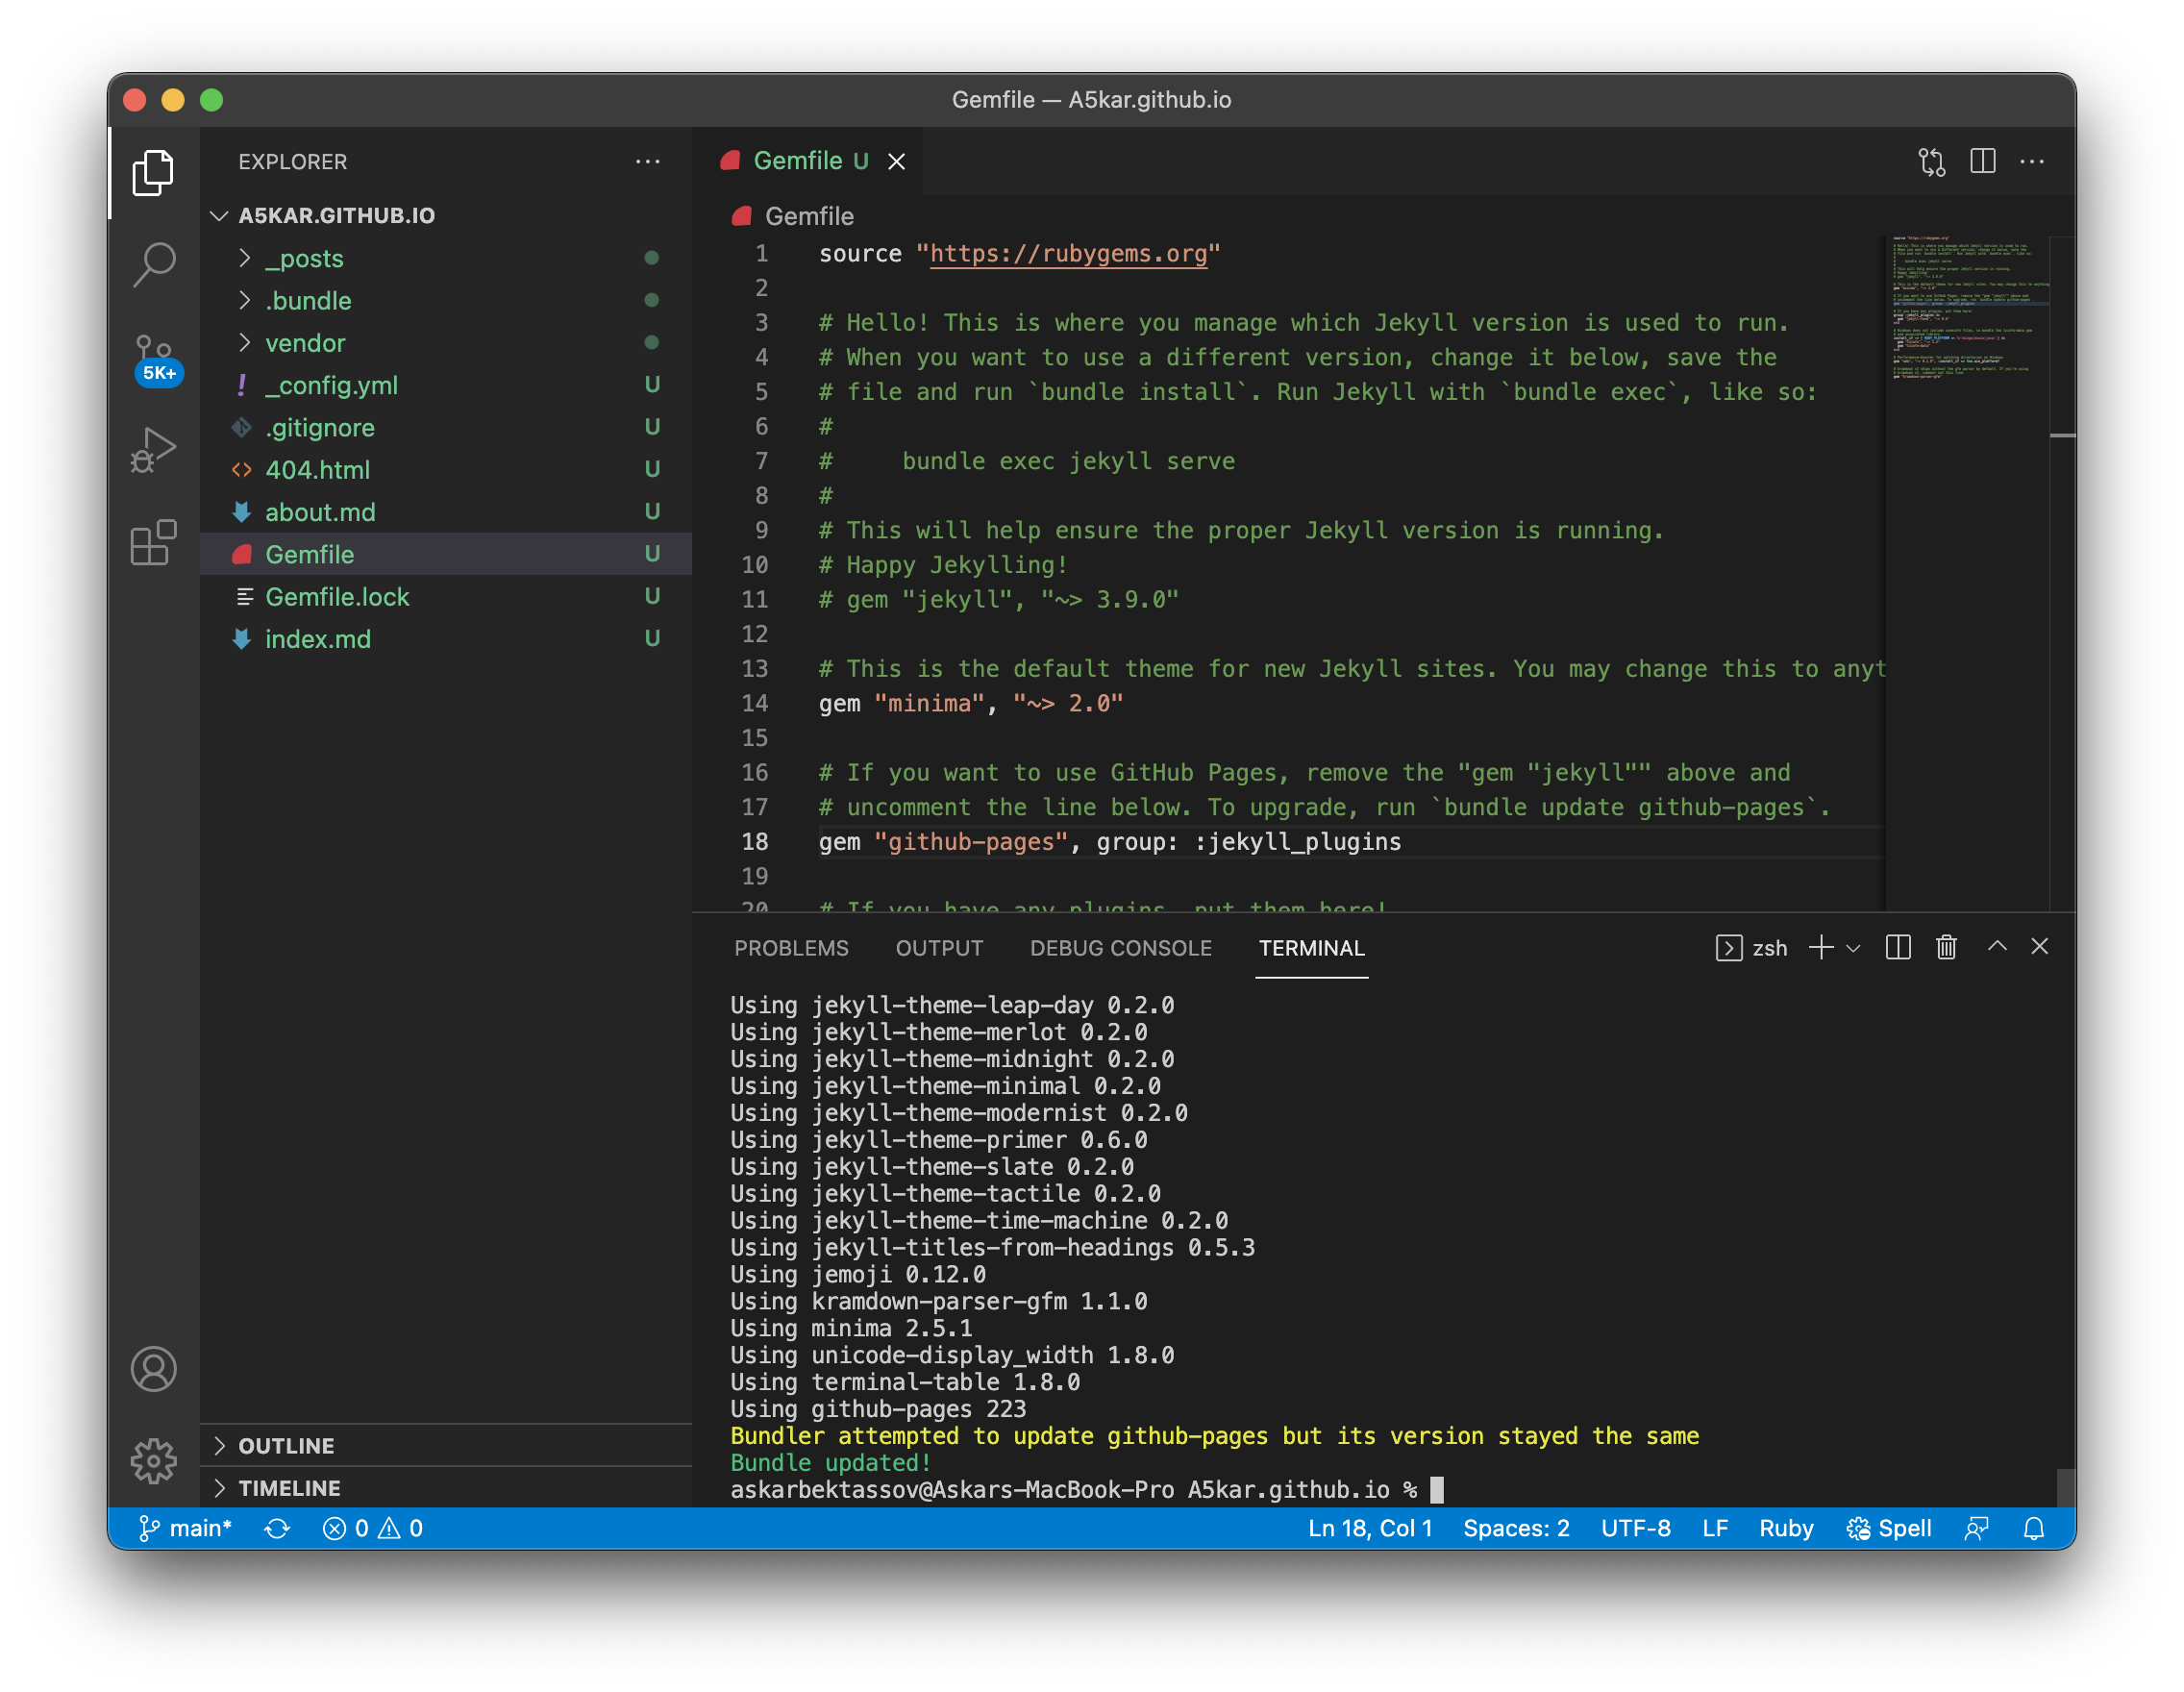
Now, run bundle add github-pages, which tells Bundler to install the GitHub Pages gem. Unlike others, this gem will not install any particular executable or library, but will rather bootstrap dependencies for setting up and maintaining a local Jekyll environment in sync with GitHub Pages.
Meantime, take a break from the screen (you should take 5 to 10 minute breaks every hour).

We are now ready to create a Jekyll scaffold, which means placing all basic files necessary to start our Jekyll server. In accordance with the official website, run bundle exec jekyll new --force --skip-bundle . and you are done.
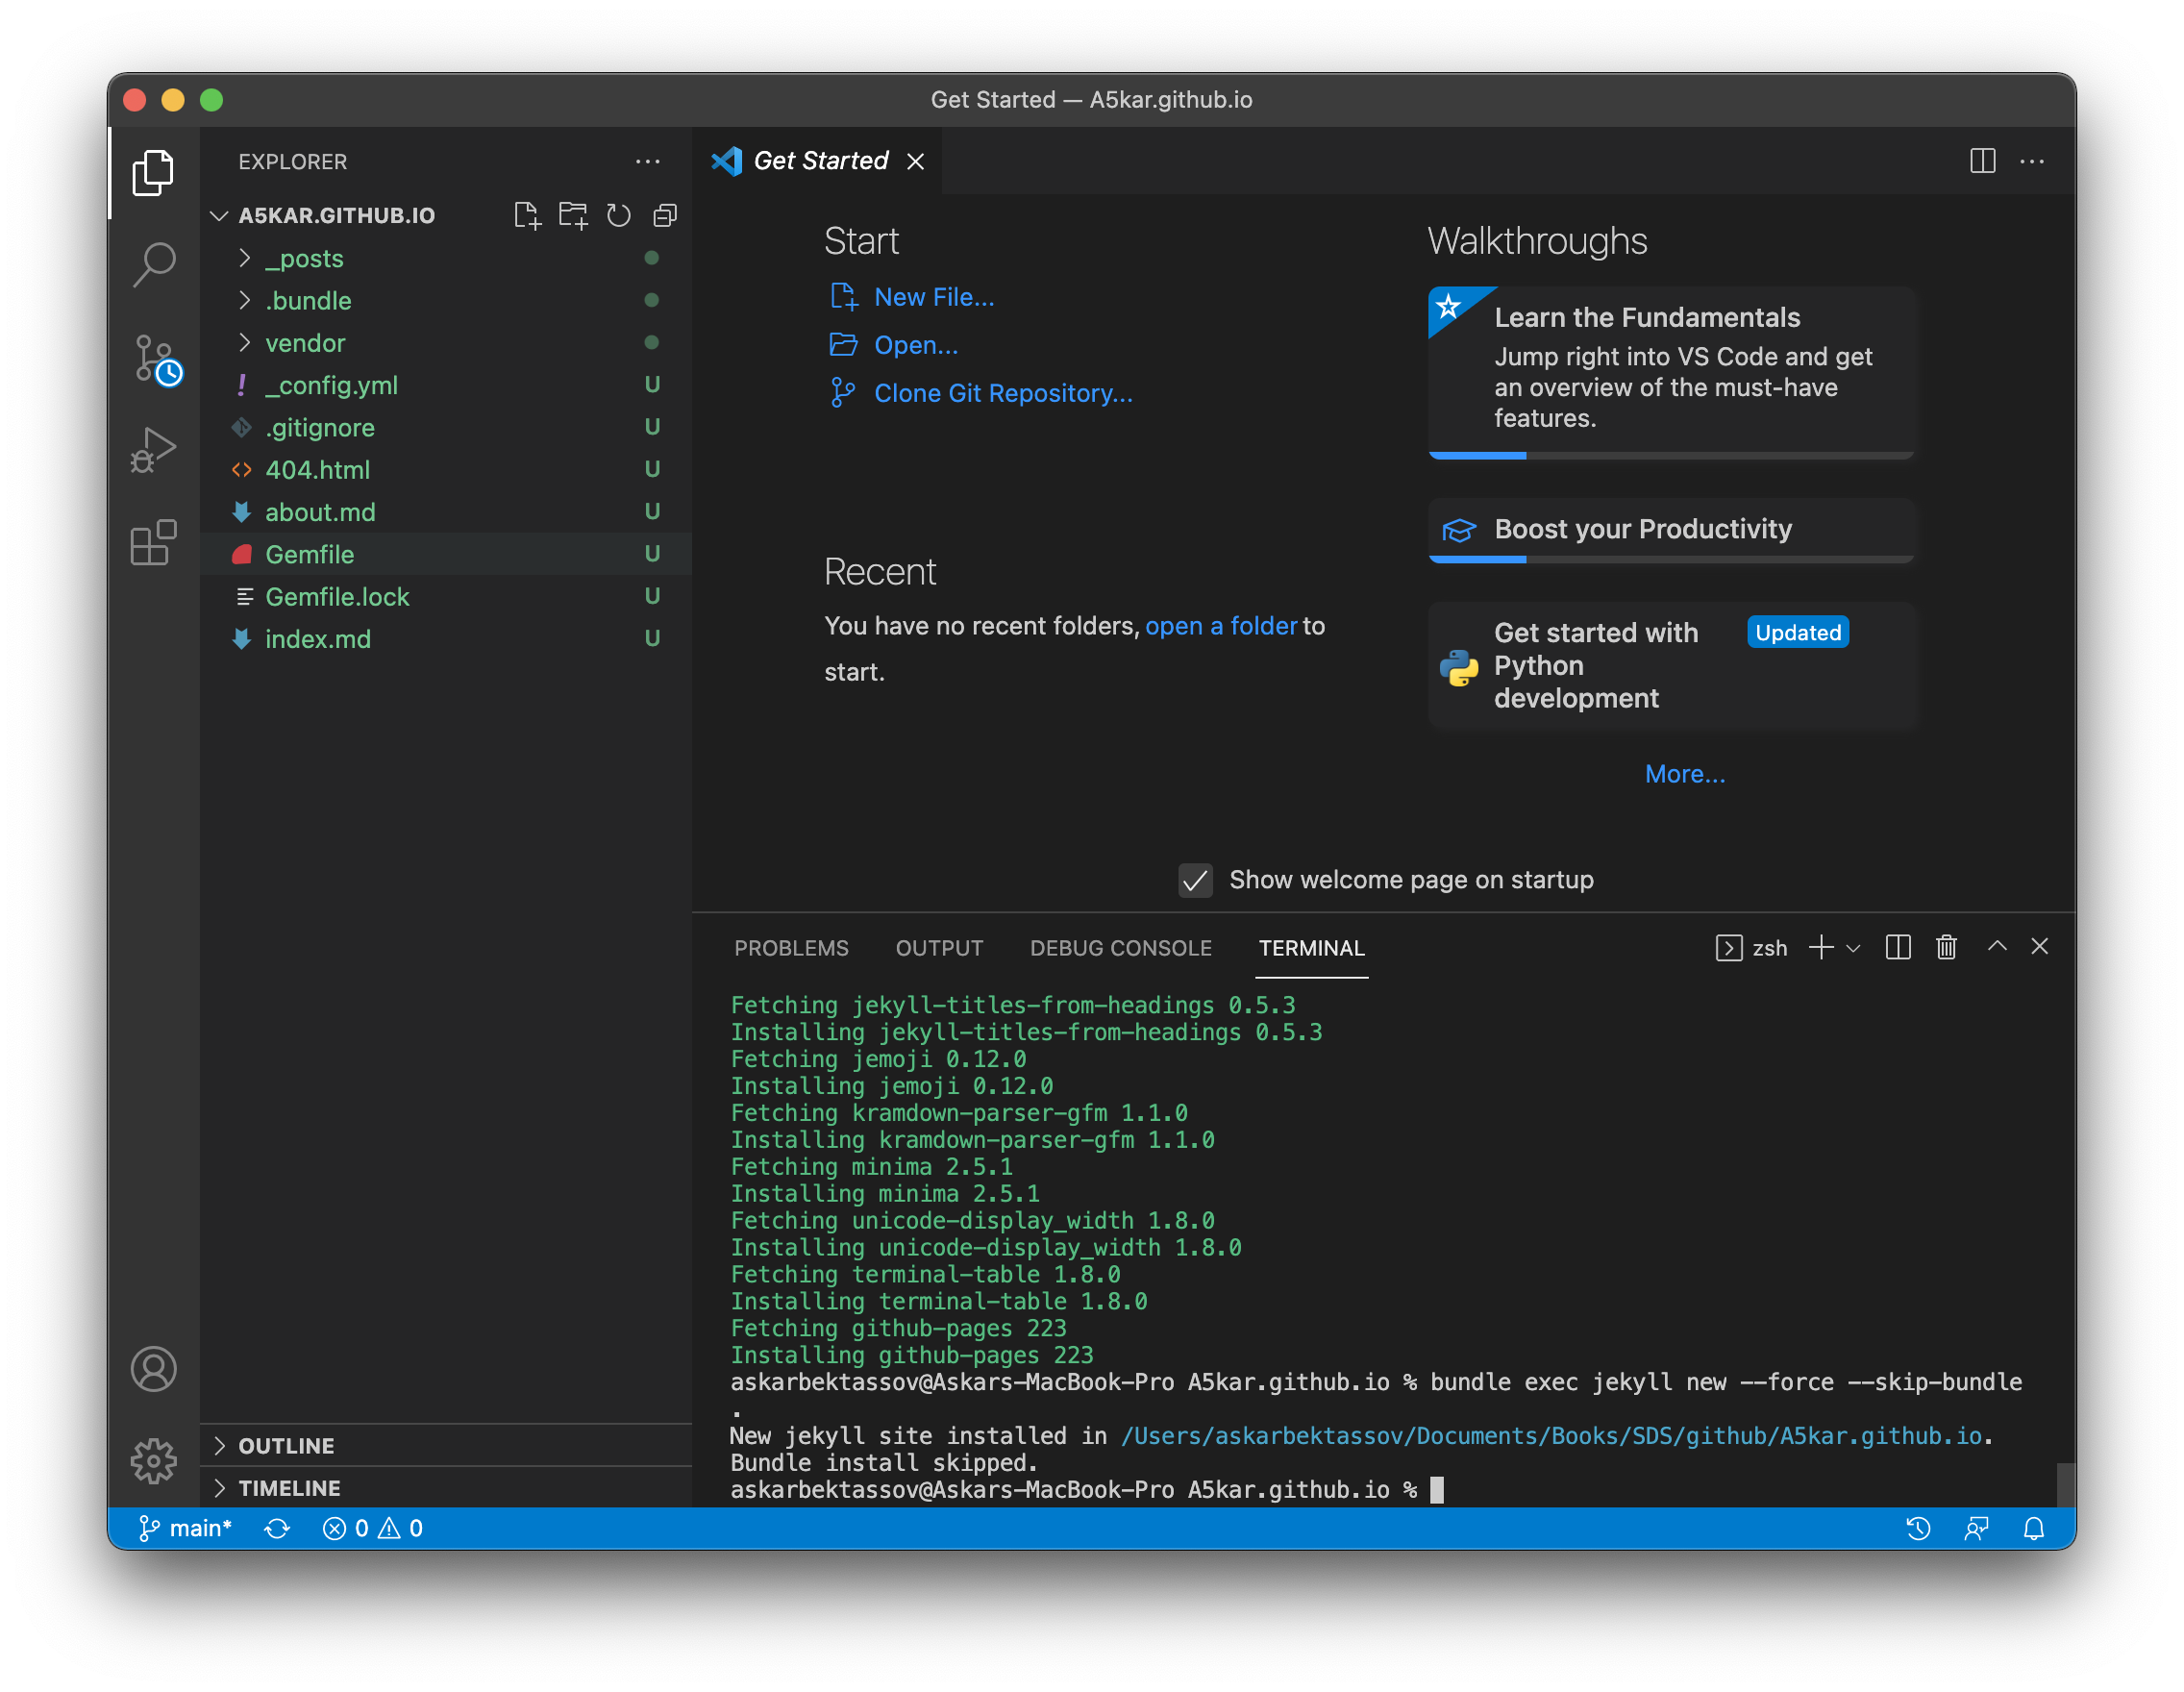
Again, take note of the new files that appeared in the left pane and have been highlighted in green, including:
_postsfolder, where we will place our fantastic posts;_config.yml, which will contain configuration parameters for our website, including theme;.gitignore, that will indicate files and folders to be ignored by git (i.e. not versioned);404.html, showing file not found error page; and- few markdown examples such as
about.mdandindex.md.
Among other things, scaffolding will update our Gemfile integrating some additional dependencies. Open it and take note of few configuration settings relevant to github pages.
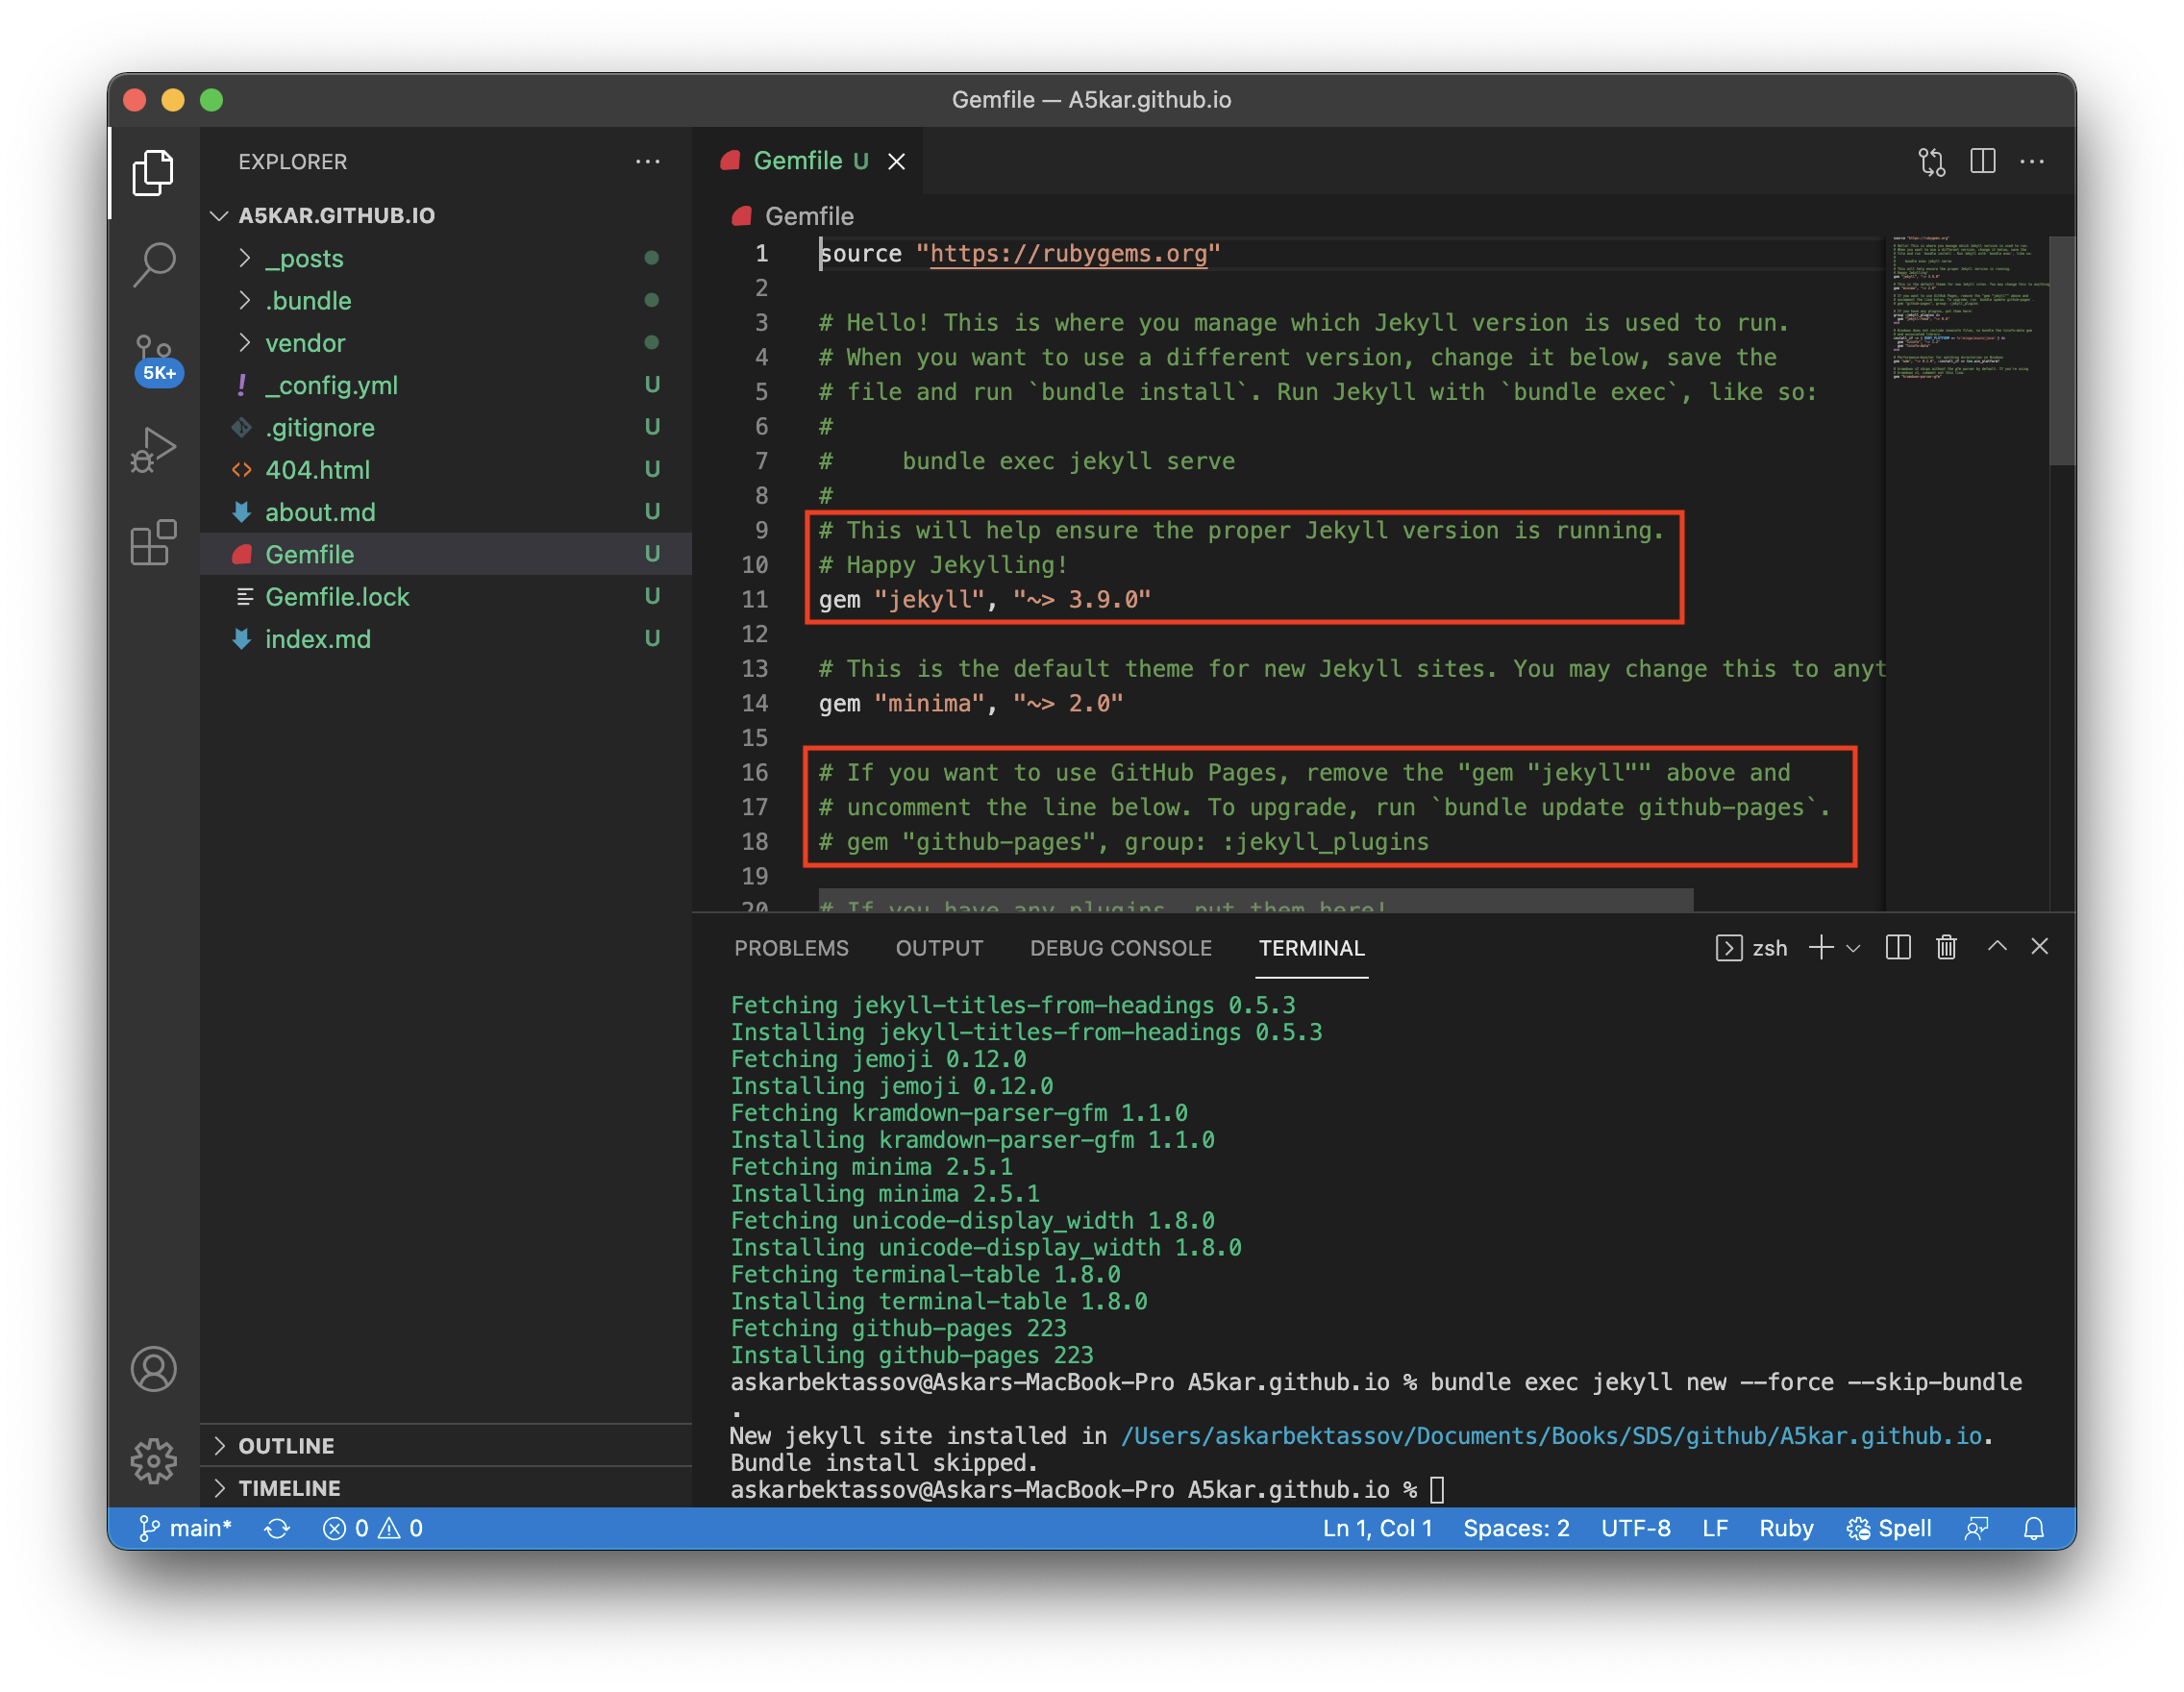
In particular, the remark highlighted above suggests to comment line 11, uncomment line 18 and run bundle update github-pages.
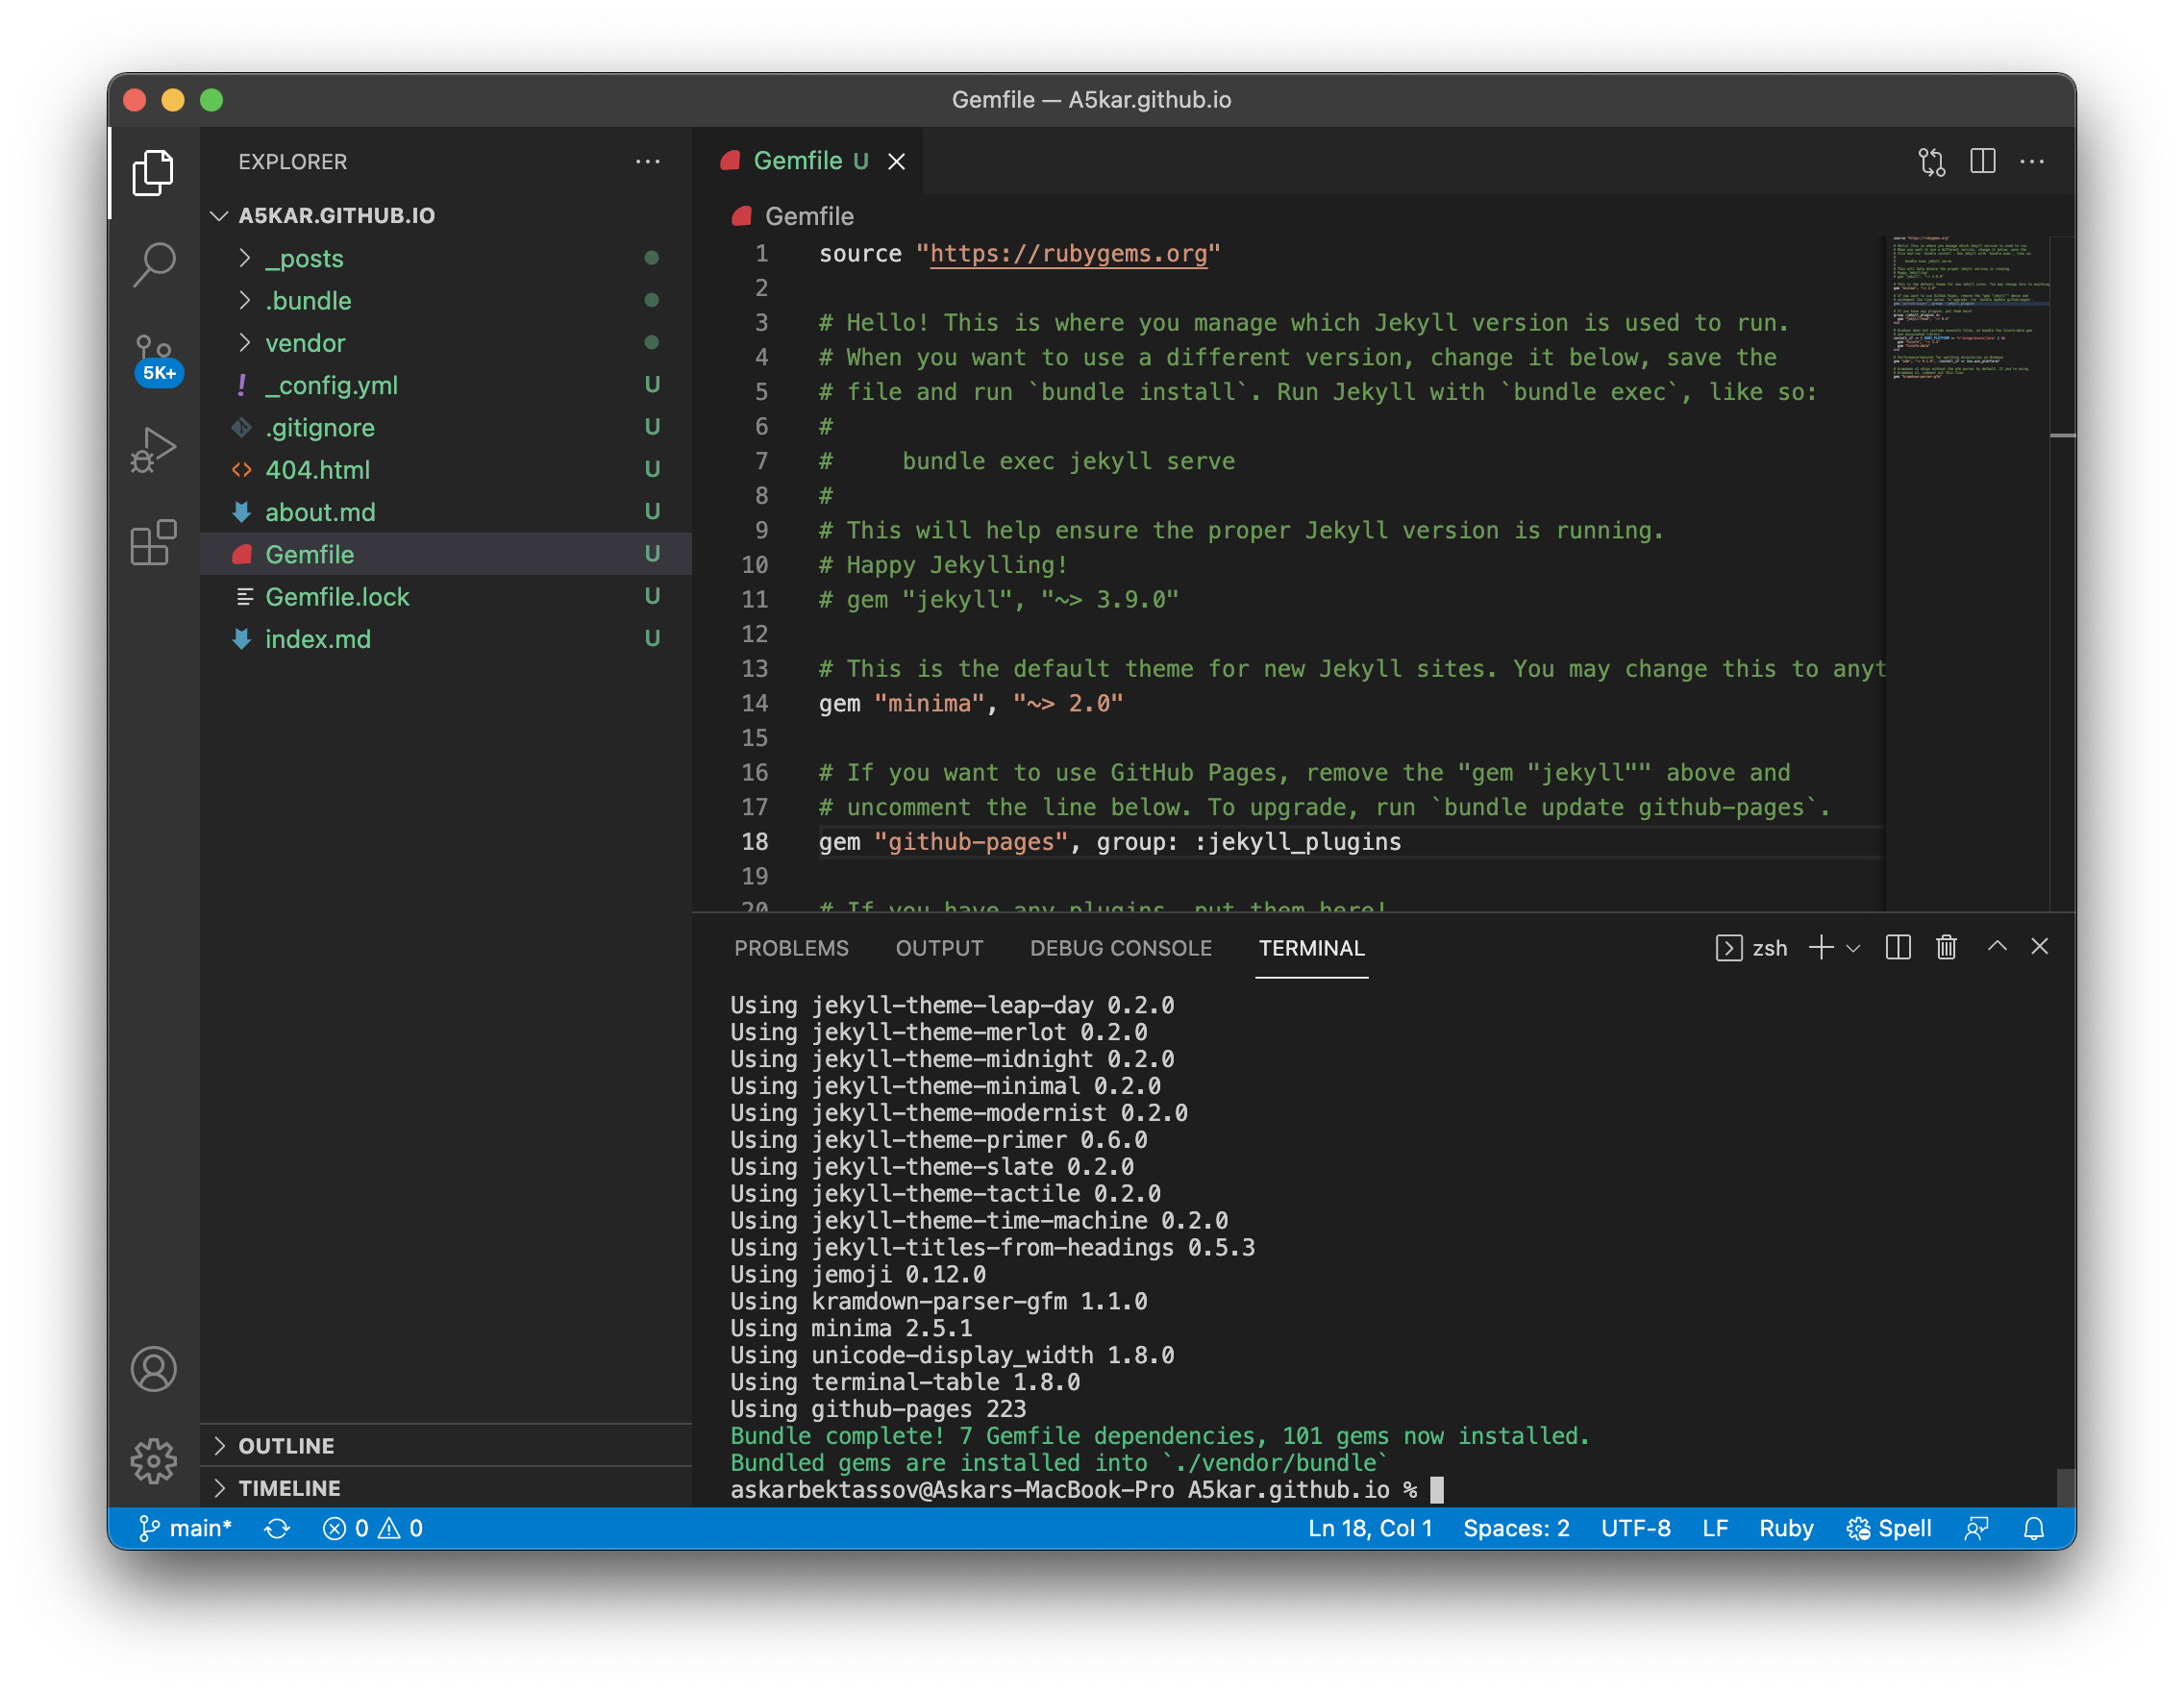
Now we need to run bundle install to ensure that all dependencies indicated in the new Gemfile are satisfied for Jekyll to work properly.
We are almost there. Without further ado, let us try and launch the server with bundle exec jekyll serve.
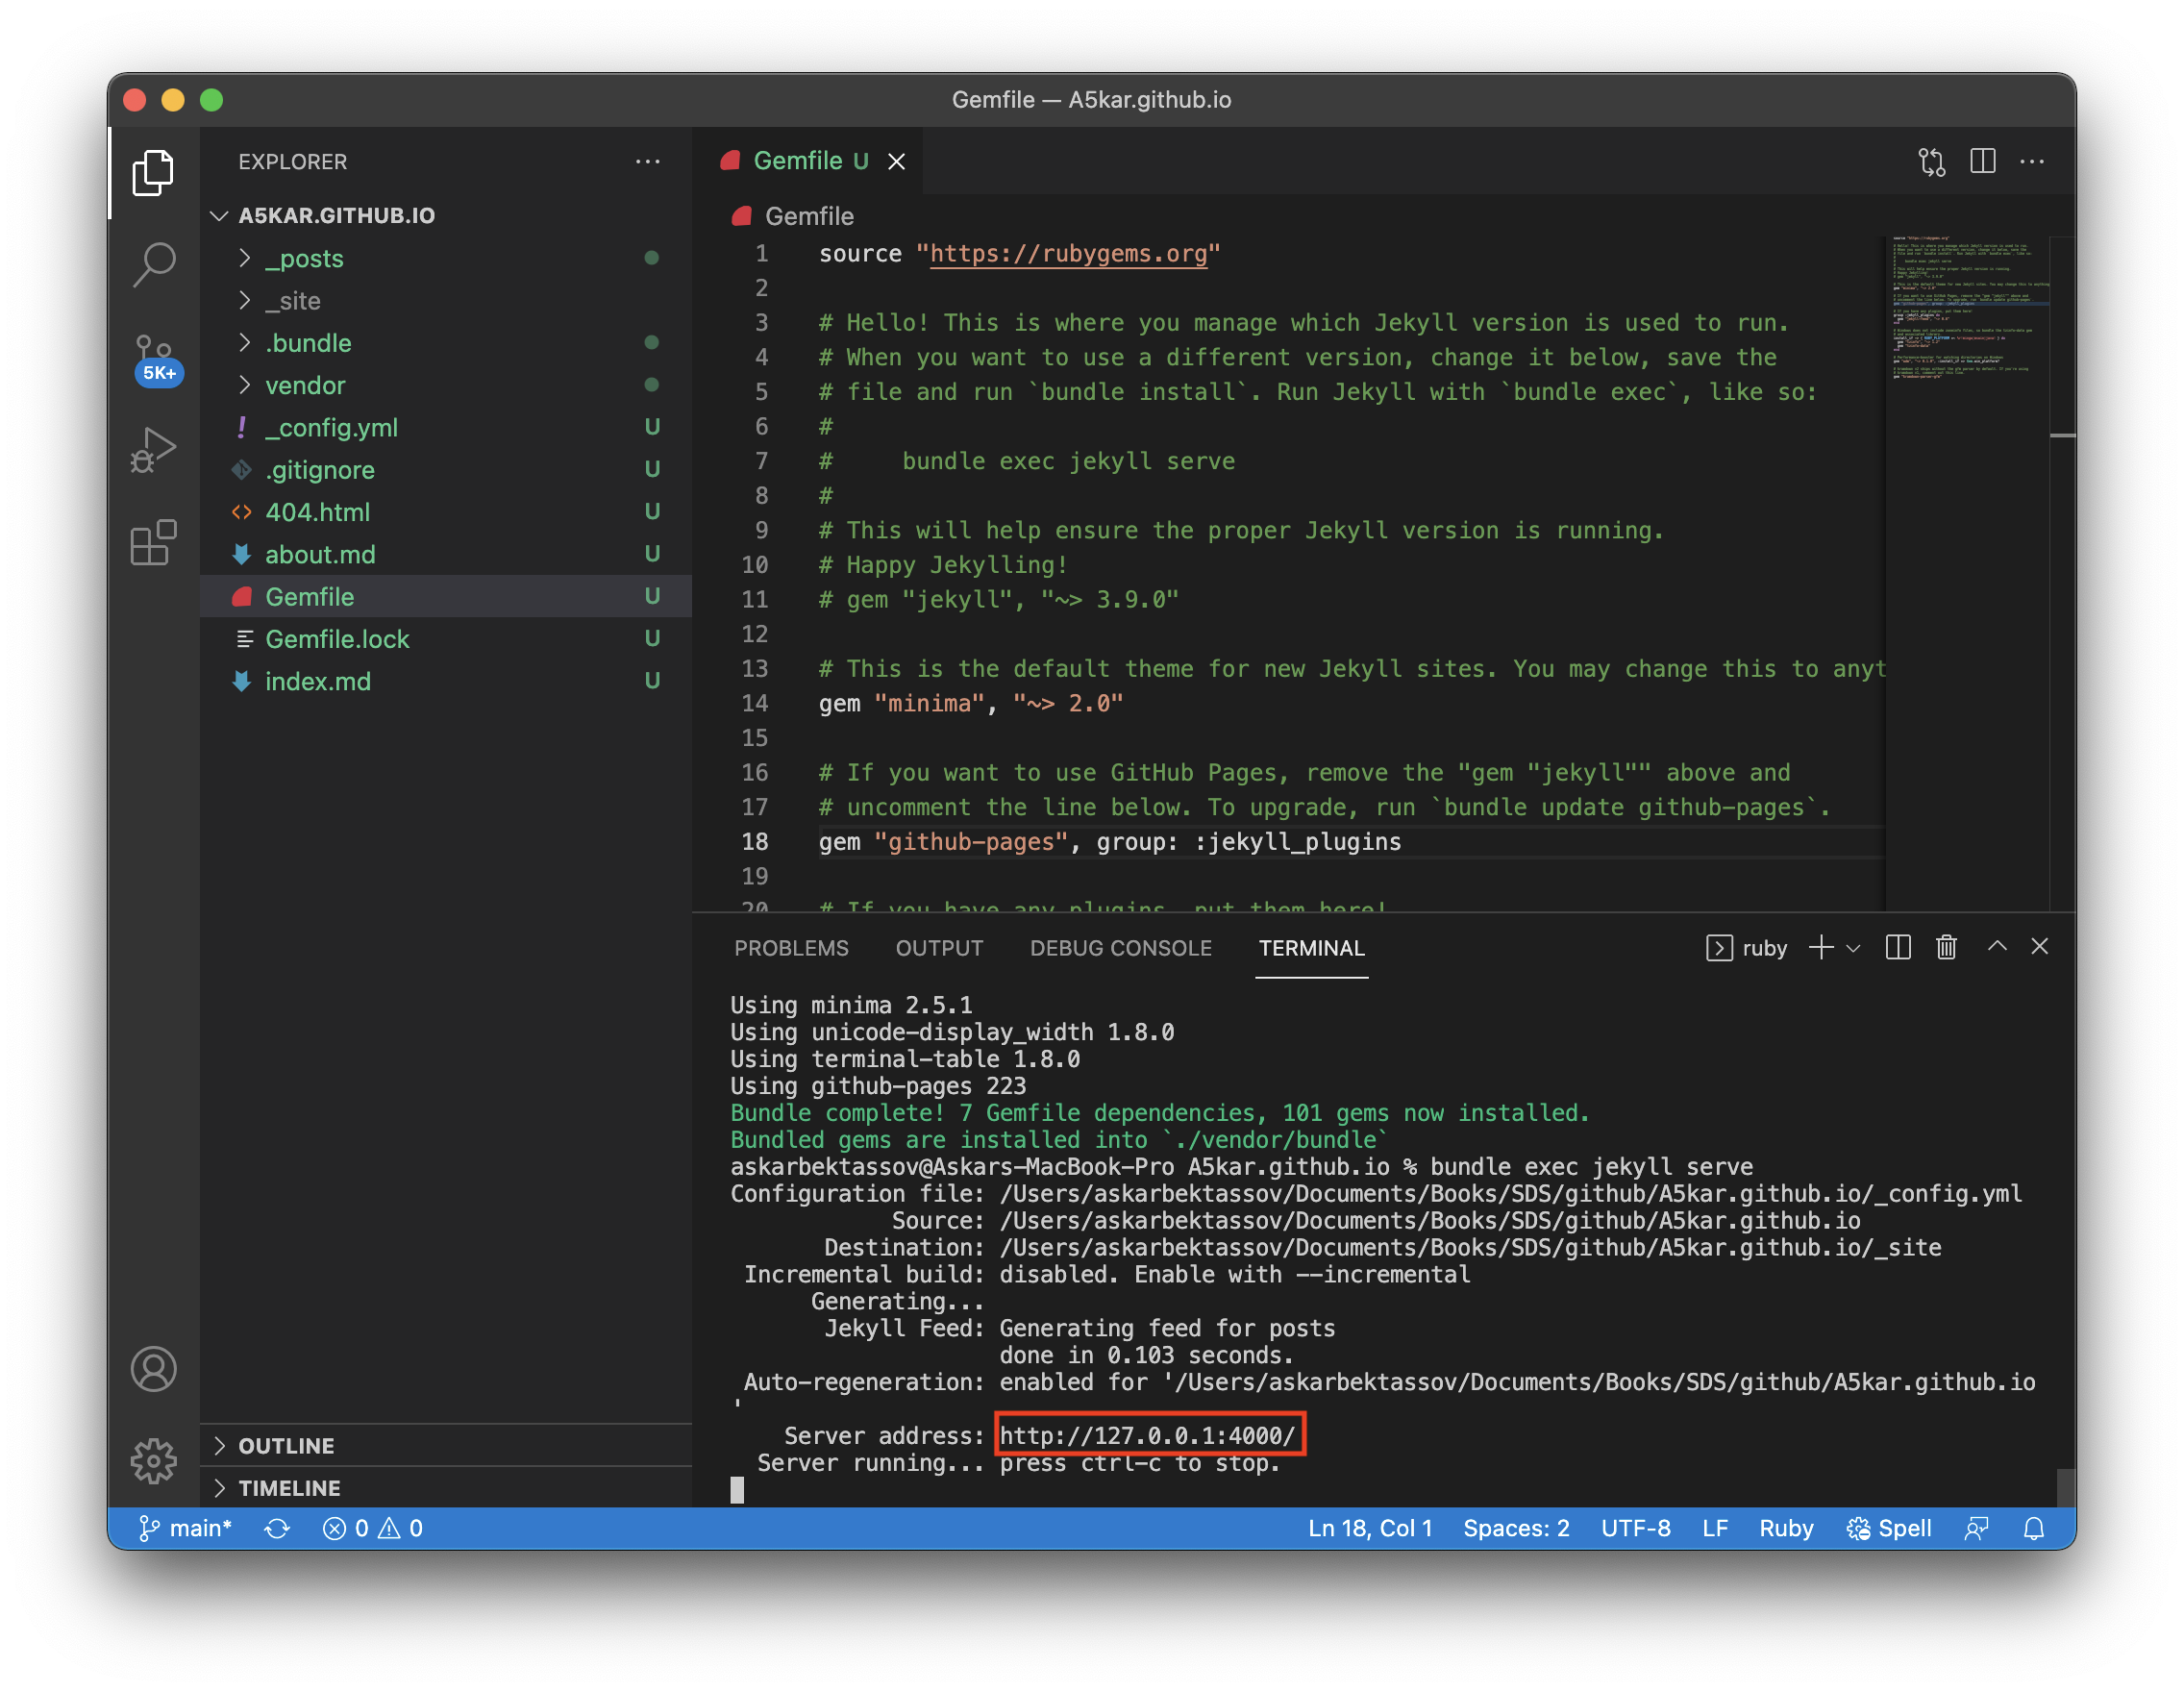
If everything went as expected, you should be able to open your browser, navigate to http://127.0.0.1:4000/ (or click the link highlighted above, while holding control) and see the starting page of your new blog website.
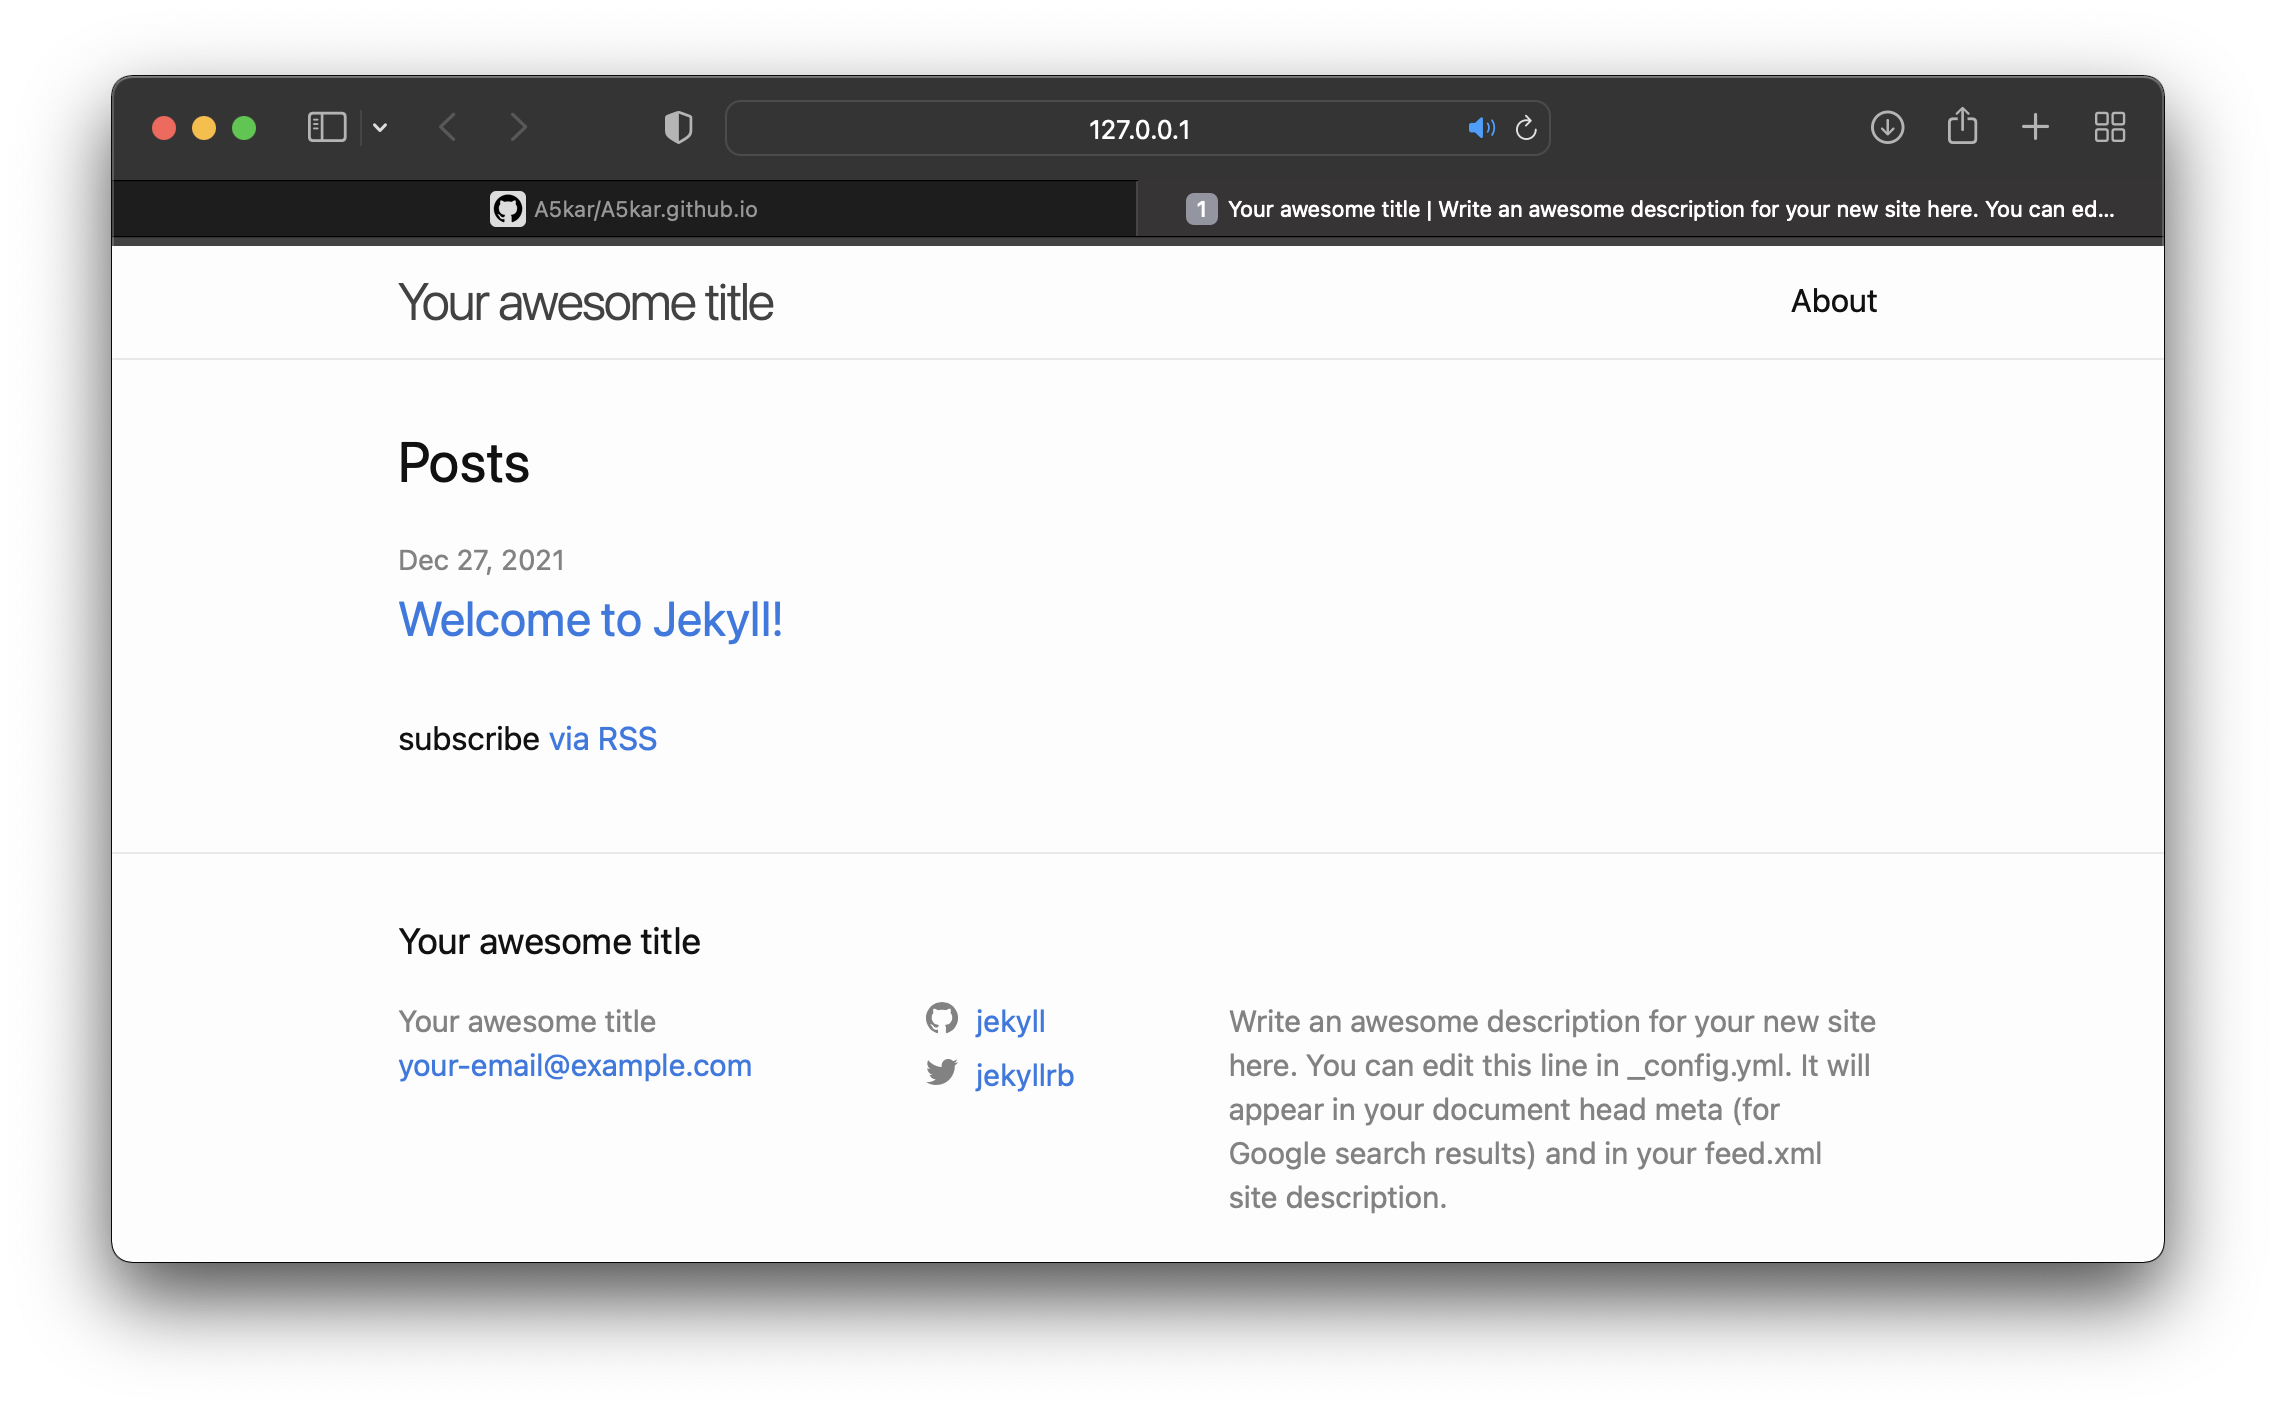
Well, what can I say… you really deserve that pat on the shoulder!
Before we move to the next section, note that you can stop the server anytime, by pressing control + C. Also, you may notice that when you launched Jekyll server, a new _site folder was created in your local folder. This is the actual website that will be deployed by Jekyll server, including all Markdown content (such as your posts, home and description pages) that has been translated into HTML.
Submit initial commit
Running the server locally, is not the same as running it on the GitHub Pages server. So we need to commit our changes to the remote repository and see if it works there as well.
However, before submitting our initial commit, let’s give a look to the local folder and see if we really need to upload all these files. For instance, it will be beneficial checking out its size (select the folder in Finder and press command + I).
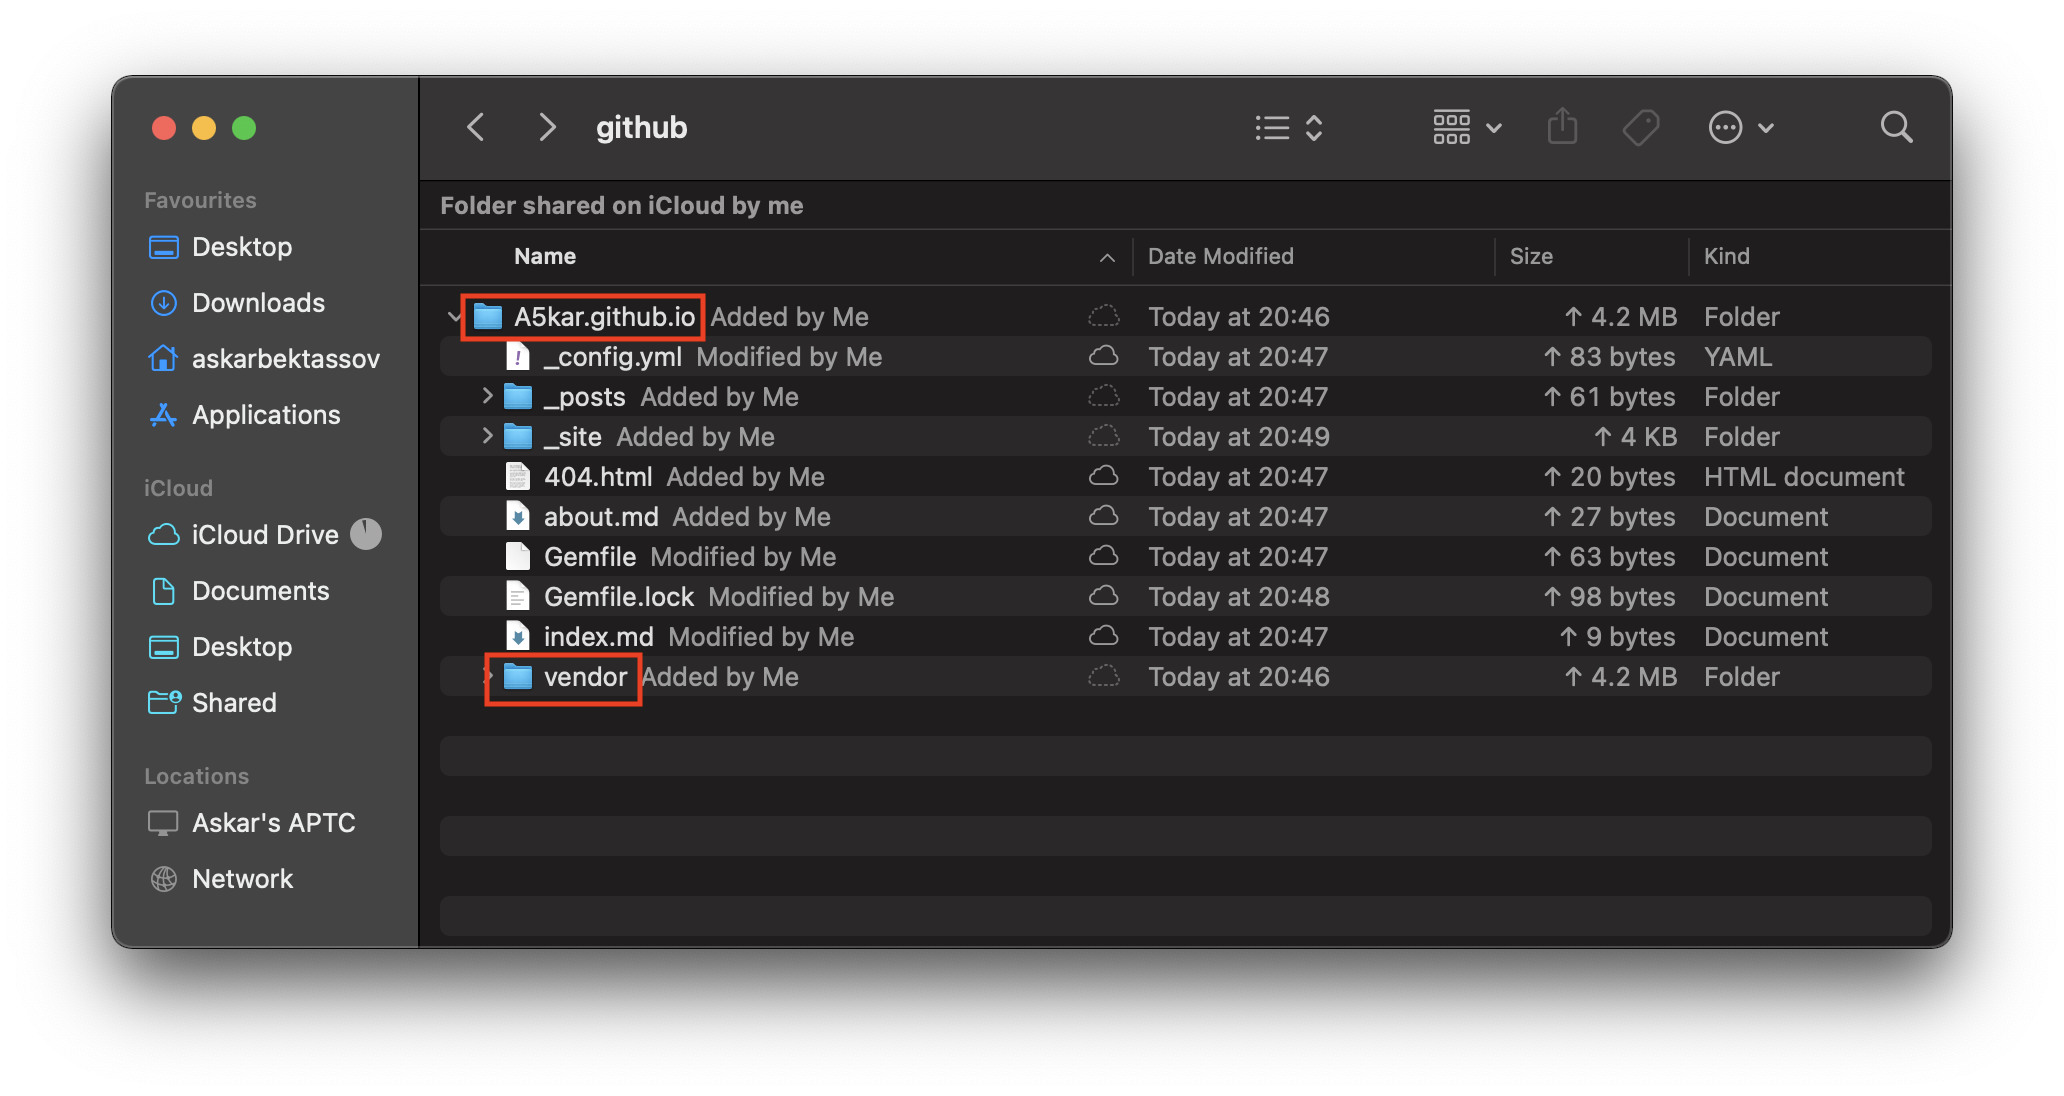
Did you notice that the size of your local project folder exploded from few KB to 99 MB? Also, did you notice that almost the entirety of the space is eaten by the vendor folder alone?
 |
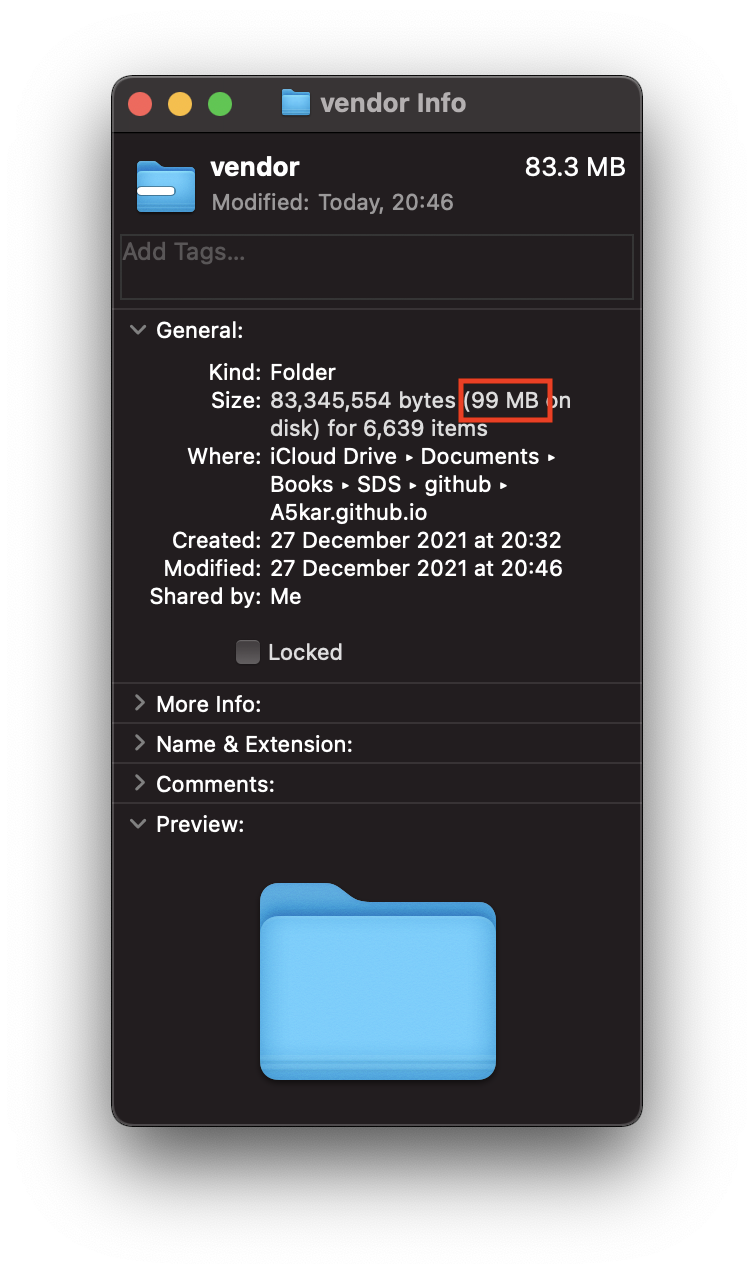 |
The reason is that bundle downloaded a bunch of gems into your local vendor/bundle folder, even though you may not really need them in the remote repository. GitHub Pages runs its own instance of Jekyll server, with all necessary dependencies; therefore, the entire vendor folder may be a deadweight you can easily ignore from uploading.
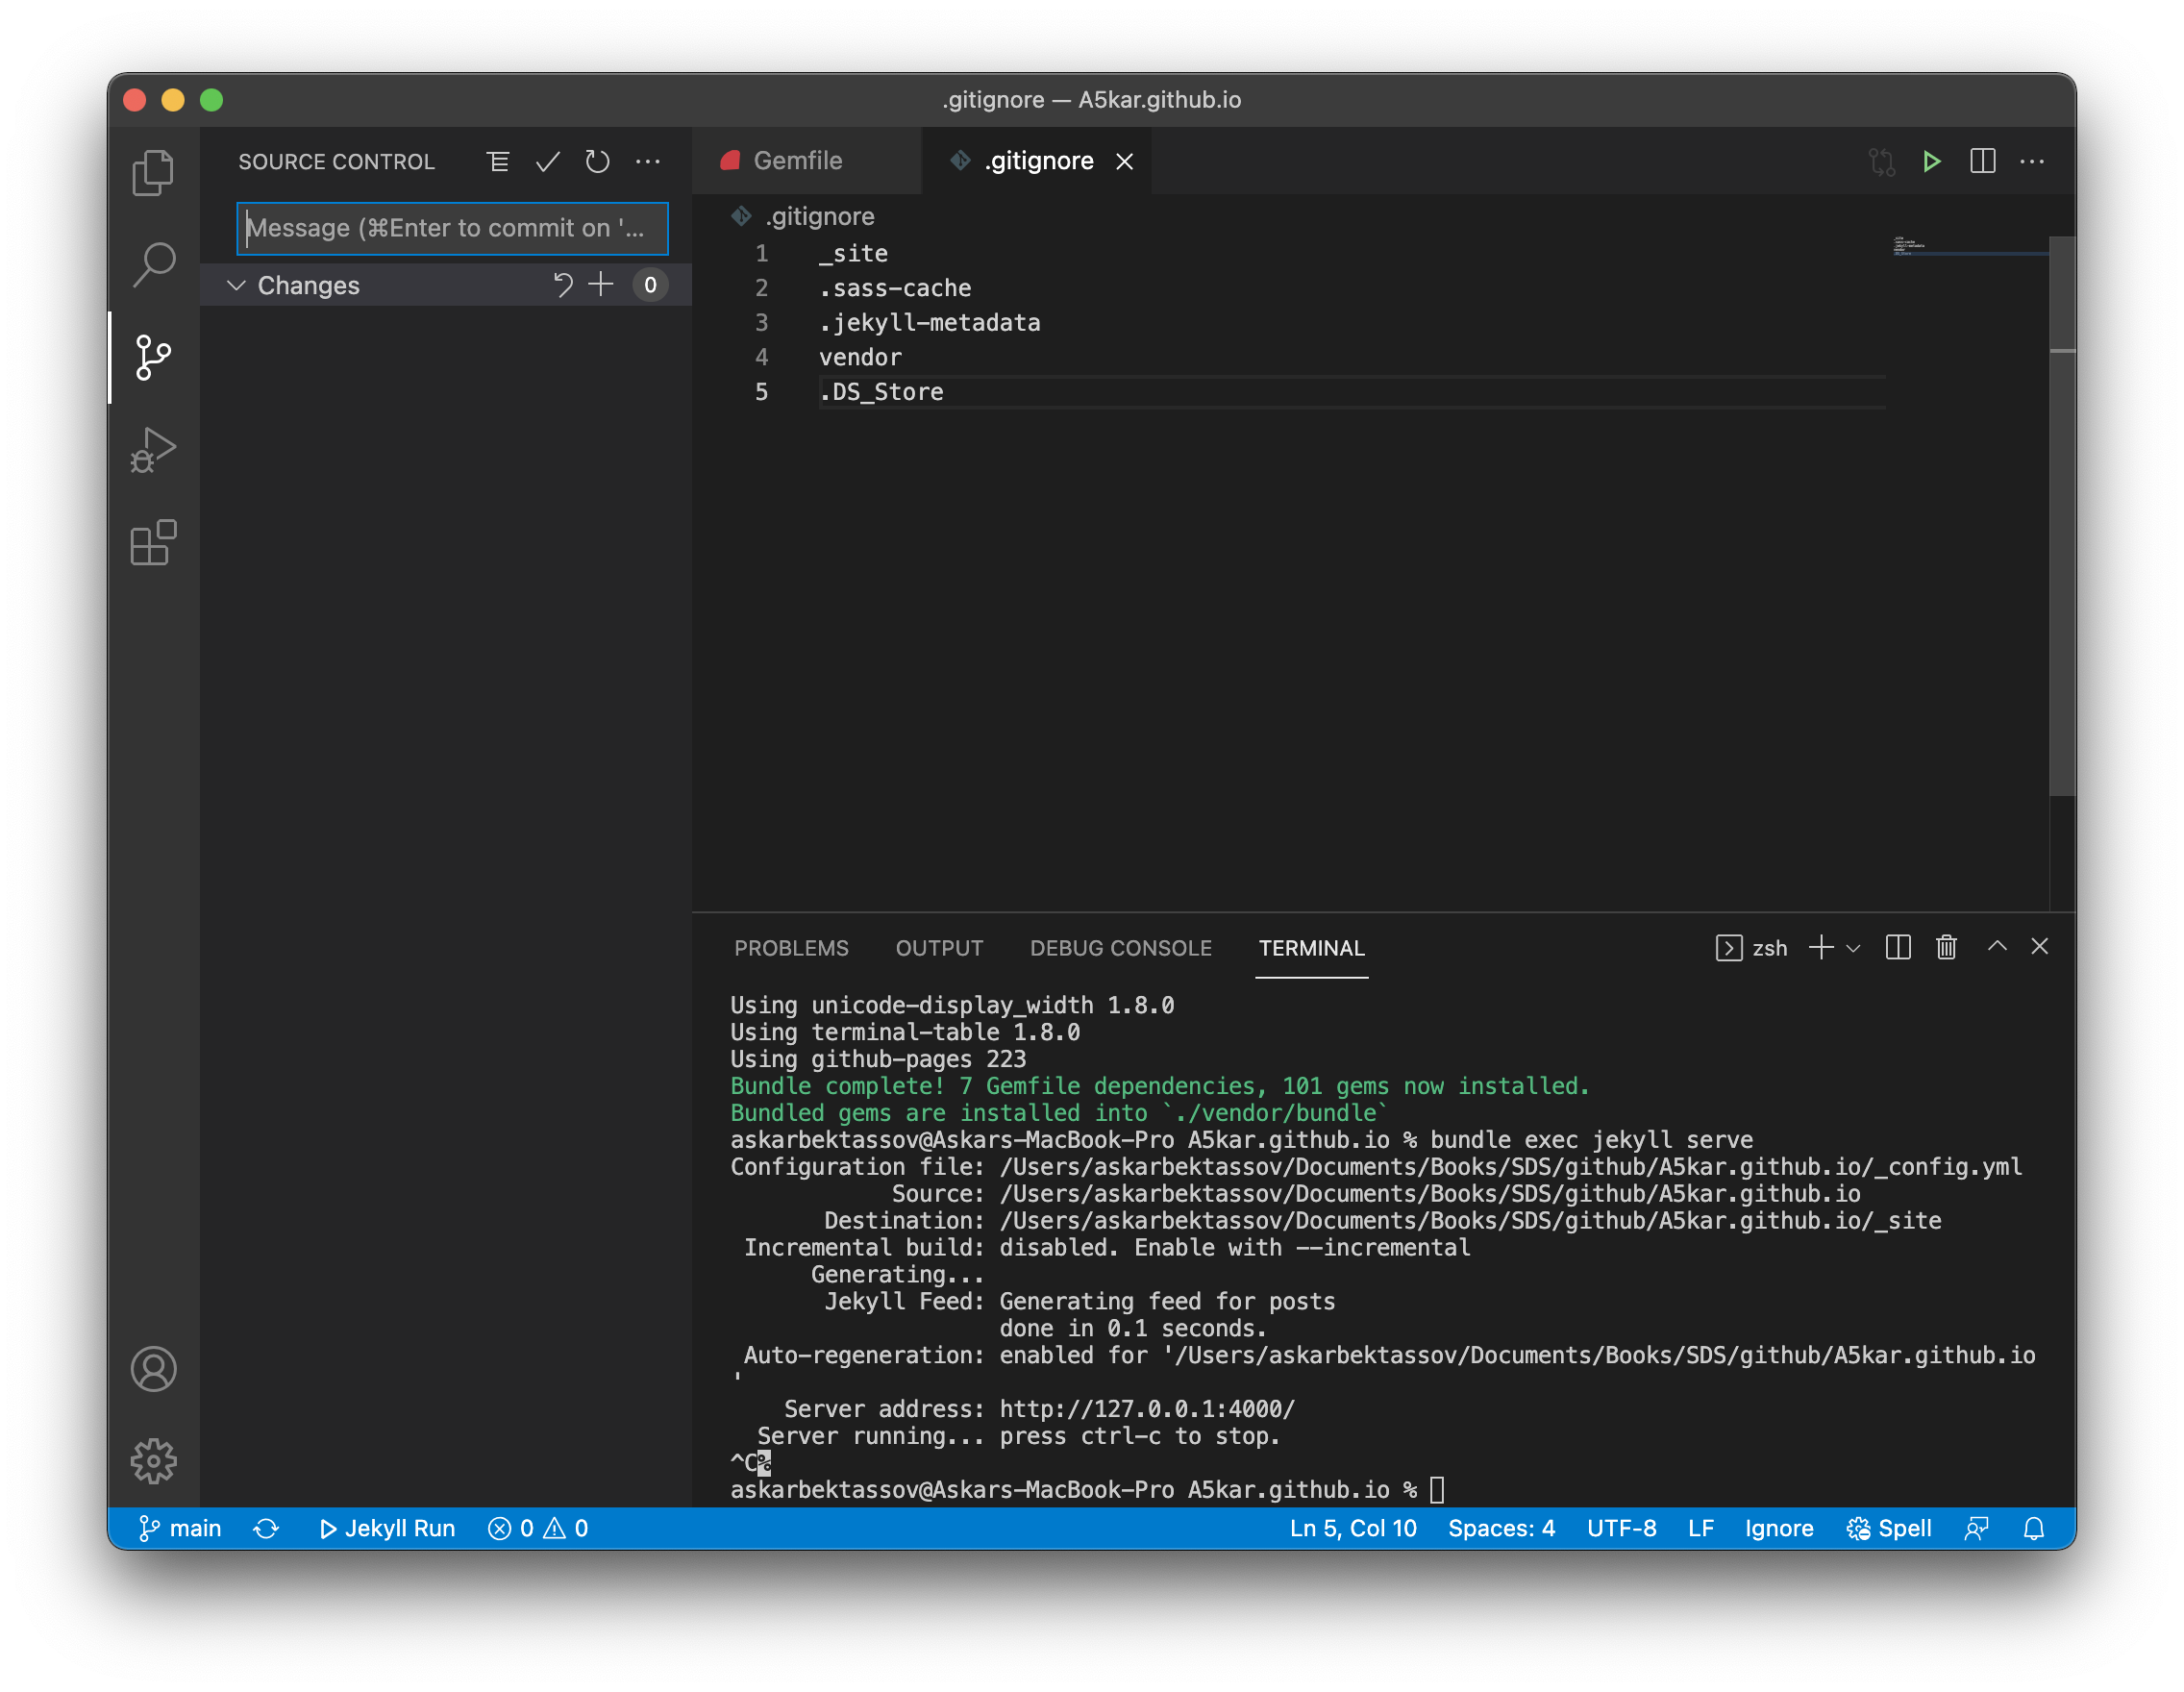
To accomplish that, open .gitignore and add a line for vendor folder and… since you are there, add also a line for .DS_Store files, which are regularly created by macOS Finder to store custom attributes of the folder in which they are contained. Press control + S to make sure that your changes have been saved in the file.
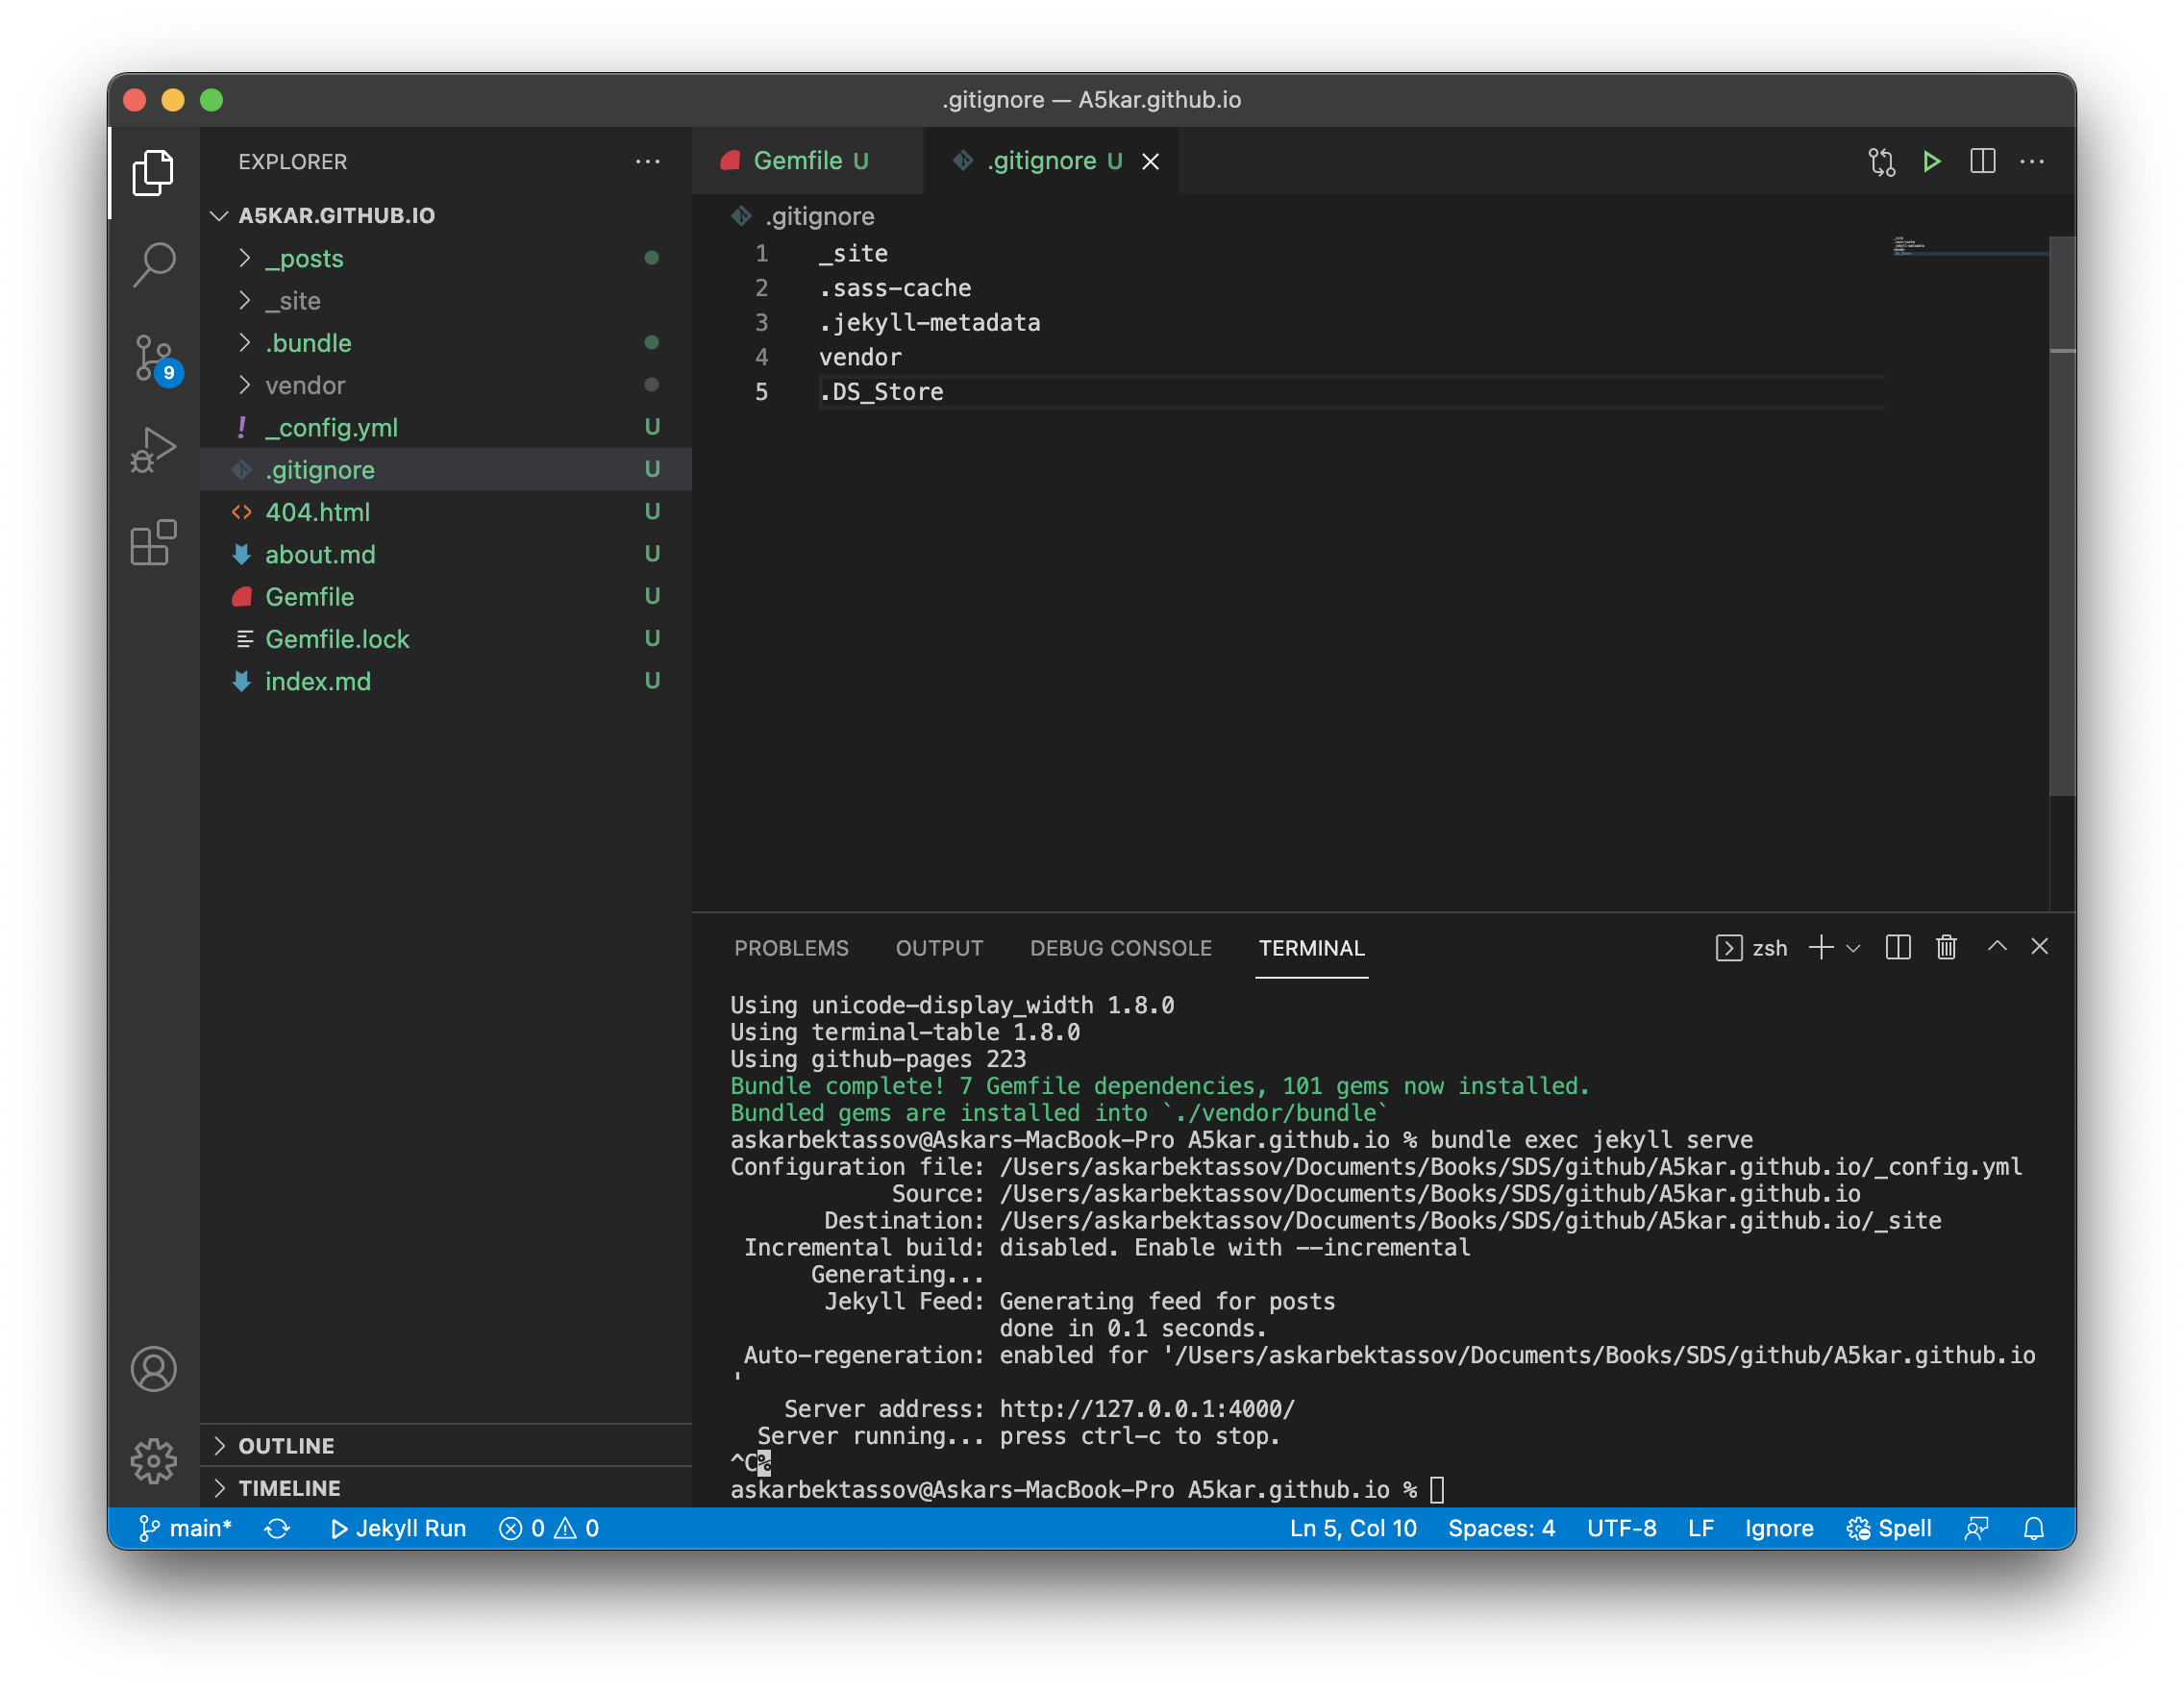
You may spot that vendor folder became grey. This confirms that the folder will not be uploaded into the repository. Same thing happens with _site folder; because its content is dynamically generated by Jekyll and does not need saving.
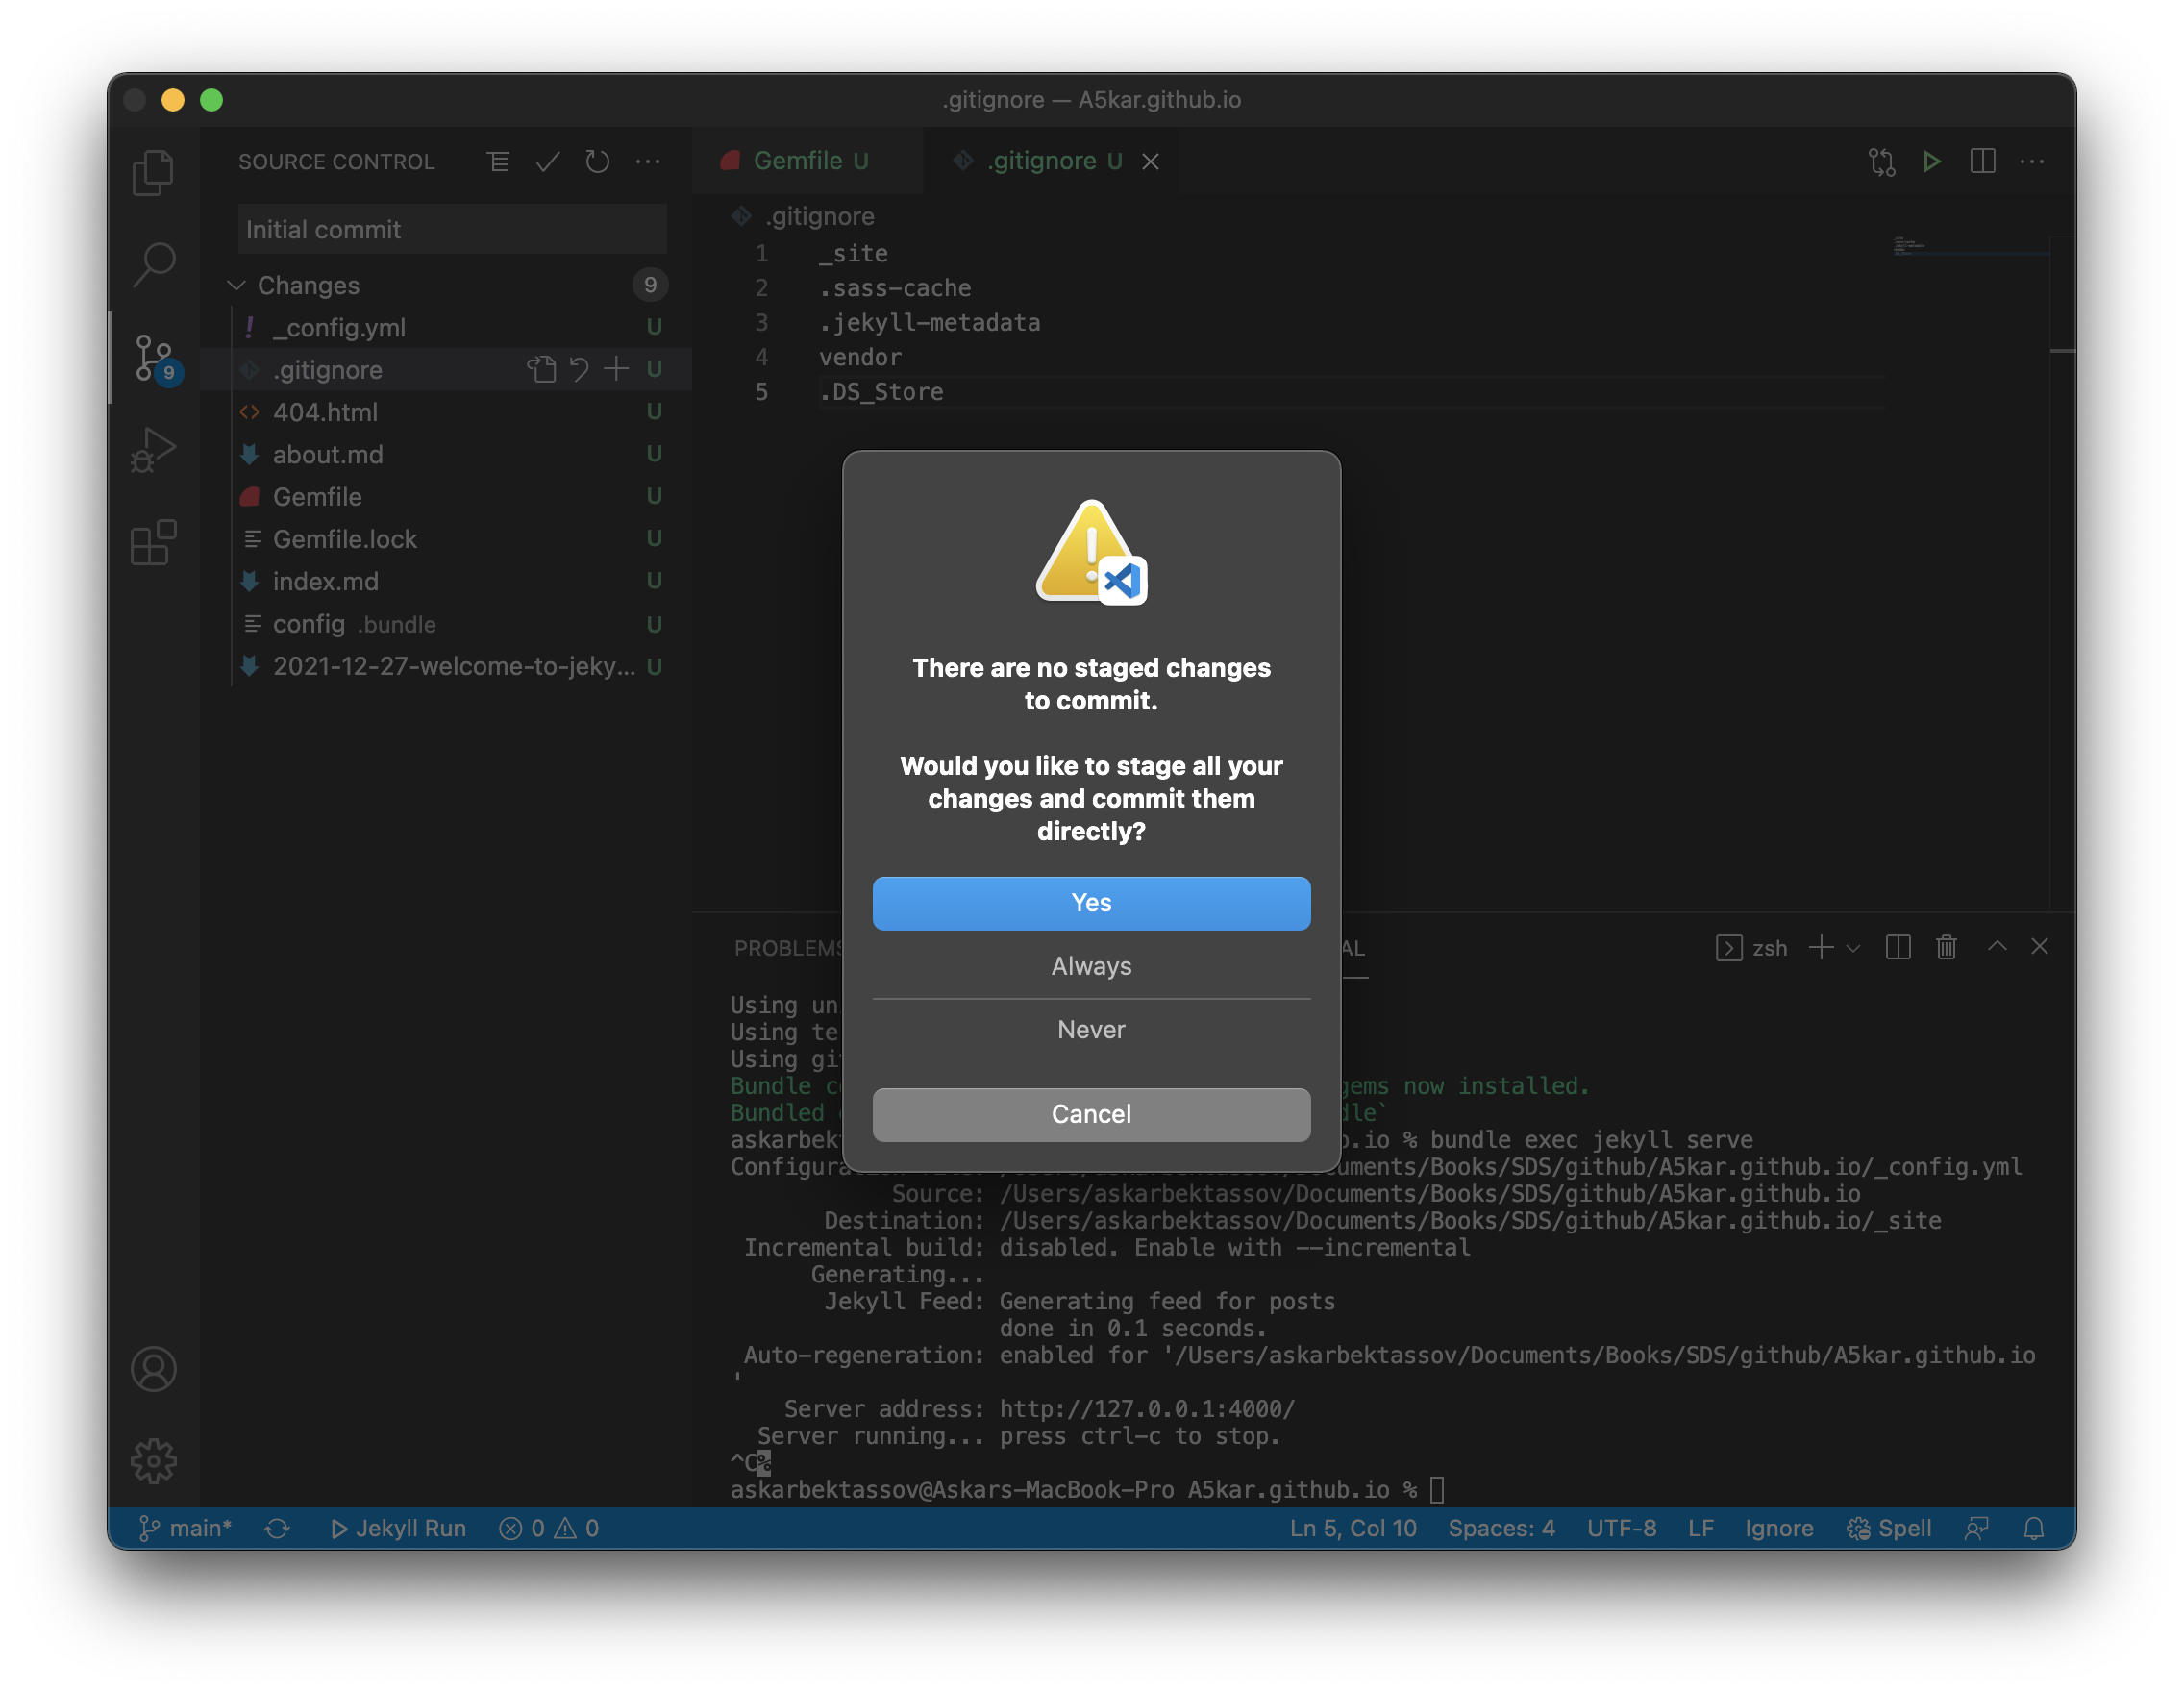
Having made this change, press control + shift + G shortcut to switch to Source Control, give a description message to your first commit (e.g. “Initial commit”) and press command + enter.
Git will complain that your local folder has some new files and will give you the option to add those new files (aka stage) and commit them directly to the repository. In any case, it is safe to accept.
In your left pane, you should not see any more files, which means that all changes have been committed to the local repository.
However, this does not mean that all changes have been pushed to the remote repository as well. To do that, press the small ... button on the top right corner of the Source Control pane, and select Pull, Push, followed by Push to..., and select origin: https://github.com/A5kar/A5kar.github.io, which will tell git to push all changes to the remote server.

After the sync has completed, you can go back to your GitHub Pages repository and see for yourself if all your new files have been indeed uploaded.
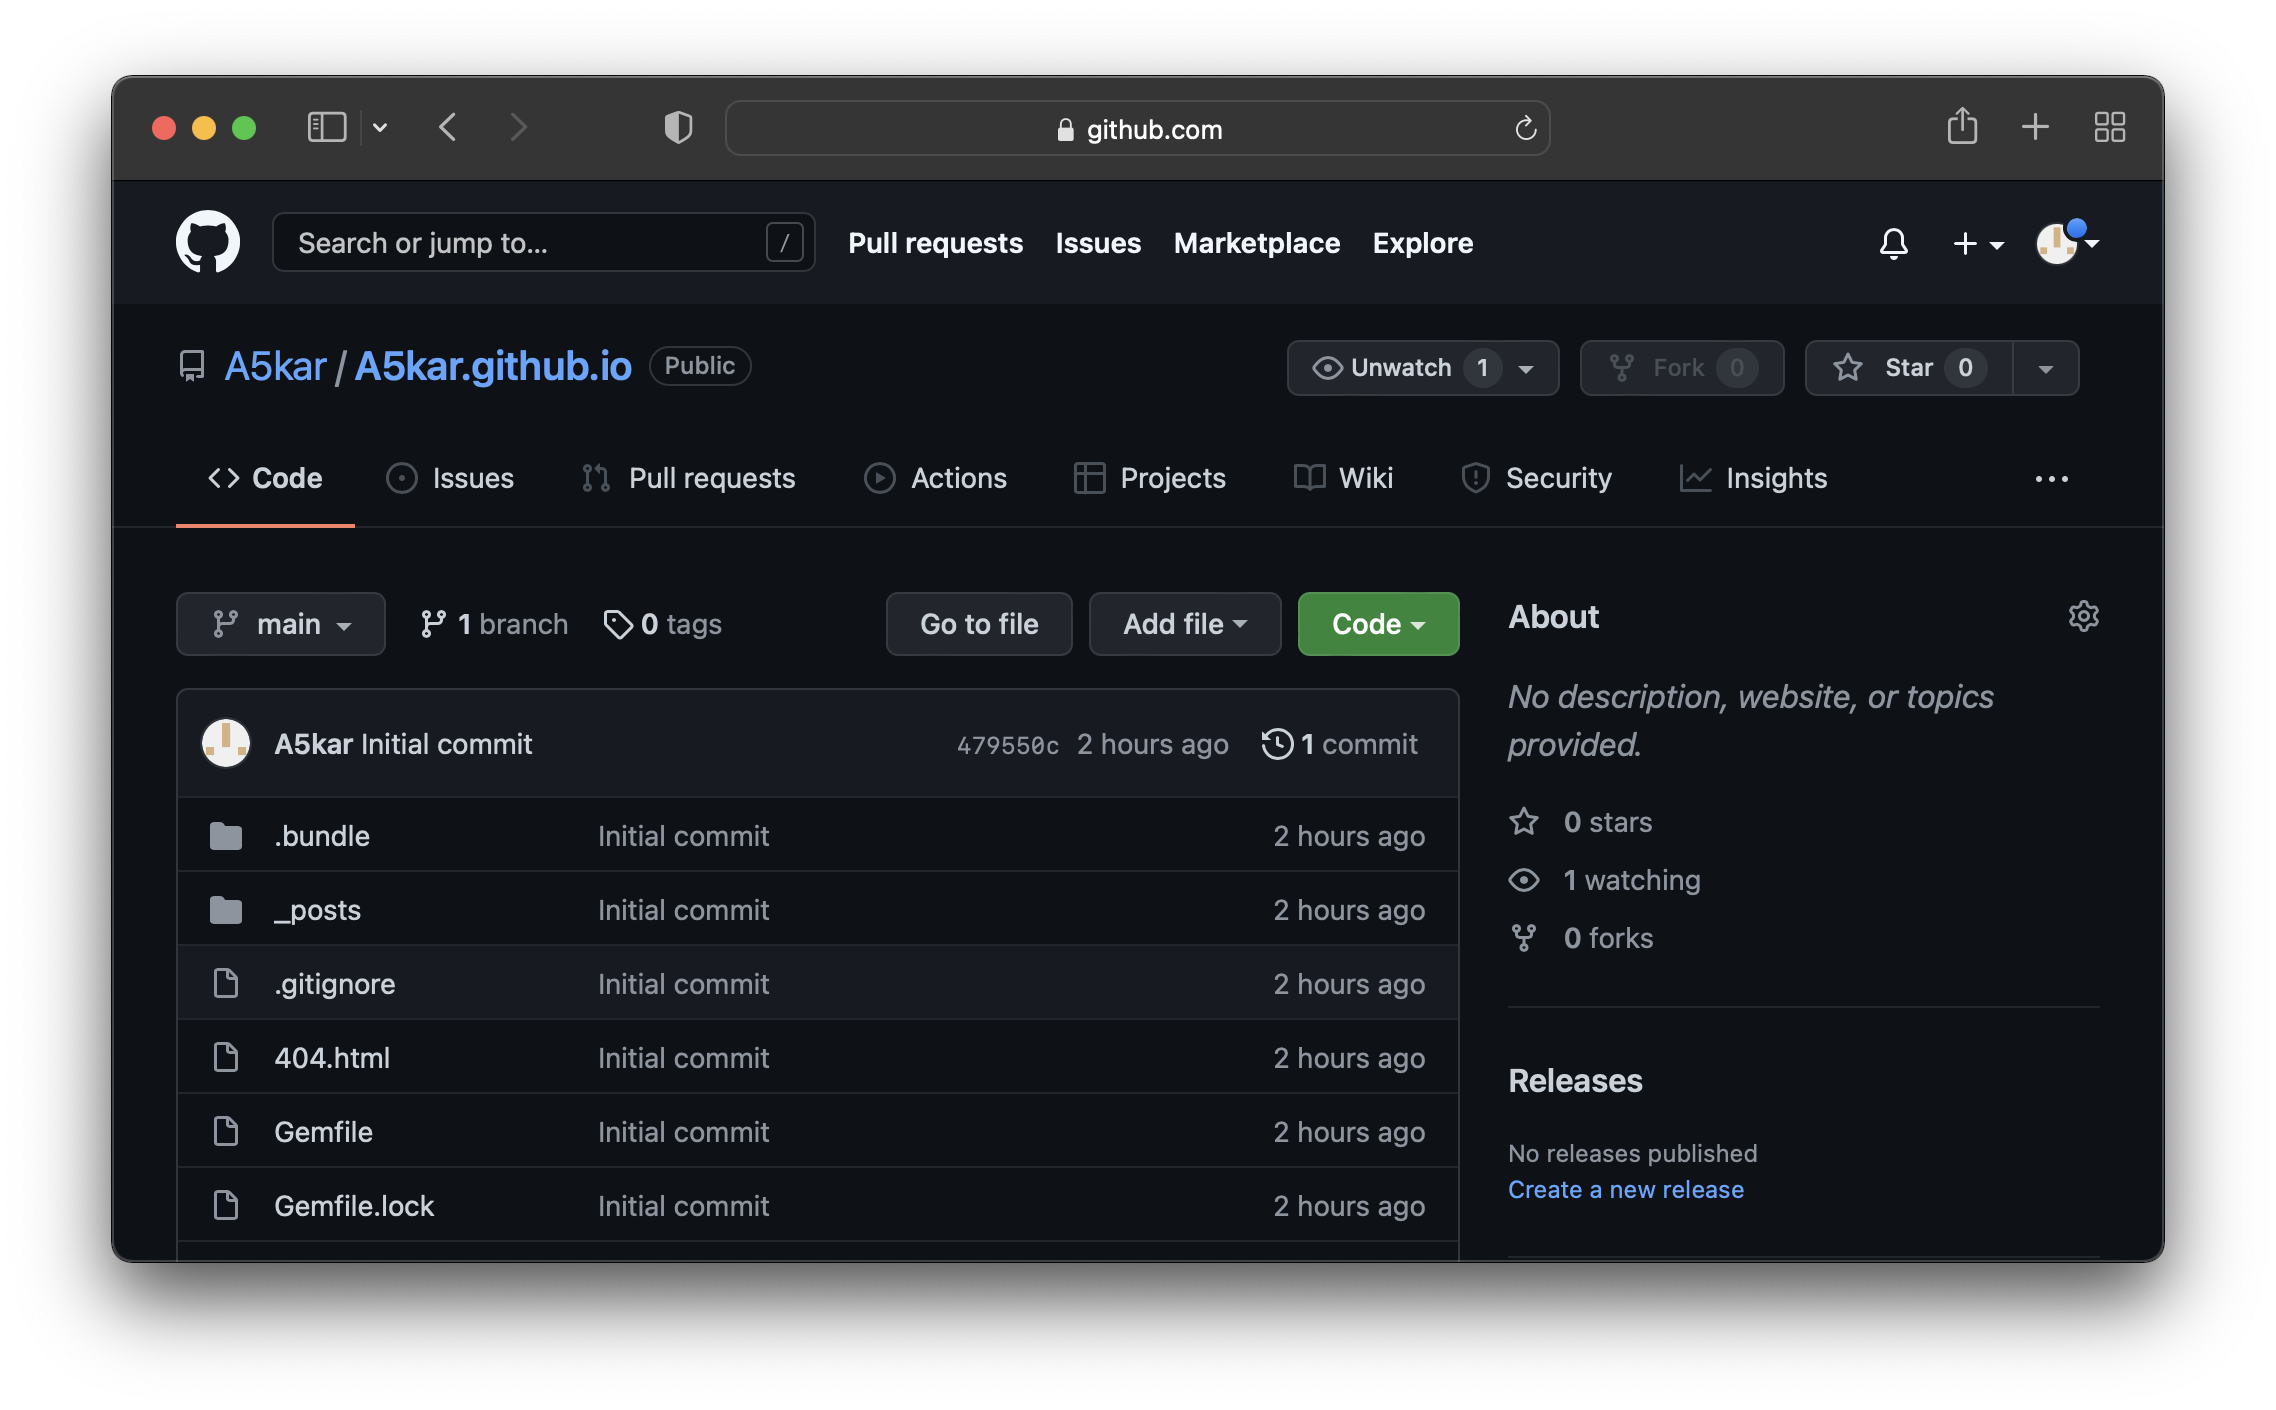
Ultimately, let’s see if GitHub Pages has published the contents of the new repository and made it available to the public. To do that, open the browser, navigate to A5kar.github.io (or a5kar.github.io, because domain names are case-insensitive) and be filled with joy.

Closing remarks
I hope you found this mini-guide helpful. It certainly helped me understanding each single step I was performing. This is the first time I developed a small website and you may understand my excitement. If you share my enthusiasm, feel free to login with your GitHub account and leave a message in the comment section!
NOTE: at the time of my initial commit, I did not know how to add comments section. To learn how I did that, read the dedicated post.